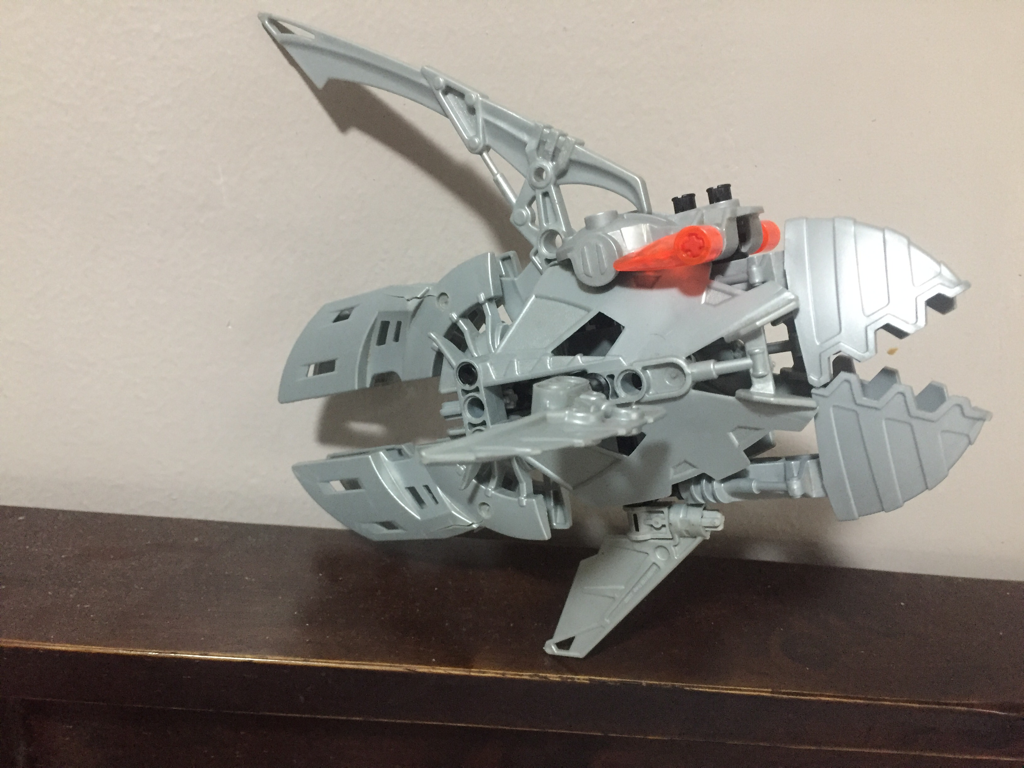
 I got another build-focused blog entry right here; it's one I've wanted to tackle for a while, but couldn't find the opportunity to do so. It wasn't until I finished my latest build that I could really collect my thoughts for this one. Creatures, animals, and monsters are pretty common subjects for Lego builds, and I've certainly built my fair share over the years. Unlike humanoid builds, the wide varieties of "creature" or "monster" that exist lend themselves to a greater degree of freedom when it comes to design. As such, I have a greater tendency to build monsters than I do humanoid beings. The thing that I enjoy about building creatures is that there really isn't a right way to build them. Save for a number of specialized pieces, there aren't really any Lego bricks whose main function is to be a body part of an animal. Contrast that with other types of Lego themes, like Bionicle or Technic; many pieces serve one very obvious purpose (be it a weapon, a head piece, wheels, etc.). Creature/monster builds feel a little more freeform; as long as the piece you use does the job for the look you want, it's fair game. 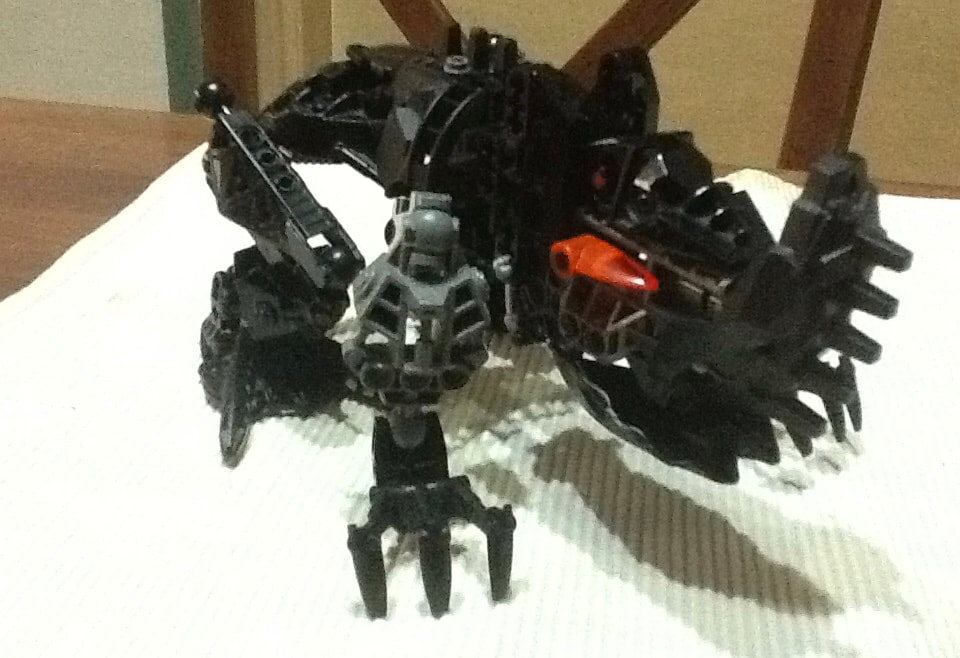 Take this quadruped beast I built, for example. The piece I used for its horn/snout thing is originally a helmet piece for a Bionicle set — I just oriented it in a different way. So many great and clever builds incorporate this method: take a piece and build around what it looks like in a certain orientation. 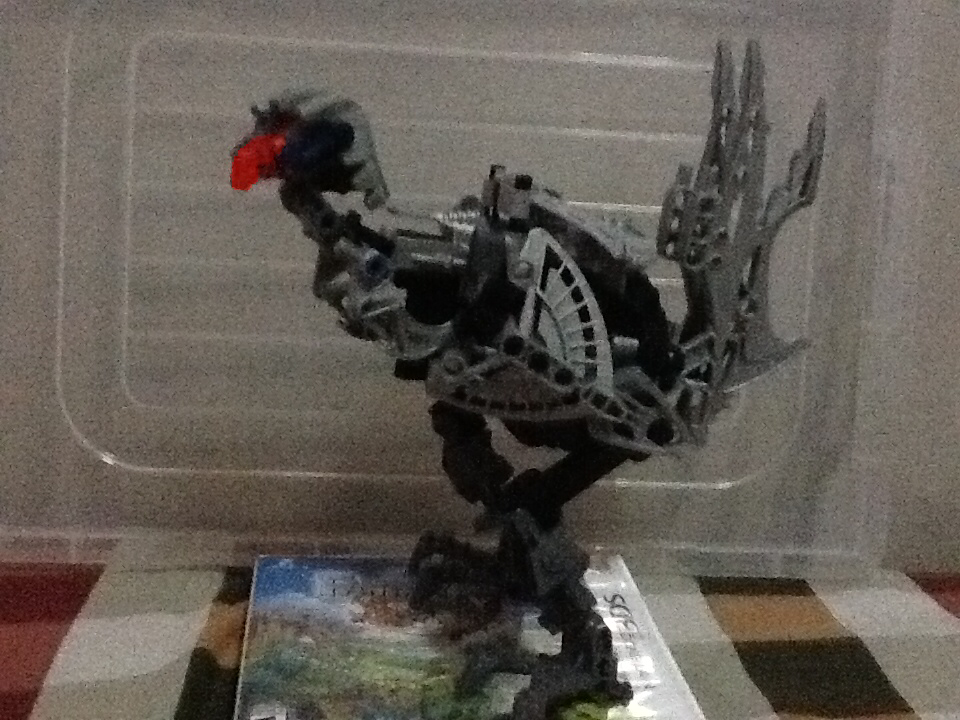 Making one thing look like another thing to achieve the appearance you want takes a bit of imagination, and some good work in your presentation. In a vacuum, the head of this chicken freak I built is just a Bionicle head turned around (the long orange piece is actually a bit you slide into the skull piece to give it "glowing" eyes). But with a bit of imagination, and by building a body that vaguely looks like a bird, and the head is a chicken head. A lot of great Lego sets actively and successfully capture your imagination in this way, and I always strive to do something similar in many designs. 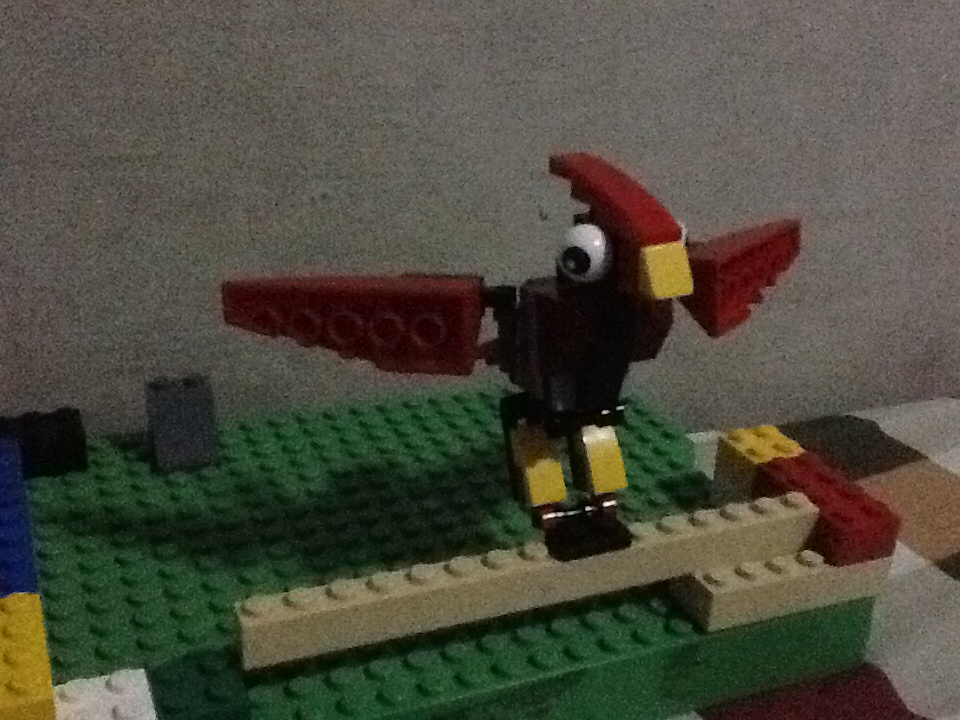 Because Technic/Bionicle/CCBS pieces tend to be highly specialized (i.e. they serve a specific purpose), have odd shapes, or have peculiar connection points, making creatures with them is a rather arduous (but incredibly satisfying) challenge. Regular System bricks are a little more forgiving, because they tend to come in relatively simpler shapes and are generally easier to work with. The former point seems like a limitation, but simple shapes are more than enough to express the appearances of many creatures. This bird I built, for example, uses largely common pieces like curved slopes and clip bricks.
While I always say that "limitation breeds creativity," the fact that there are no limitations or rules to how a monster or creature should look leads to a world of possibilities. Both in nature and in fiction, animals take on all sorts of forms, some commonplace, and others downright bizarre. Whether I take inspiration from real-life animals, pull from iconic monster designs, dream up my own Lovecraftian nightmare, or go for a mixture of these approaches, the well of creature-based builds runs incredibly deep. I have selected the above assortment of old builds to demonstrate the diversity of designs one can come up with. This was a pretty short post compared to other build-focused entries, and it lacks the sense of progression other build ideas I've tackled have, or any sort of in-depth minutiae on my methods. Nonetheless, I felt compelled to talk about this subject, as design approaches that I do my best to apply in every build are something I found to be rather prevalent when I build monsters and animals. I hope this was interesting regardless.
- end -
0 Comments
It feels strange to be talking about a build concept I just thought about yesterday. Most of the entries in this series are about ideas that I've worked on over many years, or have a storied history. That said, I think there's plenty I can say about today's build.  I grew up loving puzzles. Though my skill in the many kinds of puzzles varies greatly, I enjoy most of them across the board. A classic one I've encountered a lot is the slide puzzle, which is a puzzle consisting of tiles arranged in a square grid. The objective is to move these tiles around and arrange them in a specific order or configuration. This puzzle comes in many forms, but the kind of sliding puzzle most people are familiar with are the ones where the individual tiles form a larger image when arranged correctly. Oddly enough, slide puzzles are one of the puzzles I'm pretty bad at, but for whatever reason, I came up with the ridiculous idea to create a Lego version of such a puzzle. I thought about how to go about it for weeks until yesterday, when I constructed this simple prototype. For the next segment, I'll be talking about said prototype. Coming up with how I wanted the slide puzzle to work was the easy part. With my years of experience messing around with mosaics (as discussed here), my immediate idea was that the finished puzzle should show a mosaic image. Figuring out and assembling an image that I wanted was just as simple, and as it became clear as I worked on the prototype, this was the easiest part of the build. The reason it took me a while to get this first build going is because I spent an incredibly long time ruminating on how to make the tile component of the slide puzzle work. What size tile should I use? How do I secure the tiles to the base? How do I make the actual sliding smooth? There were a lot of questions, and I overthought a lot of my answers. Eventually, I decided to just build a proof of concept instead of pushing myself to make a full-scale attempt. That led to the prototype being small (each puzzle tile is just 2x2 studs), the sliding mechanics being simple (it's literally just a bunch of plates against a smooth surface of tile pieces), and the entire thing being rough around the edges overall. My first issue was securing the puzzle tiles. In this prototype, the tiles are not connected to the rest of the build in any meaningful way. That means, yes, they can move freely (allowing for the sliding part of the slide puzzle), but they move too freely. While I made the base the tiles rest on the minimum size it can be, it doesn't quite lock them snugly into place, and as such, they can very easily fall out or be pulled out. Though that makes disassembly easy, it means that the slide puzzle can only be really played when it's on a flat surface, and I want it to be something you can fiddle with in your hands. Somewhat counterintuitively, the puzzle tiles being loose led to the actual sliding mechanic not being smooth. As there's really nothing forcing the tiles to conform to the grid (other than the tiles themselves), sliding a tile to the empty spot isn't as one-to-one as it should be. Often, the tile will end up slightly misaligned, and though that offset is imperceptible at first glance, it's more than enough to make sliding the next tile impossible without manually realigning everything. This made the puzzle annoying to play, and since I was already not good at slide puzzles to begin with, this hurdle only served to exasperate me further as I tested the build. I spent the entirety of the following day thinking of how to get around these barriers in my next iteration. It took a couple of hours of trial and error, but I was able to build a new slide puzzle where I attempt to address these issues. This is the build you see in the above image. The first improvement I made was to up the scale of the puzzle tiles. 2x2 tiles arranged in a 3x3 grid did not have nearly enough area to create a half-decent mosaic with, so I doubled the tile size to 4x4. I also intended to upscale the grid to 4x4, but I didn't quite have the resources to make that work, so I stuck to 3x3. Even with that limitation, the larger tiles allowed me to make a better mosaic, so I'm not too upset about it. Next, I went about securing those puzzle tiles to a base. This was by far the most time-consuming part, and I went through idea after idea, having to scrap majority of them because stability ended up coming at the expense of mobility (i.e. the entire sliding gimmick straight up doesn't work). Eventually, I figured out a design for the puzzle tiles that secured them to an assembly of Technic pieces that function as sort of "rails" for the tiles to move across. This design made it harder to simply yank the tiles out of the base (I have to finagle the tiles to get them out), but the entire thing was still somewhat susceptible to gravity. It wasn't perfect, but it was certainly more secure than the prototype. The Technic "rails" also made the whole sliding thing a lot smoother, as they mitigate the offset problem of the prototype and forced the tiles to conform to the grid. There are still the occasional snags while playing the puzzle, but it wasn't as rough as before. These snags seem to be caused by a new hurdle I encountered as I went about designing this iteration. Although the rail assembly I built for the puzzle tiles to move around in helped keep things in place, it had a major flaw: they only existed at the perimeter of the grid. That means only the tiles along this perimeter are secure, leaving the very center tile completely loose, which means a) it can fall out easily, and b) it can fall out of alignment, causing snags while playing the puzzle. The other interlocking tiles do help keep that middle tile in place, but once you start tilting the whole build, it will likely fall out. I tried a bunch of things to try and secure the middle piece, but my attempts often interfered with the sliding, so I ended up leaving it as is in the end. My goal in the next iteration is to solve this problem. The slide puzzle was an interesting challenge from a design standpoint, which is why I felt like writing about it. Outside of that, it was a fun idea that I wasn't sure would work, and I'm pretty happy with myself given that I figured out a way to make it work.
To end this entry, I leave you with some news: I have submitted this build as a project on Lego Ideas. For the unfamiliar, Lego Ideas is a platform where fans submit set ideas in hopes of Lego making an official set out of said ideas. In order to for that to happen, a project must reach 10,000 supporters, and once that happens, the project goes into a review phase where Lego evaluates if it can be made into an official set. I thought, "why not," and just submitted the slide puzzle as a project on a whim. I'm not really hoping for anything big here, but I thought it'd be fun to finally submit something on Lrgo Ideas after eight years lurking on the platform. In the off chance you want to support the slide puzzle as a Lego Ideas project, follow the link here. As of writing, the project is still awaiting approval, so it probably won't go live until next week (if at all). In any case, I'm leaving the link there, so please bookmark it if you're interested and check back in the next couple of days. NOTE: you need an account to view the page. - end - I've just finished building one of my personal favorite mechanism-based builds in the web shooter, and that got me thinking about other things I've made that rely on mechanisms and such. This is going to be a retrospective on builds with very little in common, so strap yourselves in for an incoherent ride that has no narrative through line. 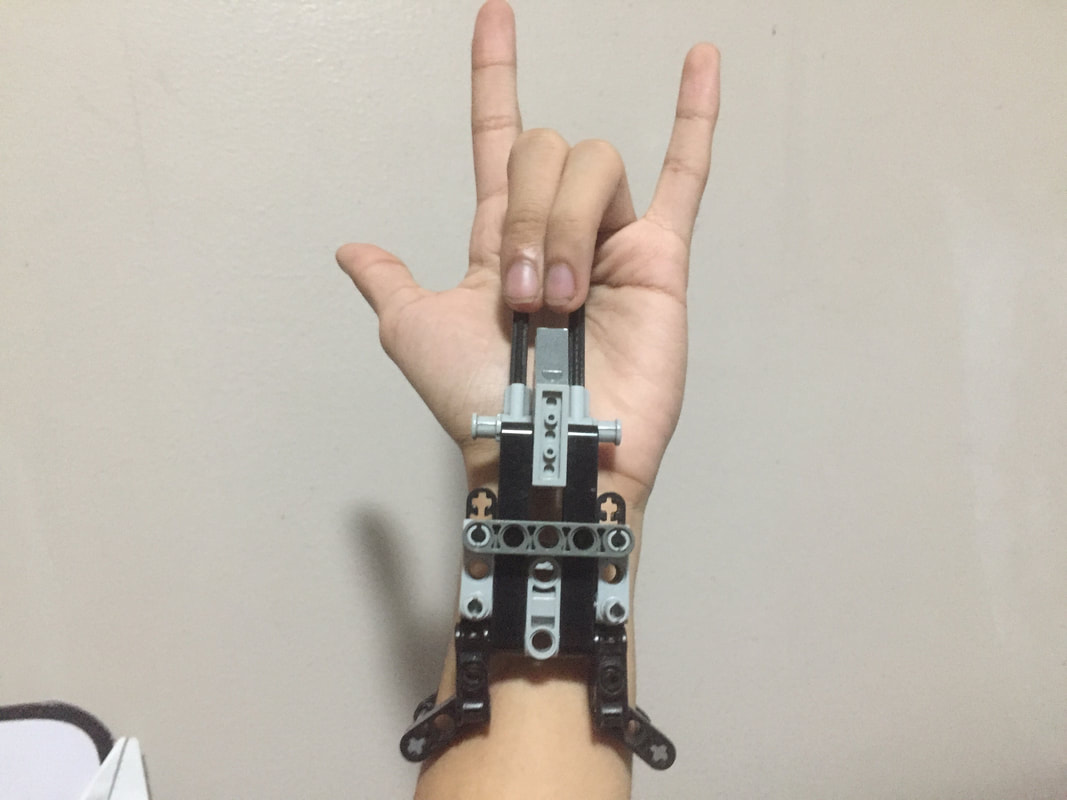 The Lego I grew up with was almost exclusively Technic and Bionicle sets, so I already had an affinity with Lego sets that had a lot of moving parts. Bionicle sets, for example, featured a lot of gears, so I was pretty familiar with how components like worm screws and bevel gears worked. A few sets also featured mechanisms that used rubber bands, so I was also able to play around with tension and elasticity-based mechanics. Occasionally, there'd be sets that featured gimmicky bricks that used an assortment of rudimentary mechanics. I mostly encountered this in sets that featured "blasters", and those came in various forms, such spring-loaded bricks that fired missiles, cannons that used air to launch projectiles, and a surprisingly vast amount of ways to fling marbles at people. I naturally gravitated to these mechanics more, as there was an element of destruction to them. While I understood a lot of these moving parts pretty well, even as a kid, I never really focused on builds that incorporated them in any meaningful way. I was content just trying to build weird spaceships or wacky Bionicle OCs and didn't really have a sense of ambition or have any grand ideas/concepts for what I wanted to make. As I got older and started to put more thought into what I built, that changed. Of course, stuff like ball-socket joints, or stuff that uses clip bricks are considered "moving parts", and I definitely use those pretty often, but those focus more on articulation and nothing else. For the sake of this discussion, my dive into mechanism-based builds will refer to builds that have a modicum of classical physics to them, or at least have movement that is beyond posing a figure. 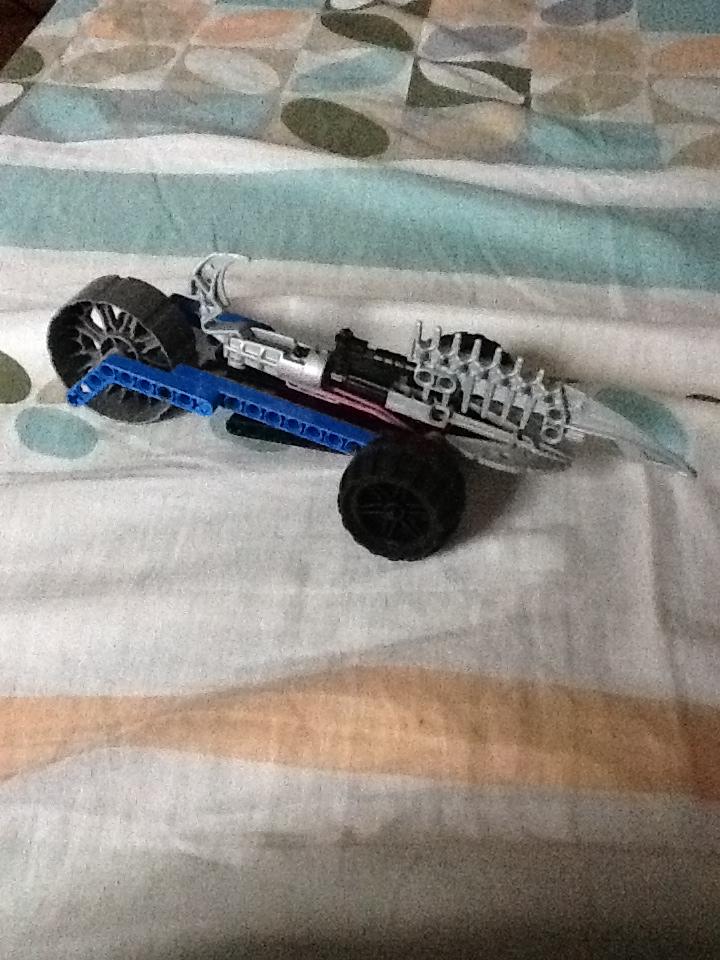 My first physics-based build came in the form of this rubber band-powered vehicle. I was inspired by some of my friends who had to make these for their Physics class, so I made my own, except in Lego. I didn't film this one in action, but I made another one years later that operated on the same principles. You can see that one in my blog post on vehicle builds.  Rubber band cars aren't particularly challenging to make. All you have to do was tie a rubber band to the rear axle, secure the other end to a stationary part of the car, and it should work when you pull it back. It doesn't work smoothly 100% of the time, and it doesn't travel far, but it gets the job done. The above image is the "chassis" of the second rubber band car I made. As you can see, that's really all there is to it. 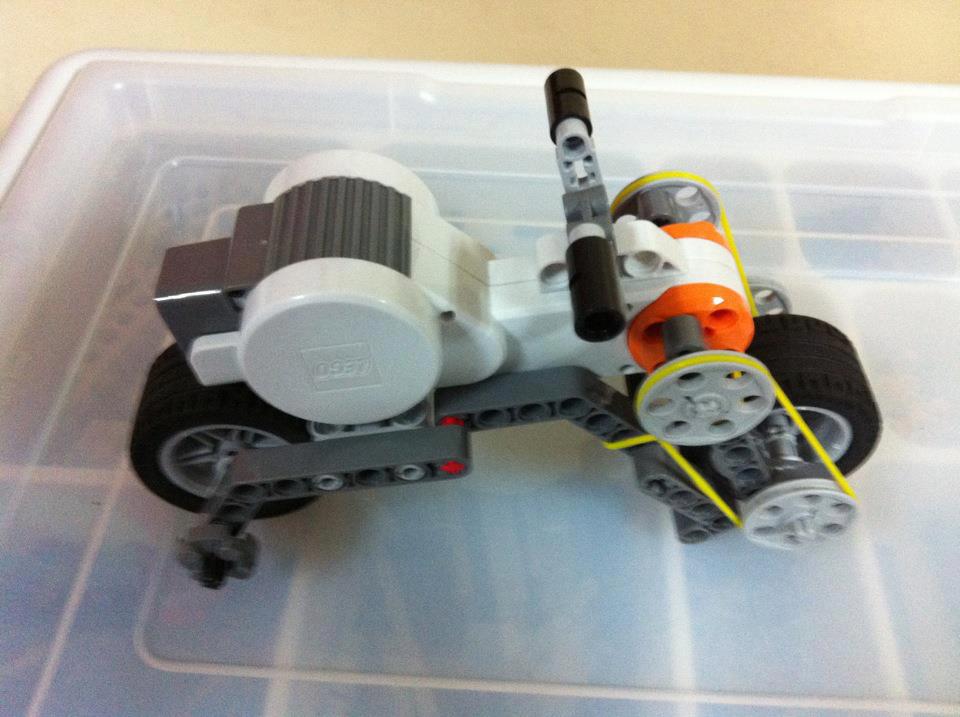 My next attempt came around the same time, during one of our robotics classes. It was quite the stroke of luck that the kits we used for the class were Lego Mindstorms kits (which is Lego's line of robotics), so I had an immediate advantage going into the class (everyone else in the class knew this, and a few people made a big deal of who got to recruit me in their group). Unfortunately, the class was only an hour long, so I didn't really have time to fuck around, but in the rare occasion our group finished early (shoutout to my boys Philip and Haram), I would make something using the servo motors the Mindstorms kit came with, program something quick on the computer, and made the build go for a bit. The only one I was able to document was this motorcycle built around the servo motor. In retrospect, it was a pretty ineffective design, because I attached the motor (done via the yellow rubber band pulley) to the front wheel instead of the rear (which makes no sense in the real world, but made the shape flow better), and that it didn't incorporate the CPU brick (which you had to connect to the motors so it read the program you wrote). In other words, it doesn't work. The first point is quite important when making a lot of these mechanics-heavy builds, because you often have to choose between something that looks aesthetically nice, or something that actually fucking works. As we go along and look at more builds, you'll notice that many of the things I made look like garbled messes, and that's because I prioritized function over form. Trying to do both, in my experience, often results in the mechanism I made suddenly not working, all because I wanted to make the build prettier. I'm sure anyone with unlimited pieces can balance both well, but I don't have all the pieces I want, do I?
A couple of years later, I tried my hand at building some catapults. The first one is nothing special; just slam down the end of the arm and it'll fling the marble (see that here). Not much to say about it. The second one, however, is a little more interesting, as it is my horrible attempt at a counterweight trebuchet. This type of catapult works by swinging the sling forward (launching any projectile within it) when the counterweight falls. Now, technically, my build executes this correctly (when I drop the counterweight, the projectile is actually launched forward). The issue was I didn't have a counterweight heavy enough to launch the marble further. I even tried using my keys (which were on a Lego keychain) as a counterweight, but that wasn't enough either. I may try my hand at this build again in the future. Here are two videos of the trebuchet in action (the original version, versus the key-counterweight version).
Next, I tried my hand at a crossbow after being inspired by a friend's build. I got myself a pair of hefty rubber bands and spent hours building the crossbow and figuring out how to make everything work. I even built my own custom crossbow bolt (though I ended up defaulting to barbecue sticks in the end). Positioning the rubber bands to generate enough tension was easy, but my nightmare when I was making this was easily the trigger system. I spent multiple hours across different days figuring out a suitable way to release the rubber bands, and it was frustrating as fuck. I really tried to make something that worked like a gun trigger (which you only had to press), but I just couldn't make it work. 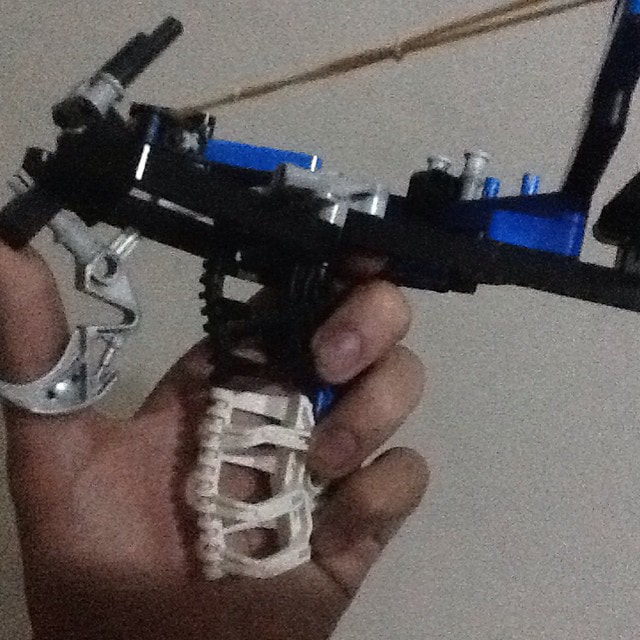 My firing mechanism ended up looking like this. Don't worry if it looks nonsensical, because it is. It essentially works like the reverse of a typical gun trigger, because I had to pull it up instead of pressing it down. As you can imagine, this is a horrible way to operate a ranged weapon, and couple that with the fact that the way I secure the rubber bands to prime the crossbow was its own unique brand of poorly-designed mess, I ended up with a finicky, pathetic excuse for a weapon. Huntress would be ashamed. Here's the crossbow in action. 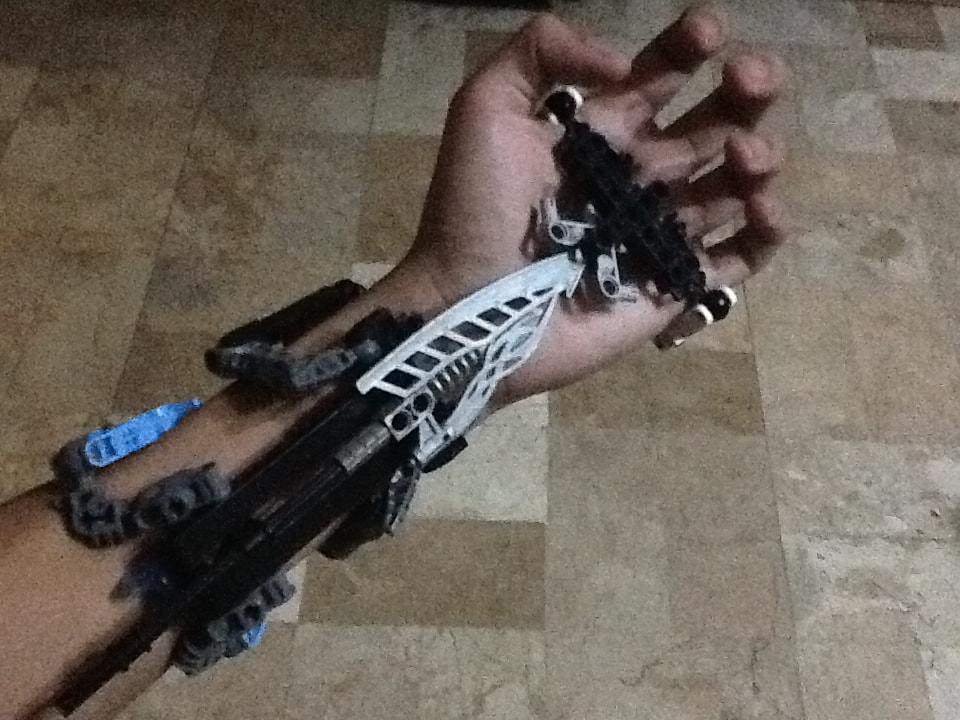 Around the same time I was making the crossbow and the trebuchet, I'd already been working on the Hidden Blade. I've already discussed the ins and outs of that build at length here, so you can read that if you haven't already. 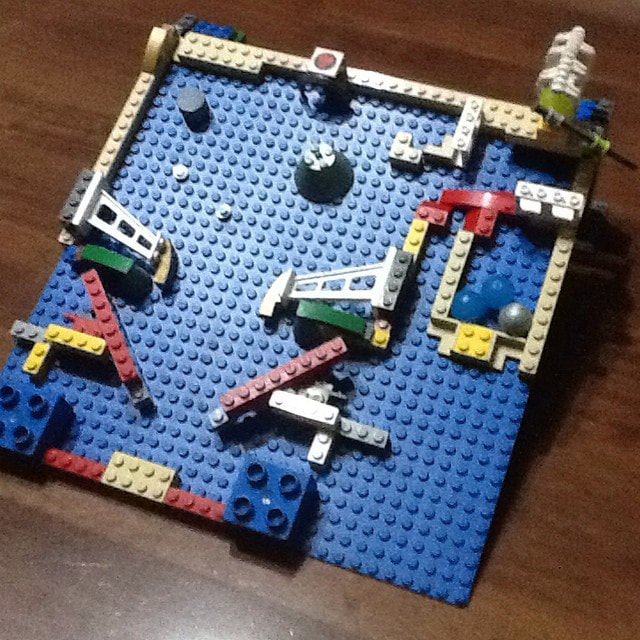 I also made this basic-ass pinball game during that time. It's nothing special; all I did was prop up a baseplate at an angle and made some shitty flippers. Gravity did the rest. It works as well as you expect, as you can see here. 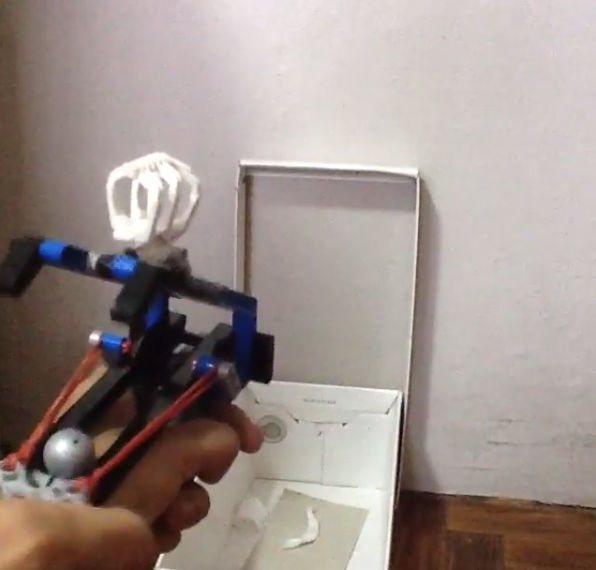 The crossbow fiasco didn't discourage me from making other launcher-type weapons. This first one I made (about a year after) is something I called "the most contrived slingshot ever made", because it was pretty much an over-designed slingshot. This wasn't for no reason, however; the frankly unnecessary framework surrounding the actual slingshot was me trying out ways to have marbles travel along a "rail" (a concept I've yet to revisit). See it in motion here. For whatever reason, I incorporated a Lego-designed spring-loaded missile launcher into this slingshot build, and it made the weapon make a little more sense (because I trigger the launcher much like a gun). You can see that here.  By this time, I had realized that I haven't made any builds that used gears in any meaningful way. This was largely due to my limited selection of gear types (I mostly have double bevels). I did have a few weird pieces that had gear teeth in it, however, and I tried looking into designing things around that. The abomination you see above is a result of one of these experiments, and is something I've dubbed "the clapping machine". See it clap here. Gears in general are still a weak spot for me to this day, and I'm still looking into making stuff using them from time to time. 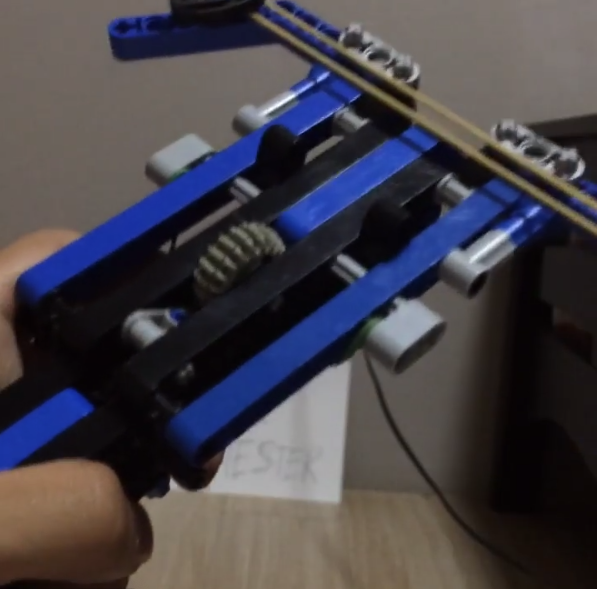 I did eventually find a solution to my crossbow problem around this time, and came up with a significantly smaller, yet infinitely more effective design. I had taken inspiration from a design I saw on YouTube, but I unfortunately can't remember who it was. In any case, watch this better crossbow here. 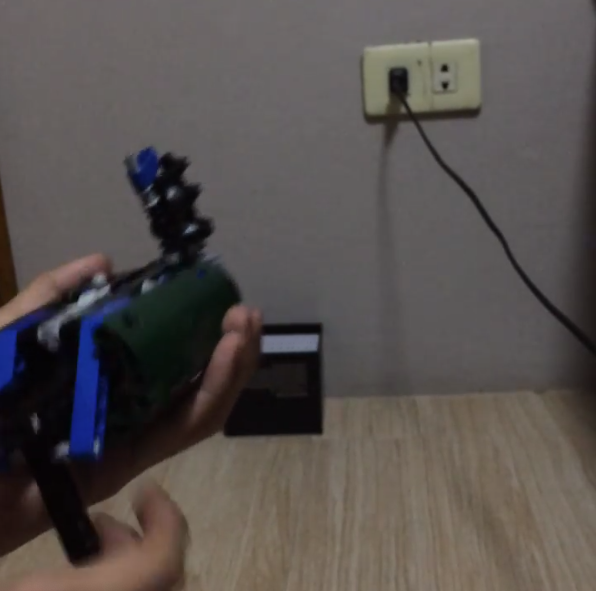 Along with crossbows and slingshots, I also wanted to try building handheld marble launchers. These launchers were featured quite heavily multiple times in Bionicle's history (2006 and 2008, mostly), and worked using specialized pieces in which you place marbles into. By pushing an axle through a specific hole, the said piece provided enough resistance such that when you apply a modest amount of force, the marble is sent flying. They worked well enough on their own, but I wanted the challenge of making something on the scale of a handgun. Using a mechanism taken from a Lego set I owned (the Rockoh T3, for those keeping track), I devised the launcher you see above. Unlike a regular gun, I actually push a moving component at the back end of the launcher, which pushes some internal bits that deliver the force to the aforementioned launcher piece. I was pretty happy with this design, but maybe I'll look into a mechanism that's a little more elegant, so to speak. Watch the launcher launch here.
Remember in 2017 when fidget spinners were all the rage? Well, I capitalized on that hype by making one of my own! There's not much to it mechanism-wise (I just built something you could spin and put it on an axle), but hey, it works! Fidget spinners may have been the rage when it comes to "trinkets you can fiddle around when your hands aren't busy", but my favorite of the fidget-type toys is the Yoshimoto cube (AKA the magic folding cube, infinite cube, and other cute nicknames). I had one of those as a kid, and after seeing a YouTuber by the name of slfroden make a Lego version of the toy (here's the video), I was inspired to make one of my own. Yoshimoto cubes are actually eight smaller cubes connected in specific ways. Figuring out how each cube connected to one another was the main challenge, because positioning the hinges between the cubes correctly was the key to making the whole thing move. After I figured that out, the next hurdle was figuring out how exactly to construct those smaller cubes, because I wanted to use Technic bricks. Everything worked out in the end, and to this day, I still have the cube on my nightstand. See an early version of the Yoshimoto cube here, and the original fidget spinner design spin here. 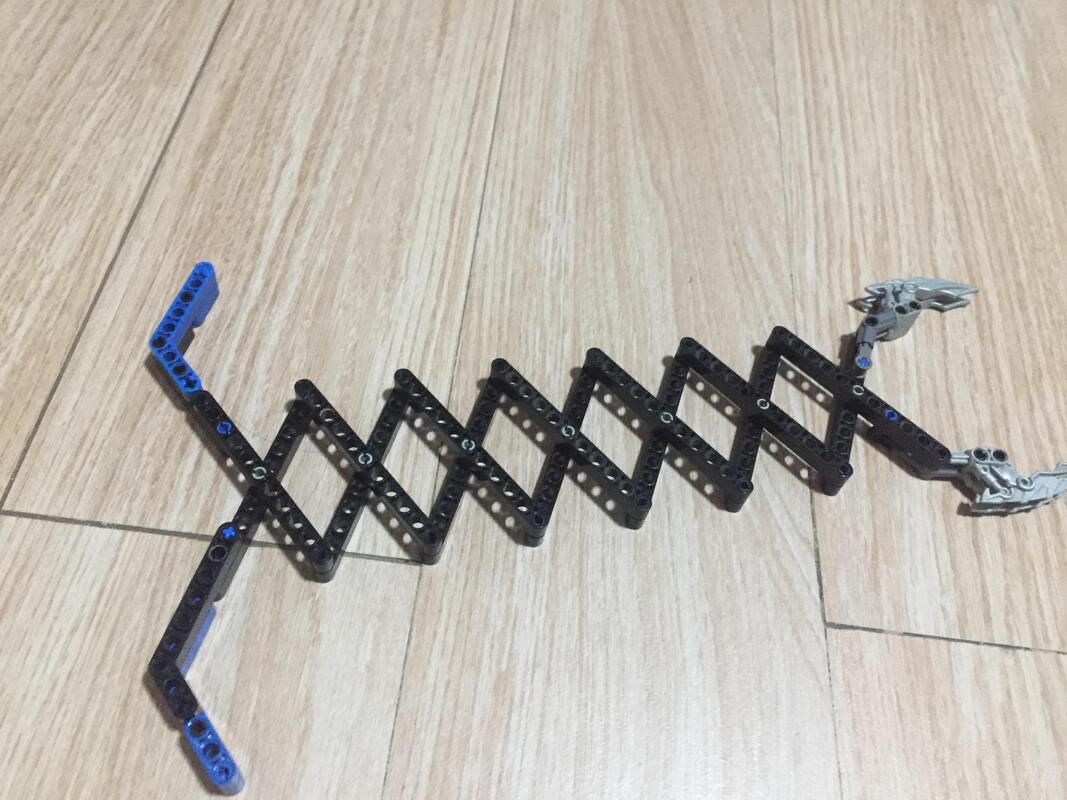 One of my more recent forays into mechanism-based builds is this retractable grabby claw, inspired by Nintendo's Ultra Hand toy (when Nintendo used to make toys). Again, it's pretty straightforward (it's just a scissor lift in Lego form), but it gets the job done, as I show here. That's about it for movement and mechanism-based builds from me over the years. As you can see, there's a lot of variety to the kinds of mechanisms I explore, so it's hard to really tie it all together in a thematic sense. The only real thing that binds all these builds together is the form vs. function balance I mentioned previously. Making builds look nice (or at least not garbage) is something I value, but when it comes to builds of this nature, I feel that demonstrating the concept takes precedence to making something look cool. Often with these kinds of builds, the satisfaction came from assembling something that functions exactly as I imagined, and to me, that's worth sacrificing aesthetic over. Before I go, I want to share the inspirations behind the very build that inspired me to write this entry: the web shooter. Here are a pair of builds from years ago that were an attempt at the concept:
The photo on the left was from 2013. It's nothing more than a clever use of ball-and-socket joints; when I push my ring and middle fingers down on one of the joints, the "arm" of the build bends, revealing the "web" underneath (represented here by the silver tentacle piece). When not in use, that tentacle can clearly be seen on the back of my hand, so you'd probably see the trick before I do it. It's not at all impressive, but I certainly found it amusing at the time. The other photo is me repurposing one of the older Hidden Blade models. All I did was swap out the blade piece with the tentacle piece from before, fling my arm like an idiot, and ta-da! The "web" "shoots out". Again, not an elegant solution, but it's just as amusing. Ever since I got into wearable builds (something I have discussed to death on this blog series), making Spidey's web shooters was one of those endgame goals I had. The problem was that I couldn't figure out how to create a launching mechanism that both works and is wearable (a struggle I touched on in the previously-linked Hidden Blade blog entry). What's more, I wanted the mechanism to work one specific way, and that's when I do the iconic "THWIP" gesture, and with the various firing mechanisms I've discussed above, that seemed impossible. My eureka moment came in the form of the spring-loaded 1x4 bricks that came with some of my Star Wars buildable figures. These bricks look and work like any old 1x4 brick, except within it is a spring and a hole where you can insert specially-designed missiles into. Triggering the mechanism is almost annoyingly easy; even a tiny amount of force applied to the tail end of the missile (which, after loading the missile, extends past the brick itself) causes the brick to fire the missile, and at a decent range, no less. I decided to exploit that by jury-rigging a Technic lever that, when I do the "THWIP" hand sign, taps the missile's tail and triggers the launcher. It worked like a dream, and while the "webs" I'm shooting look nothing like webs, the fact that I got the mechanisms to work exactly the way I wanted it to was more than enough to satisfy me. This is one of my favorite mechanism-based builds ever for that reason alone. You can view the full post on my Instagram here (there's also an additional video on there where I show how the mechanism works), but I'll leave you with this GIF regardless. 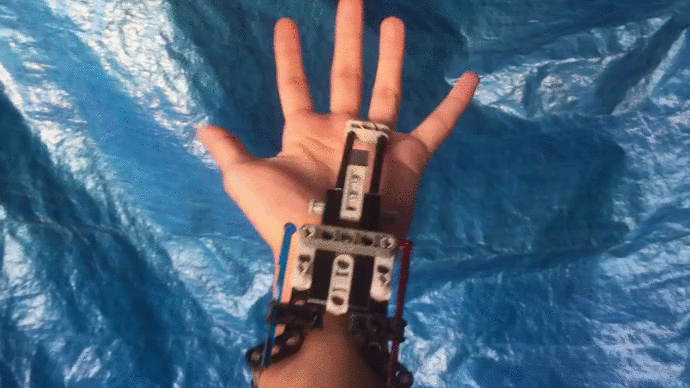 - end -
I don't know what it is about this year, but I've been having some real trouble putting out builds. It feels like I'm in a creative rut, and I haven't really had as many spontaneous ideas as I usually had in the past. I really shouldn't pressure myself too hard on a purely creative endeavor, but sometimes I can't help but feel that I could be doing much better. 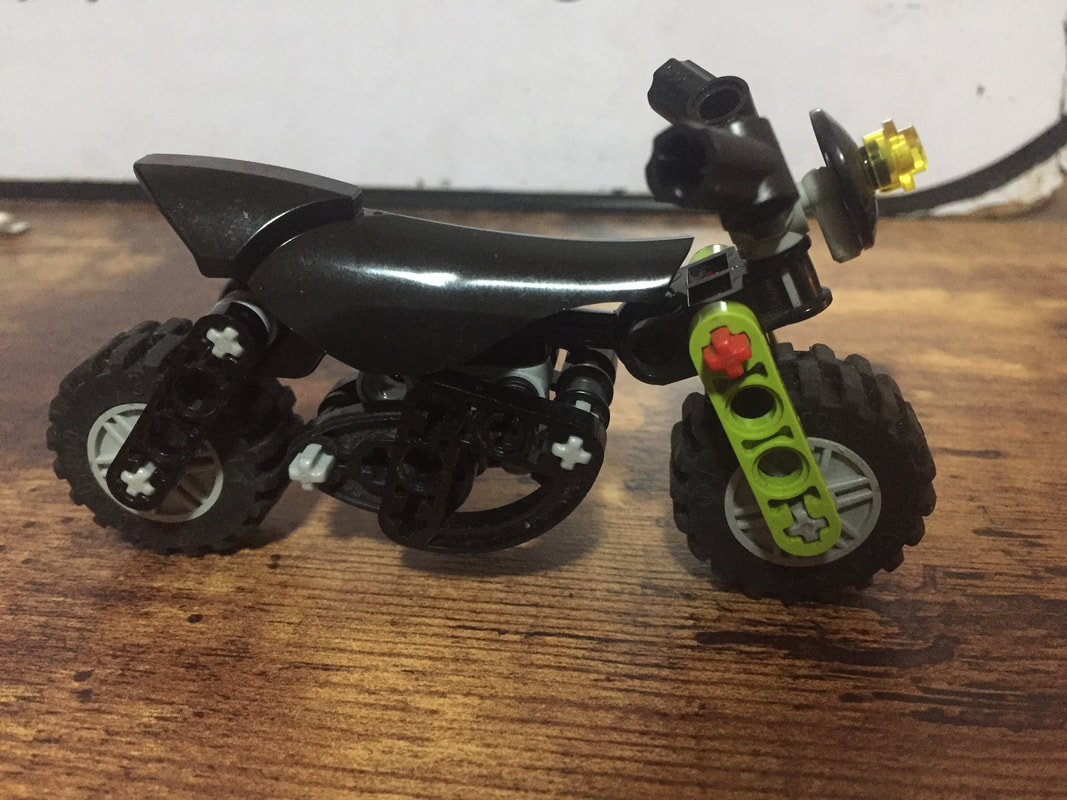 Melodrama aside, I still brainstorm build concepts as often as I can, and today, one of those concepts came alive with the neat motorcycle build you see above. Finishing this build had me thinking about my vehicle builds throughout the years, and why I've done very little of them. I don't think it's hyperbole to say that most kids who get their hands on Lego bricks often try to build some sort of vehicle at least once or twice. I'm certainly no exception, having built my fair share of rudimentary boats, cars, and aircraft. Being mostly a Bionicle collector throughout my childhood, however, most of my creative work during that time was of the more humanoid/robotic persuasion (as I touch on in a previous blog entry). That said, I still did my fair share of building with normal bricks, and vehicles were certainly a subject younger me did try building frequently. 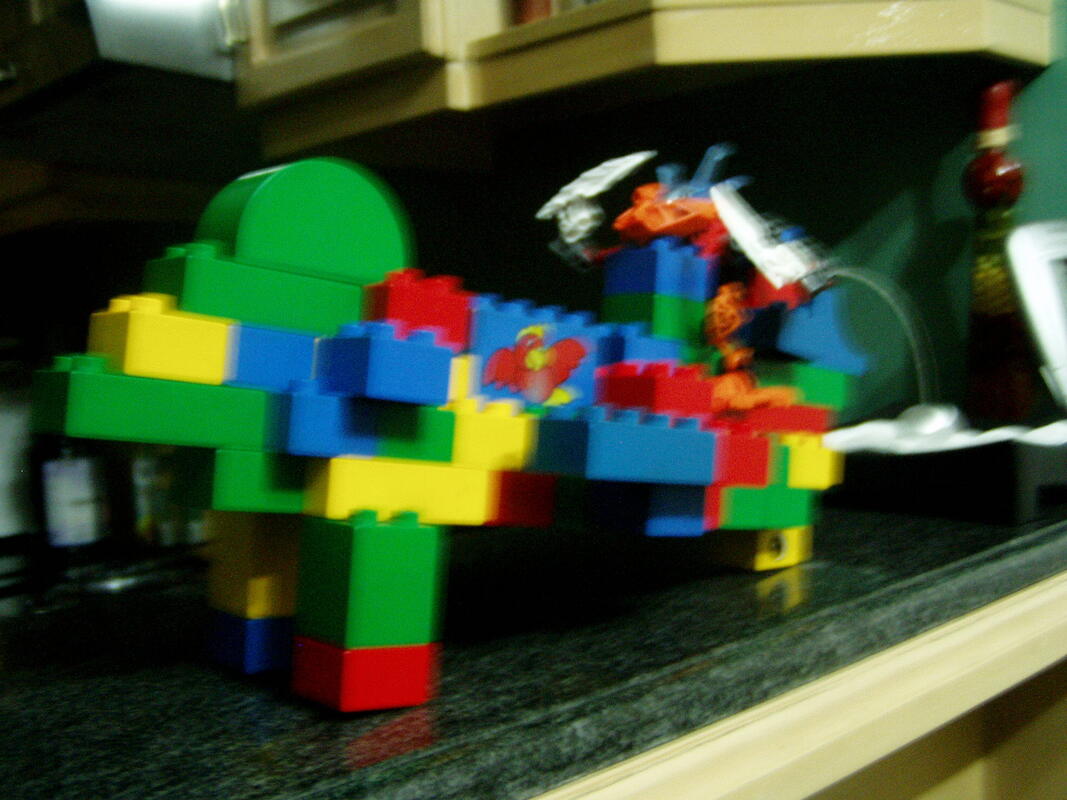 In addition to normal Lego bricks and Bionicle/Technic parts, I also had access to Duplo bricks, which is Lego for very young children. Due to Duplo's sheer size and minimal piece variety, there was little you could really make without making active use of your imagination. Of course, 8-year-old me didn't give a shit about design then, so pretty much any combination of bricks to me was some sort of spaceship or gun. The above picture is one of my few recorded Duplo builds, and considering that I've given most of those old bricks away, that fact probably won't change.
By the 2010s (right around the time Bionicle was first discontinued), I decided to go back to building things with normal Lego bricks. I started buying small sets, and when I came across the Creator 3-in-1 vehicle sets, that's when I properly got into vehicle builds. One of the sets (the mini jet) came with angled plates, which were perfect for making aircraft/spacecraft. The builds you see above are all built around said angled plates.
Having grown up a Star Wars fan, a lot of my builds then were heavily influenced by the designs I saw in the movies. Here are a few examples of such designs. Believe me, there's a lot more where those came from.
I also experimented a lot with scale during this time, switching from small-scale to modestly minifig-scale on a regular basis. As you can see, a lot of these builds are an uncoordinated mishmash of pieces. My focus at the time was more on capturing the shape that I wanted, which meant I often ignored color coordination of any kind. Like any kid, I also felt the need to attach 700 guns and other doodads onto the ship, so that often led to the whole thing looking quite cluttered.
I also tried making aircraft that follow more realistic designs. While the color schemes still look like a chaotic mess, focusing less on strange attachments and more on capturing a sense of the real vehicle's appearance helped me make more refined builds as time went on. Instead of obsessing over endless minutiae that won't come across in the photo anyway, sticking to a "big picture" approach and focusing my efforts on the most important and defining features is a methodology I still do my best to follow to this day.
You'll notice that there's a distinct lack of vehicles that operate on the land or on the sea. I never really found cars or boats particularly exciting as a kid, so building those wasn't something I did often. That said, it's still a subject I explored, though in the case of land vehicles, I tried to incorporate more ridiculous and outlandish concepts (like grabbing claws). At this point, I was starting to exhaust my vehicle ideas. I didn't have a lot of pieces to work with then, and there's only so many ways you can arrange those same pieces to form something distinct. To mix things up, I started incorporating Technic and Bionicle pieces into these vehicles (like in the above examples), with wildly varying results.  Eventually, I started making vehicles purely from Bionicle and Technic pieces. While Technic pieces lend themselves quite well to vehicle builds (especially with the abundance of gears and wheels), most Bionicle-specific elements do not, which meant I had to think outside the box. My earliest attempt at a Bionicle-based vehicle was this miniaturized take on the Swamp Strider, which was an actual thing in Bionicle's story. By this time, however, building spaceships got boring really quick, building cars (still) didn't interest me too much, and I didn't really have any big ideas for Bionicle-based vehicles. I found more enjoyment building all sorts of things outside of vehicles, so it wasn't too hard for me to shift my focus to other creative pursuits.
As I got into college and started exploring all those build concepts I've already written about here, I hardly ever built vehicles at all. In the rare occasion that I do, it was either me messing around with newly acquired pieces, or me trying out some sort of gimmick (like an all-red build, or building something around the Lego Games dice piece).
One such gimmick I explored was the idea of a Transformers-type build. I had seen builds that successfully make the gimmick work in Lego, so I decided to try my hand at it. I experimented a bunch and came up with an edgy-looking motorcycle that transformed into this freak that used the wheels as skates. Other than the obvious stability issues, I was pretty happy with the result (though I regret not recording a video of the full transformation process). I might try a more refined version of this in the future.
I've also messed around with vehicles that are propelled by other forces. The one on the left is powered by a rubber band (see that in action here), while the other is driven by a deflating balloon (in action here). They work more as demonstrations for a physics class than as full-fledged designs. While I've built my fair share of vehicles in my early days, it's evident that they're not my go-to build subject in the present. The few that I've built beyond my "SPACESHIP" phase are either based on some strange design in my head, revolves around the use of a specific piece, or operates on some sort of gimmick. Other than that, it just seems to be a subject that I don't gravitate towards. Perhaps it's because vehicles are such a common subject in Lego that I'd prefer to build something less typical? Or maybe, because of how common it is, I don't feel like I can make anything within the category that truly stands out? I haven't quite figured out the answer. It doesn't help that the Internet exists, either. As I said, vehicle builds are pretty common, and there are a ton of them online. A lot of the most impressive builds I've seen are either brilliantly accurate scale models of real-life cars, or absolute units of spaceship builds with striking and unique designs. As unhealthy as it is to compare my creative work to that of others, I've never felt that anything I can come up with could match anything I see featured on Reddit (for example). It's equal parts inspiring and disheartening. I do my best to focus more on the former than on the latter, but sometimes it does get to me. I don't think I'll stop being less apprehensive about taking on serious vehicle build projects anytime soon, but all I know is that if/when inspiration strikes, I'll get right to building. I'll also try to get into random spaceship builds again for fun. Even though I don't seem to enjoy making vehicles as much (other than the rare out-of-the-blue idea), looking at some of these really old "spaceship" photos did remind me of how fun it was to just mash together a wide, disjointed assortment of pieces to create something that vaguely looks like something that can fly. Some of the builds I'm most proud of came about with me simply messing about with ludicrous combinations of pieces — maybe this is what I need to get past that damned creative rut. I'll leave you with a gallery of assorted vehicles from across the years. See you in the next build, whenever that may be.
- end -
I've been a little out of sorts in the builds department as of late (and this year in general), and this is clear given how little I've put out so far this year. While I generally don't force myself to work on builds when the ideas are just not there, I have been trying to get back into the swing of things, and that starts with today's build: the third iteration of my Portal Gun. I'm a big fan of the Portal series. It's probably one of the best puzzle games I've ever played, with its fun, physics-based mechanics, hilarious writing, impeccable voice acting, and enigmatic sci-fi setting. I have my good friend Fred to thank for introducing me to this wonderful game series, and I'd like to pay that forward a little bit by talking about it briefly. If you haven't heard of the game, I can't recommend it enough. Go play it for yourself (preferably without looking anything up). I promise it's worth it. 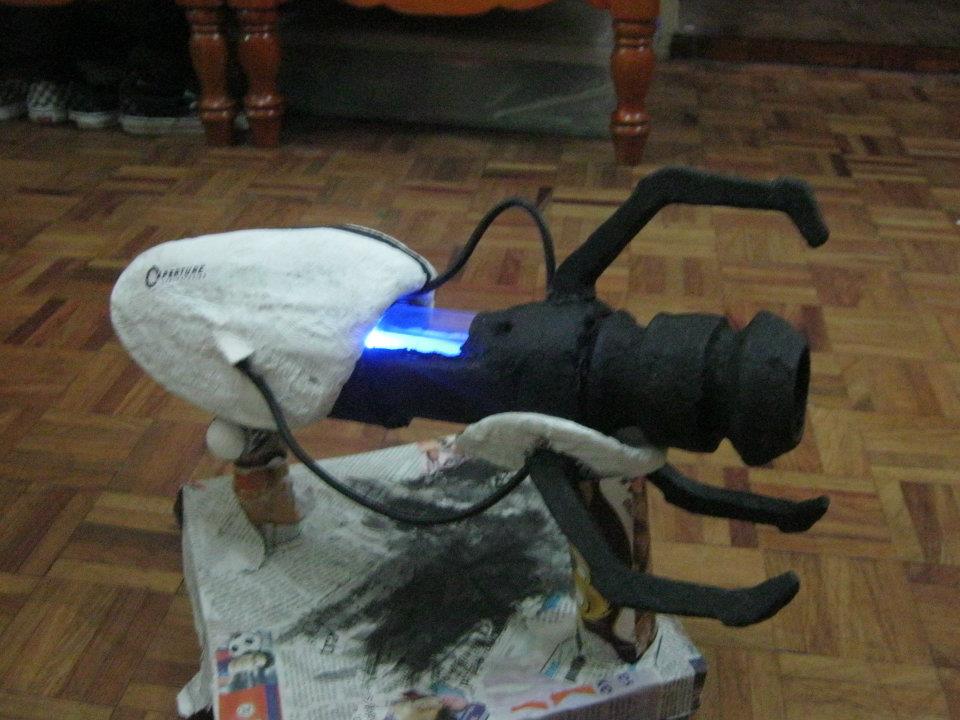 Photo credit: Fred Bucao The inspiration for this build actually goes a little deeper than "I like Portal, I wanna build the Portal gun." See, back in high school, Fred set out to make a DIY Portal Gun prop to brandish (and cement his status as #1 Portal fan), and it came out wonderfully (complete with light functions). Though I had yet to get into wearable builds during this time, I saw Fred's prop as a glass ceiling to one day break, albeit in Lego form.
A year later (probably during the summer, when I finally got to play Portal 2 on my PS3), I was able to create the first version of the Portal Gun. I immediately showed it to Fred, who was thrilled by my efforts. The fact that I was able to capture a sense of the Portal Gun's iconic design felt like such a triumph at the time. In fact, I was so happy with this build that it remained intact for two entire years (i.e. I never disassembled it once for parts). Looking back now, this first build had serious issues. For one, the build was as flimsy as it looks. I made some questionable assembly decisions when it came time to attach the handle component to the "barrel" of the gun, which made the gun unwieldy. What's more, the handle component itself hardly had any room for my hand (you can probably tell by the image on the right), making it awkward and a little painful to wield. That's not even mentioning the uneven color scheme (I don't have much in terms of white pieces, so I hope you don't fault me for that) and the overall barebones look to the thing; I clearly didn't even try to cover up the exterior. Despite these clear flaws, I still hold this build in high regard, as it's the first notable instance where I successfully captured the appearance of a pre-existing object/design with Lego in a decently accurate manner.
Mk. 2 of the Portal Gun came about more than two years later. If you compare this to the first build, you'll notice that there's very little difference between the two. That's because a lot of my efforts with this build were focused on stability as opposed to aesthetic. As I mentioned before, the original Portal Gun was flimsy as hell, and my first order of business in Mk. 2 was reinforcing the middle portion of the build to make everything more stable. Design-wise, that middle part looked the same, but thanks to some assembly underneath, the whole thing is no longer under the threat of spontaneously falling apart. Other than that, I changed very little, but the most notable change in terms of appearance was my addition of the orange piece at the end of the barrel. The portals the Portal Gun shoots out are traditionally colored blue and orange, and finding a way to communicate that in the build with that one piece felt like a eureka moment. That alone elevated this build in my eyes, and it would remain intact for another couple of years. Taking into account that I changed very little, the same issues with scale and color scheme still persisted. In the games, the Portal Gun is slightly larger than that, and its handle covers the entirety of one's hand (unlike my design, which is a tiny handle that hardly covers anything). And although I couldn't do much about my own limited resources, the fact that my design isn't white (or at least has a consistent color scheme) still bothered me. 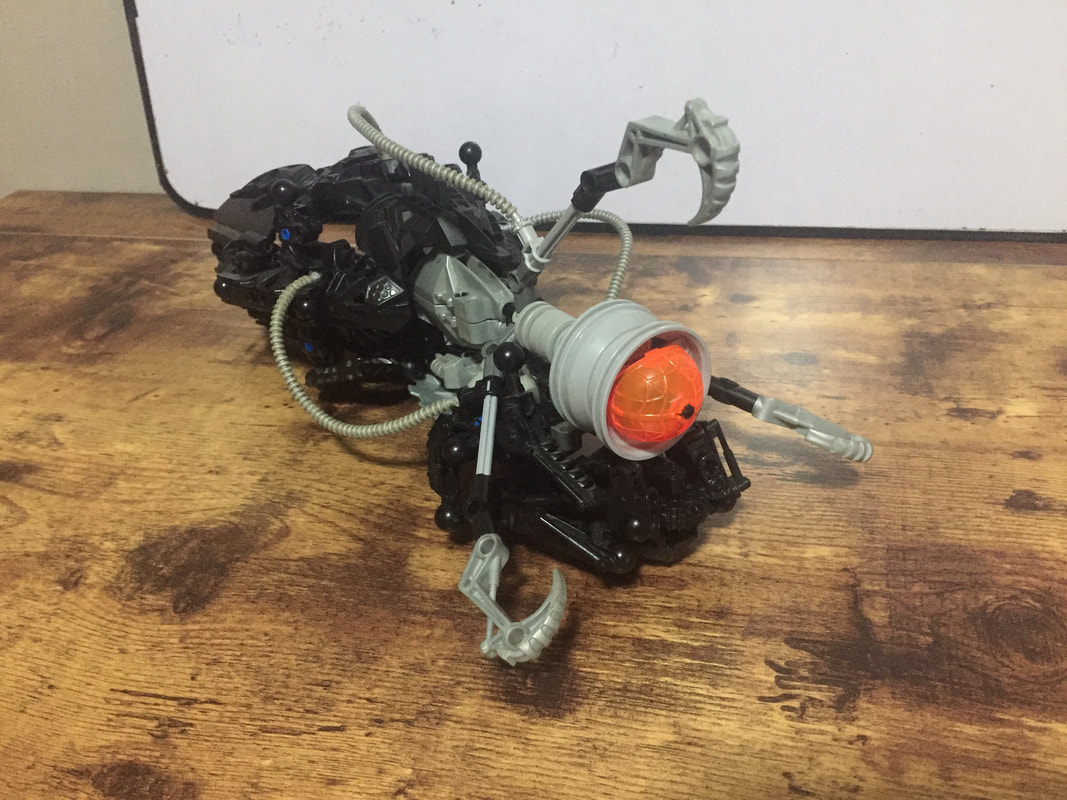 Fast forward to present day (about four years after Mk. 2), and I finally build a Mk. 3. I'd actually been meaning to work on this build for a little while now, and if last month hadn't been so busy, I would've gotten it done sooner. Nevertheless, the newest version of the Portal Gun is here, and it's actually a new design I built from scratch. My main focus for this build was improving the handle. The one thing I strongly disliked about the earlier designs was this portion of the gun, as it was hard to hold (as there was very little to actually hold) and was nothing like the actual Portal Gun design. What's more, I still have to take into account that the handle must support the rest of the gun.
For this part, I took inspiration from an early 2012 build: this tiny arm cannon. It's one of my first forays into wearable builds, and while its design is breathtakingly rudimentary, the overall idea of it (something that cleanly envelops my hand) served as a decent basis for a design. At this point, I have some experience designing builds meant to be worn/held with my hands, so constructing a handle that's both stable and comfortable wasn't too difficult. Rather, my issue was having said handle neatly cover the entirety of my hand while approximating what the original Portal Gun design looks like (and doesn't look like shit in the process). To put it simply, the problem was on form, not on function. A small subset of Lego pieces work really well as neat-looking exterior components, and unfortunately, I don't own many pieces that belong to that subset. That meant I had to get real resourceful with what I did have to create a handle that is both stable enough to fulfill its intended purpose and actually looks decent aesthetic-wise. The former is easy on its own, but it's when you attempt the latter in conjunction that things get challenging. Covering exteriors has been a consistent issue I've had with wearable builds over the years. If you look through my masks or my gauntlet/glove builds, you'll notice that I don't have many pictures showing off different angles, and that's because covering every square inch of real estate neatly (especially in a way that looks good in different angles) is difficult. It's often an exercise in futility to get everything looking perfect, and with my limited resources, I often just bite the bullet instead of driving myself insane by forcing the issue. To rephrase my earlier point: not all Lego pieces look good as exterior components (e.g. flat pieces look good, ball-and-socket limbs usually don't). Couple that with the fact that Lego wasn't designed with wearability in mind and you have a recipe for inconsistent-looking masks/gloves/other wearables. Stare at any of my mask builds long enough and you'll realize that it's all just a chaotic hodgepodge of disparate pieces. Figuring out how to make such a mess look even remotely presentable is always a challenge, and even then, I'd usually still end up with weird-looking gaps, or stuff that just looks off and distracts from the flow of the overall design. And one must remember: the final product still has to function as intended (i.e. it needs to be wearable, is stable when worn, and is decently comfortable). That means I have to take into account how aesthetic components affect things like the internal assembly (which accounts for stability), or my comfort (space for my hand in the case of gloves, seeing/breathing in the case of masks). Most, if not all, of my wearable builds have been a challenge to balance both aspects of form and function, and more often than not, the scales tip a little too far into one side or the other. Once I had figured out the handle, however, the rest of the design came together easily. The new handle had more than enough connection points that allowed it to support the barrel with no stress, so stability was a non-issue. Appearance-wise, I still felt that the earlier versions of the barrel captured the look that I wanted, so I merely adapted that design to fit with the new handle, and added a few new flourishes here and there. I also tried to stick to a more consistent color scheme, using black as the main color, with the barrel taking on lighter, grayish colors (which is sort of the reverse of the original design, which had a white exterior and black innards). I also kept the orange bit, because it feels more like a Portal Gun that way. Yes, the design isn't exactly 1:1 with the original, and I still don't have nearly enough white pieces to achieve the original look, but I think this effort is a decent improvement over the previous versions. I figured out the handle dilemma and found a decent balance between form and function, and I put together a final product that I feel like I can be proud of. I'm pretty satisfied with this version, so I'm probably leaving the Portal Gun project alone for a while (until I get some white pieces). That, or I can build an entirely new Portal Gun, this time based on the one from Rick & Morty. I'm still figuring out how to make that design work on a 1:1 scale, but I did build an itty-bitty version a couple of years back as a proof of concept: 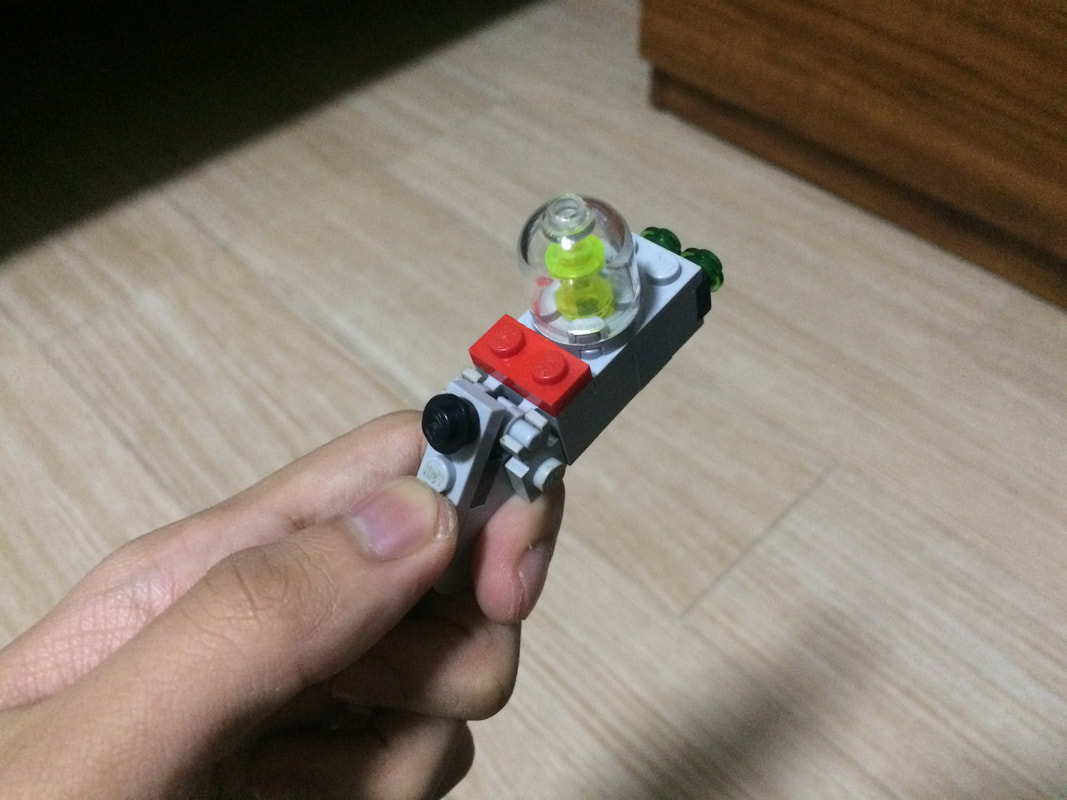 Go see some extra pictures on my Instagram post:
https://www.instagram.com/p/By7AYCendBJ/ Check out the Portal games on Steam:
And to Fred: thanks for being an inspiration, even to this day, even after everything. - end - Unlike most other entries in this series, this blog post isn't tied to any recent builds that I've worked on. However, like most of my build ideas, it came from a random and spontaneous thought. Nearly all of my builds were something I myself thought of building. Whether I was inspired by another build I saw or some form of media I consumed, or I came about a design by experimenting with pieces, or I got a bizarre eureka moment at times when I should really be doing something else (usually sleeping), many of my builds were born inside my shitstorm of a brain. However, there are a few rare exceptions to this fact. 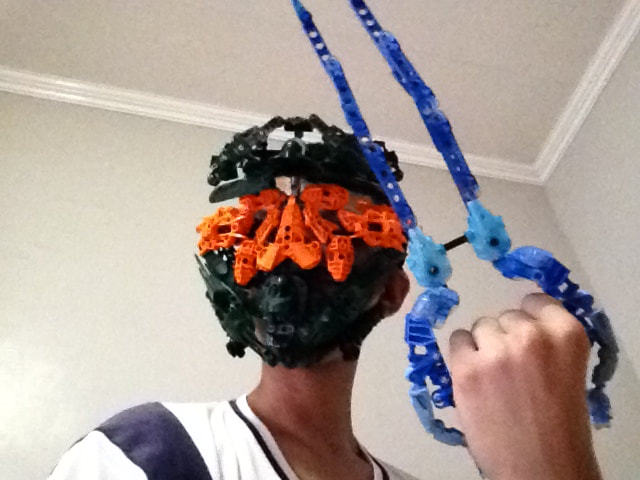 The first instance I built something based on someone else's suggestion was around 2014. My build-focused Instagram page was just in its infancy then, but I had been slowly gaining the odd follow here and there, mostly from fellow Lego/Bionicle builders. One of these followers (I don't remember the username anymore; they changed their handle constantly and eventually deactivated, and that was four years ago) ended up taking a liking to my work, going as far as to leave nice comments on my posts (which blew my mind at the time). During my hot streak of building wearable masks, they floated a suggestion towards me: "why not build Master Chief from Halo?" No one's ever really suggested a build to me at this point (other than perhaps the Hidden Blade), so I was kind of taken aback. I've never been told what to build before, and I felt like I had to oblige because this person was uncharacteristically (by Internet standards) nice. I figured, Master Chief's cool, so fuck it, let's try building it. I'm all too familiar with the pressure of having to not disappoint someone (what, too real?), so working on this build was a little more intense than what I was used to. To make things more interesting, I threw in a scaled-down Energy Sword to complement the mask. The kind follower ended up liking the build, and I enjoyed the end result, so I guess it all worked out. As a bonus, my best friend (a huge Halo fan) liked it, too. Other than this one moment, I never really made it my business to take on other people's suggestions. After this one-off, I got exactly two comments from other Instagram followers suggesting their own builds, but I ended up not working on them. It's not because I don't give a shit; I definitely do, because the instant I got those suggestions, I immediately looked up reference photos. It just so happens that the suggestions seem to be beyond what I could pull off with my resources, so I deemed it better to keep the ideas on the backburner than to half-ass an attempt just to pander to people. I still clearly remember those two suggestions after all these years, and I occasionally think about how to go about assembling them (usually to no success). Inspired by those improv drawing shows on YouTube (Drawfee being my favorite of the bunch), I often pondered on the idea of taking build suggestions as a sort of "training" exercise. I enjoyed the spontaneous creativity spurred on by improv comedy, and the fact that the concept could be extended to art (in my case, building) fascinated me. Recalling the earlier incidents of me not being able to execute on a suggestion, actually moving forward with the idea terrified me. What if I can't do it? What if they don't like it? Hell, what if no one humors me? Around mid- to late 2016, some friends of mine set up a Discord server for our circle. We usually spent our time there chatting about whatever, using it to talk when in multiplayer games, and generally just fucking around. At some point, I thought, this is the perfect environment to test out the improv build idea. I went and set up a text channel within the server dedicated to build prompts. They shot an idea, I respond with a picture of the build. Simple enough. Thankfully, my friends didn't think this was dumb as shit, and I got a good number of suggestions. The above images are a few of my favorite builds that came from their suggestions. Considering that these are my friends we're talking about, I got a few suggestions deliberately designed to fuck with me. I also got some super challenging suggestions, some of which still haunt me to this day. Whatever suggestion it ended up being, I had a lot of fun working on all of their suggestions, because a) I get to make something for someone else, b) I invited the challenge of figuring out alternate means to make a suggestion work (e.g. I'm not great at building people, so how do I get around that?) and c) I get to fuck with them back (in build form) if they give me a silly suggestion (my favorite example of this was when someone suggested a John Cena build and I promptly replied with a picture of nothing). The builds, though varying in quality, mean a lot compared to many of my other work, and that's because my friends got to be part of the creative process. It also helps that they all thoroughly enjoyed what I put out. The fun I had tying in my friends to my builds was my primary motivation for starting out the Brickheadz project. I'm hoping to figure out more projects that involve my friends at some point. Unfortunately, we're rarely on the aforementioned Discord server anymore, save for the odd occasion. By extension, the build prompt train is decommissioned. I've been thinking of reviving it in some other form so that it reaches a larger audience of friends (the server rarely had more than six people at a time), but the usual fears of maybe fucking shit up still plague me. In the event that I overcome my dread and follow through with the idea again, I've played around with a couple of ideas to change things up. One idea I'd really like to try out is that instead of suggesting a specific thing, people suggest a theme (e.g. everyday objects, characters, etc.) instead. I'm also toying with the idea of making the entire thing a video series, but that's probably not gonna happen unless I happen upon good recording equipment, and I stop hating the sound of my own voice. Opening build suggestions to strangers is absolutely off the table; I can predict (and am amused by) the fuckery of my friends, but I don't think I can handle anyone outside that. Most strangers who comment on my work are nice, but I'm not taking any chances. I usually build for me, but let it be known that I have built, and do build stuff for other people. I'll also make it clear that in the event that you throw a suggestion my way that I do keep it in mind, even if it ends up seemingly unheeded. Sometimes it just takes a bit of time, brainstorming, and the right pieces to make a build work (the previously mentioned Hidden Blade being a prime example). I appreciate that you have confidence in my ability to make a build happen that you make suggestions; it means a lot more than I make it known.
Even if you aren't in the business of making suggestions, I appreciate you all the same. Whether you like my shit on Instagram, leave a nice comment, read these build-focused blog posts, or even silently scroll past my latest build photo after looking at it for two seconds, the fact that my work means something (even if that something is momentary, or possibly negative) to someone other than myself motivates me to keep building, and heaven knows I need motivation. Lastly, shoutout to the Block 12 Discord. You know who you are. - end - Whereas most of the builds I've covered here have either been builds of a certain type or ideas I have iterated and improved on over the years, today's topic will be slightly different. The build I'll be discussing today was a one-and-done project I worked on almost five years ago that I never thought of revisiting until very recently. Before I proceed, here's a reference image of what Unown's many forms look like, in case you are not well-versed in the world of Pokémon. Have fun comparing and contrasting the official artwork with my builds. 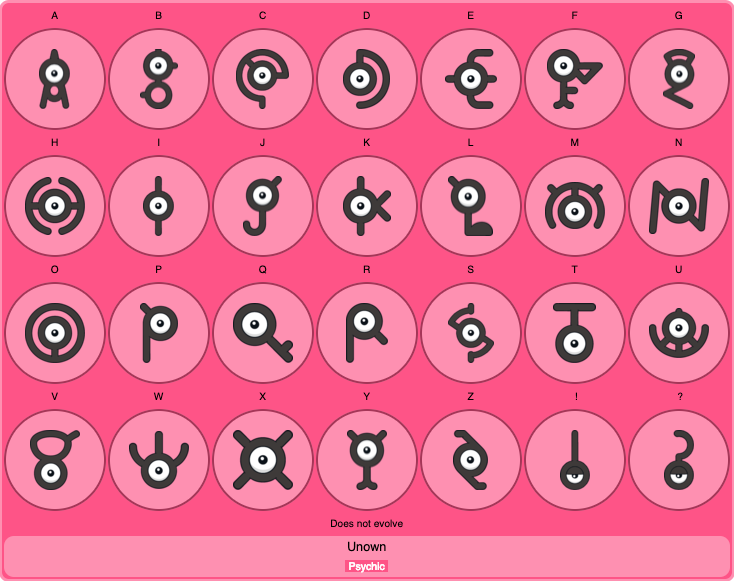 Image taken from a screenshot of Bulbapedia's article on Unown The Unown Alphabet was the first proper instance of me taking on a massive build project focused around a theme. Most of the time, my builds are one-offs; they're not related to anything else I've worked on in a thematic sense, and are made independent of previous build ideas (barring taking inspiration from older builds from a design/assembly standpoint). While I have done an occasional series of builds that fit a singular theme (e.g. a claw build to complement my Black Panther mask build, or a series of pixel art mosaics I made of all the items in Super Mario Bros.), or builds of the same nature (wearable masks or pixel art mosaics, for instance), none were on the scale of "I'm gonna build 20+ things all fitting the same theme back to back." Apart from the Brickheadz project (which you can now view in its entirety here, or by clicking on Project Voodoo in the navigation bar), I've never subjected myself to a building gauntlet of this magnitude ever since. I'm a huge Pokémon fan, and I've always wanted to work on a Pokémon build. Other than the occasional pixel art and two major, yet unrefined attempts, I could never quite capture the signature designs of the damn things. I often found myself going through the PokéDex, looking for a Pokémon design that I could maybe pull off with Lego bricks. I eventually got a eureka moment while playing around with some pieces; I had constructed something that felt very reminiscent of Unown's single eye. With that as a base, I got right to work. 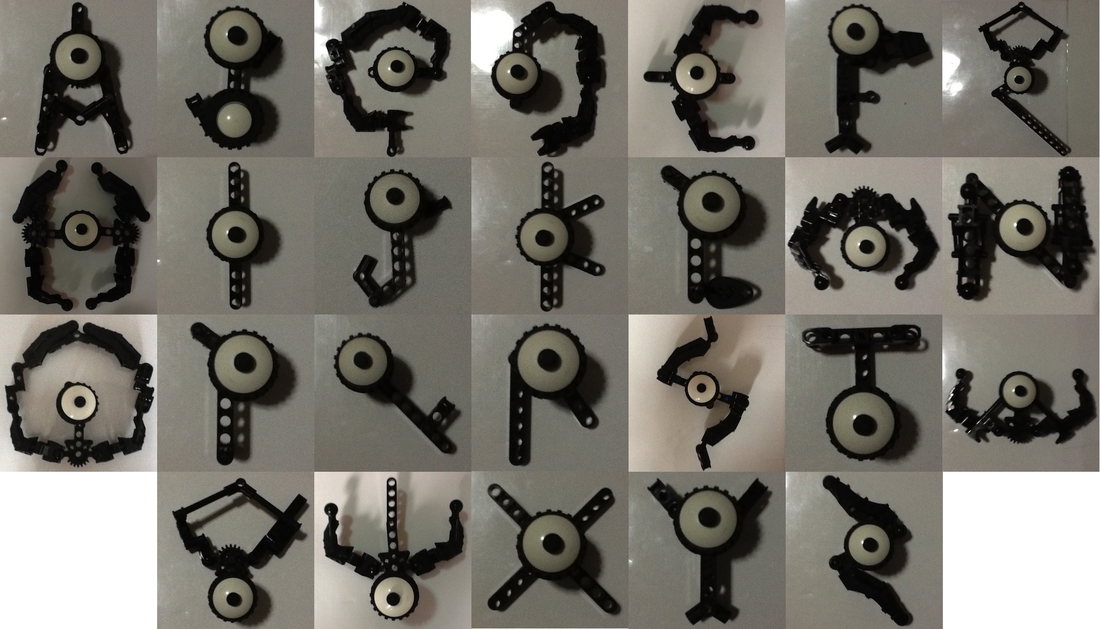 As you can see in the above image, I did the best I could to capture the designs of each Unown form. I used a wide variety of black pieces to achieve all the shapes, but due to the nature of some of the pieces I used, a few Unown ended up looking less refined than others. The Z, for example, looks wonderfully clean, as opposed to, say, the H, which very clearly looks like a disjointed amalgam of pieces. I also had issues with building curves (a common Lego problem), and capturing a proper sense of scale (e.g. the G looks comically large compared to the other Unown) and proportion (the O's form doesn't have a uniform width throughout). Despite these problems I encountered, I was still mostly satisfied with the end result. This project also took several hours (taking into account idle time where I was brainstorming designs), so I didn't feel a strong desire to change shit around or completely rebuild something from scratch by the end of the build session. 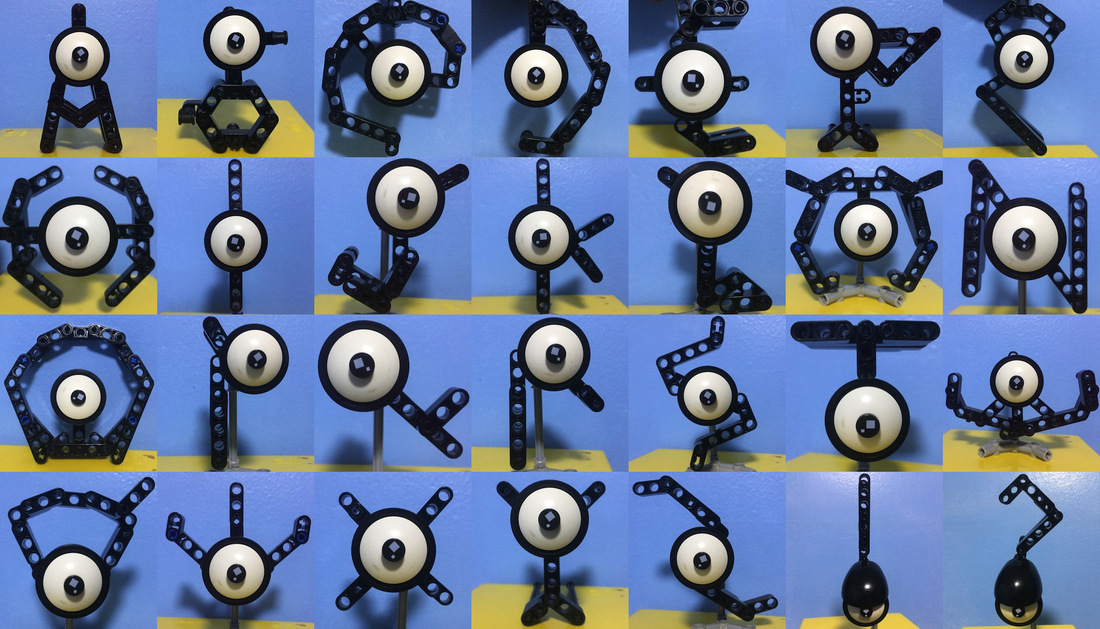 Unlike other projects, like the Infinity Gauntlet or the Cyclops visor, this wasn't one of those build ideas I ever felt compelled to revisit for whatever reason. Perhaps I felt like I couldn't improve upon the builds with the pieces I had? I'm not quite sure. In any case, the desire to revisit the idea came about somewhat recently, when I was looking through photos of old builds. I had resolved to check out builds from years ago in hopes of creating improved versions based on the initial concept, and I thought that the Unown Alphabet was a great place to start. The first thing I did was improve the design of the eye. Now, I recognize how stupid that sounds, but as good as the first eye looked, I wasn't quite satisfied with the pieces I used to construct it. I used the exact same white piece for the sclera, but I used all-new pieces for the pupil and the eye socket. Compared to the original eye, it doesn't look all that different, but it feels a lot more polished. The main challenge of the build, like last time, was to capture the shape of each Unown. My use of different black pieces led to clunky, jagged appearances for some of the Unown, so I decided to use a single piece type across all the builds: the beam piece. These are Lego Technic pieces that have pin holes all over them, and they come in all sorts of lengths. Although curves were still a little tough to pull off with these beams (some of the Unown look a tad more angular than I would've wanted), the overall result looked much cleaner. Using a specific, limited set of pieces was very challenging, but in my doing so, the Unown all have a sort of homogeneous aesthetic, making them really appear like they are of the same species. In addition, using/reusing the same set of pieces helped me get a handle of the scale of each Unown, and I no longer had to worry about uneven proportions throughout each of their designs. I still think I may have missed the mark a little with some of the sizes here and there, but there's nothing that looks completely off. I did have to use pieces other than beams to achieve the look I wanted in a few of the Unown, but these instances were rare, and I made it a point to at least use pieces that had about the same width as the beams, as to not interfere with the overall aesthetic. For the first Unown Alphabet, I simply took pictures of them resting on the floor against a white background. I decided to change that as well in this iteration by displaying them upright against a wall. This was a challenge in itself, because majority of the Unown designs couldn't stand on their own, or even lean against the wall in a stable fashion. My solution was to build a sort of display stand, and for most of the Unown, this was sufficient. For others, I had to attach an extra beam piece to the entire build and simply hold the Unown up while I take the picture. This was a less elegant solution, and you'll likely notice that extra beam jutting out of the main build. A few letters, like the A or the Y, only needed minimal assistance to stand upright. If you know your Pokémon, you'll notice that my first go at the Unown Alphabet isn't 100% complete. That's because I deliberately decided to skip the ! and ? forms of Unown. Unlike the letters, these Unown have half-closed (or half-open, if you're an optimist) eyes, and at the time, I didn't know how to pull off this look. It took me a fair bit of experimentation, but I managed to figure that mystery out, so Mk. 2 of the Unown Alphabet features the entire Unown family! In case you want to view the Unown individually, I've set up a story highlight on my Instagram. You can take a look at that here. Revisiting the Unown Alphabet ended up being a ton of fun, especially with the added challenge of using only one type of piece (for the most part) to form the body. I'm not sure if I'll ever do a Mk. 3, but if I do, I'll try going about it by using an entirely different piece type, and see if I get better results. Maybe I'll experiment with scale as well, and try to go bigger/smaller. As always, there'll be more builds to come, and you know where to see them. I'm thinking of revisiting more of my old builds; maybe there's something on there you want to see me try again? Before I go, I'll leave you with a few bonus images. These were the two previous attempts at building other Pokémon that I mentioned earlier. Take a guess as to who they are.
- end -
This build-focused blog entry is going to be a little different, as it focuses less on how a build idea I've come up with on has evolved over the years, and more on why I don't favor a certain build type. The main idea of the post will revolve around an irony that defines me as a builder: I own a lot of Bionicle sets, but I don't build a lot of "Bionicle-like" creations.  Before I proceed, it's imperative I explain what the fuck a "Bionicle" even is. Bionicle is a Lego theme that the company first put out in 2001. Unlike your typical Lego bricks. Bionicle uses Technic bricks for its sets. Technic is the Lego toy line aimed more at older kids/adults, as it uses more complex elements like pins, axles, gears, and more (I feel the need to point out that these are still compatible with vanilla Lego bricks). If you've taken a robotics class that uses Lego Mindstorms, a lot of those pieces are Technic pieces. What sets Bionicle apart from Technic is that in addition to typical Technic pieces, Bionicle sets have parts that have balls/sockets, which allow you to create limbs. Essentially, you're building action figures when you pick up a Bionicle set. It's like the G.I. Joe of Lego. Most Bionicle sets are your typical humanoid figures. There are a ton of sets deviating from this norm (spiders, beasts, even vehicles), but most people usually remember the humanoid ones (largely because they're the protagonists of the story). For the purposes of this blog entry, I'll be referring exclusively to these humanoids for my comparisons and descriptions. If you look at Bionicle-focused builders in places like Instagram, Flickr, or BZPower (a Bionicle fan forum I frequent), you'll see that many people (definitely not all) have a tendency to go the humanoid route for custom creations. It's usually a genuine surprise to see anything other than that when browsing through fan builds. When I first got into custom builds, I went this route, too. I was very much obsessed with Bionicle's rich story for most of my childhood, and, like many other fans, I wanted to build original characters to fight it out with my other figures. It's like typical make-believe with dolls or action figures, except I gotta build the characters first.
Above are some examples of my early work. These are part of a folder of builds from around 2009–2011 that have never seen the light of day because they're all fucking terrible (if that piques your interest, let me know). Sure, you might say they're creative in some sense, but they're the furthest from original, at least in terms of construction. The humanoid Bionicle sets (the ones of this size and price range, anyway), while unique in terms of aesthetic, all share the same basic construction blueprint: build the torso, build the arms, build the legs, slap on the head. The particular pieces used to create these body parts vary as you go through Bionicle's set catalog, but boiled down to their fundamentals, it's all the same. All I did in these early builds is follow the same formula, except I mixed and matched pieces from different sets. Of course, there's nothing wrong with doing that, it's just not that interesting when you think about it. In 2006, Lego used some new pieces for the torso and limbs. At the time, I thought, hey, new pieces, cool. It was cool until you realize that most humanoid Bionicle sets from this year until late 2009 (barring several exceptions) pretty much used the same base pieces, with the only things changing being weapons and armor. Throughout this period, building sets felt largely uninteresting because there was rarely anything unique from a construction standpoint. This persists even to this day, where a lot of Lego's buildable figures use a new brick system (based on this era of Bionicle) called CCBS, which leans less on Technic and more on the ball-socket joint system Bionicle pioneered. Believe me when I say that once you've built one CCBS set, you've pretty much built them all. This is not meant to be derisive, of course— it's just how it is. The reason I bring up this "same-y" vibe to building Bionicle sets is because, early on, I felt this dissatisfaction with my earliest builds. I was essentially churning out facsimiles of the same base figure. It got old real quick. It also helped that, when I shared one of my builds of this nature online, I caught a lot of shit for essentially swapping a few pieces out and calling it brand new. This happened when I was pretty young (and completely new to the idea of people being assholes on the Internet), so I felt like shit, but hey, they weren't wrong.
I quickly found myself having to justify building humanoid creations by having a completely custom design incorporated into it (e.g. a custom mask, or a cool arm cannon, like the above builds). Eventually, that justification turned into an outright aversion to humanoid builds. That change ended up being for the better, because that got me to think about using pieces that used to be just the torso piece in new and exciting ways. Stuff like orienting Kanohi masks (the masks most Bionicle characters wear) in different angles to achieve a unique look were lessons I learned during this phase of my building "career", and are design techniques I still use today.
I don't remember a lot of builds from this earlier era (I constantly shock myself whenever I look through that folder of old build photos), but the ones I do remember are the ones that strayed completely away from the standard Bionicle person build. They're memorable because I found a cool new use of a Bionicle piece that had seemingly only one function. A lot of Bionicle pieces feel like this; finding a new or creative way to use a piece in a build will almost always result in praise amongst fellow builders. In the cases of the above, the spider uses what's normally a Bionicle torso piece as a cephalothorax, and the stingray's basic shape is formed by silver pieces that are usually bladed weapons wielded by Bionicle people. Eventually, that challenge of finding new ways to use Bionicle pieces presented itself in later builds as the years went by (many of which I've already talked about; go to the Derryck Builds blog category to see more specific instances). Those builds are always fun, but I occasionally found myself wanting to build humanoid figures for a change, like the old days. This desire is often spurred on when I look through the builds of other creators online; the best humanoid builds often have completely custom limb and torso designs, and I regularly thought of those builds as a challenge to make something in that same vein.  Inspiration would strike here and there for humanoid builds, and I made it a point that, at the very least, the torso would be a completely custom design (I found, and still find, custom limbs to be particularly challenging to come up with). The most Herculean humanoid build effort I ever came up with (as of today) was something I dubbed the Silver Knight. Almost nothing about it was derived from the Bionicle template of humanoid builds; everything from head to toe was something I went out of my way to design. I think of this build fondly not only from a design perspective, but also in terms of scale— larger Bionicle sets (aptly named "Titans") are often of this size. Coming up with custom humanoid designs is rewarding, but I often had to take two things into account: mobility and stability. To use the above Silver Knight as an example: those limbs don't have a full range of motion (I distinctly remember the legs being annoying to move around), and, as a consequence, it's challenging to find a pose where the figure stands perfectly stable. The template may be boring, but if there's one thing it gets right, it's that it isn't unwieldy to play with. At the end of the day, these are toys; they gotta be easy to play with. The reason I brought up this topic today was because a recent build (which is in the "Bionicle-like humanoid" category) got me to think, wow, I really don't build stuff like this often, do I? This is as much a journey of self-reflection (pretentious as that may sound) as it is me giving you, glorious reader, a guided tour of my thought process. It was also a good excuse to look through that damned folder of old builds again. I'm gonna try and come up with more humanoid builds in the future, but regardless of whatever the future may hold in terms of my builds, my Instagram page is the place to see that future. Refer to the sidebar for the link. Before I go, here's a few more photos from the old build folder. Builds from that era take me back to early high school, so humor me as I reminisce (and laugh at my poor design choices + my utter incompetence at photography):
And, as a bonus, here's a humanoid build I came up with in late 2012 for my yearbook creative shot (modified after the fact). I was going for an Inception-style situation, which I think I pulled off adequately. I might revisit this idea someday and make a more refined version.
- end -
I haven't been writing about builds as much as I would like, so, to tie in with my latest build, I thought it'd be neat to talk about the history of my Cyclops visor builds. It's not as much of a saga as, say, the history behind my mosaic or mask builds, but it does have a fair amount of backstory, one that I hope you'll find interesting. This idea first came to me during 4th Year high school— a good approximation would be around late 2012. Our English department had come up with this thing called Lit Live, where you spend the day essentially cosplaying characters from literature. Lucky for me, comic books counted as literature (as it should), so I immediately started thinking of comic characters who had iconic paraphernalia that I could then turn into a wearable build. I had a bunch of ideas for which comic character to go as, but the Cyclops visor stuck out to me, because a) it was iconic enough that I could get away with making just that and wearing normal clothes, and b) I thought it'd be a cool idea to build it around my glasses so I could have it on the entire day. Unfortunately, I couldn't figure out how to pull off the latter point, so I gave up after a while. Remember, this was in 2012; I don't quite figure out wearable builds (especially ones on my face) until over a year later. Oh, and in case you were wondering, I went as Doctor Octopus during Lit Live. It was a completely half-assed costume— I wore a green shirt, some random jeans, and cobbled together a tentacle build that looked so terrible, I'm not even sure I documented it. I might revisit that idea in the future, just so I can absolve myself of that sin.
Almost an entire year after I first came up with it, I took on the Cyclops visor idea again, and I was actually able to figure something out. I had been fiddling with this red hose piece and stumbled upon a weird way to attach it to Bionicle limb pieces. One thing led to another, and eventually, the first Cyclops visor was born. I was pretty proud of myself at the time for coming up with the idea of using the hose piece as the red part of the visor. The big problem I found with this first iteration was that I couldn't see shit through it. I also wasn't too thrilled with how it actually looked, either. The visor itself was razor thin (Cyclops's covers a good amount of his face), and the color scheme (or lack thereof) made it pretty clear that the build was something I jury-rigged as a proof of concept as opposed to a design I deliberated on. Despite this, I was still happy with the build, but it was obvious to me that there was plenty of room for improvement.
Mk. 2 of the visor came about a year later after Mk. 1, and it felt like a complete step up. It uses the original idea of the red hose piece made to look like the ruby-quartz component of the visor, but the key change lies in the visor itself. Inspired by how the visor looked in the original X-Men movies, I used slightly larger pieces, and went with an all-black color scheme. Considering how much I stressed out over having the build attach to my glasses the first time, I elected not to worry about that aspect at all in this version. That said, it was something I thought about a lot, especially during the peak of my mask-making days (an issue I didn't think to bring up in the wearable masks blog post). Having the masks I built be glasses-friendly was always something at the back of my mind, but it was never a top priority because it ended up being more trouble than it was worth. 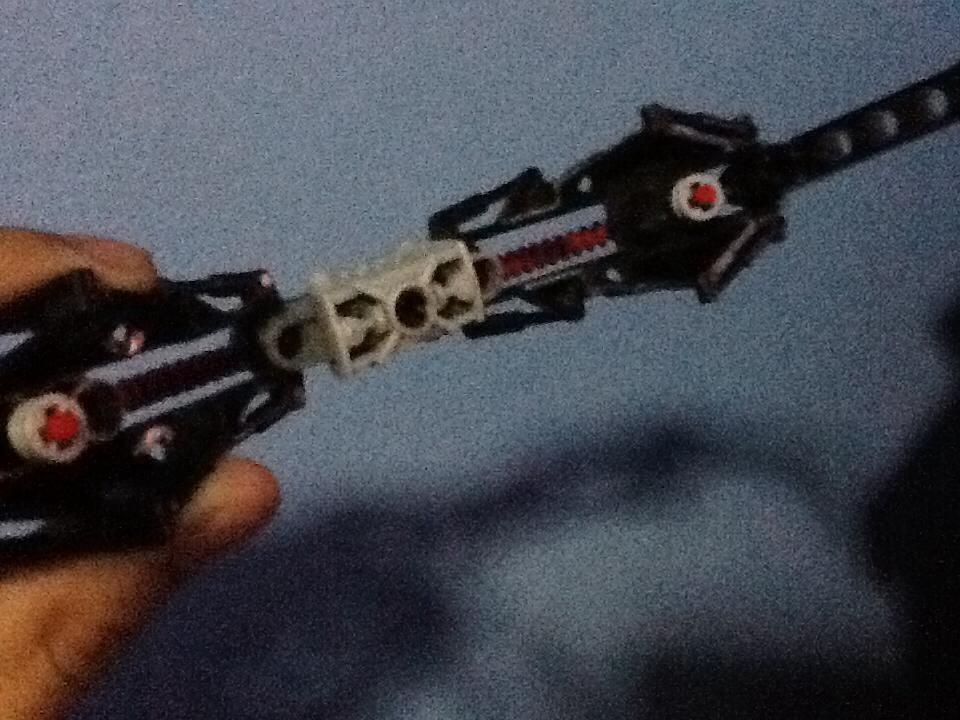 Whereas the original limb pieces I used as the length of the visor didn't really provide much in the way of vision, the replacement pieces had convenient spaces in them which worked perfectly as eye holes. I was so thrilled by this discovery that I implemented the design in a few mask builds. Here are a couple of instances where I do so:
By this point, however, I felt that the red hose design was rather played out, and I needed a fresh idea to improve upon the Cyclops visor idea. My goal was to use translucent red pieces instead of the bright red that I had been using, which I felt would look a lot better. Unfortunately, I didn't have a lot of translucent red pieces lying around, and the ones I did have were too tiny to work with. I did, however, try out a new visor design on a mask build that showed some promise as part of the Cyclops visor. I never really went anywhere with the design, mostly because it was in translucent orange, and I was adamant about the translucent red thing. Here's the mask in question: 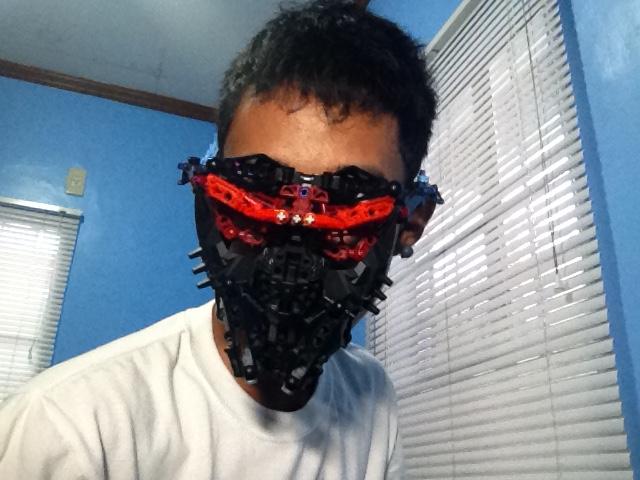 I had actually been sitting on a Cyclops visor redesign since early last year, when I acquired a Kylo Ren set from the Lego Star Wars Buildable Figure line. This set naturally had Ren's iconic trisaber, and the main blade of this trisaber was a long, hefty translucent red piece. I recall looking at the piece while I was building the set and thinking, this piece is perfect for what I have in mind. Now that I had the perfect piece, the next challenge was to build the main visor around it. This was quite challenging, because this piece only had one connection point, and due to this, I had to figure out how to attach it to the main assembly while still maintaining a sense of symmetry throughout the build. I also had to think about the color scheme, since I felt like I had to go with something other than black. Ideally, I'd have gone with the classic yellow, but alas, I didn't have enough of those to work with. Instead, I opted for the silver color scheme, which was just as prominent in the comics, and a color which I had no short supply of. With the abundance of silver pieces at my disposal, I was also able to make the visor closer to how large it usually is in the comics. I even tried to capture the visor's more rounded shape, but curves are a little tough to pull off with Lego, so the end result is more of a rough approximation more than anything. 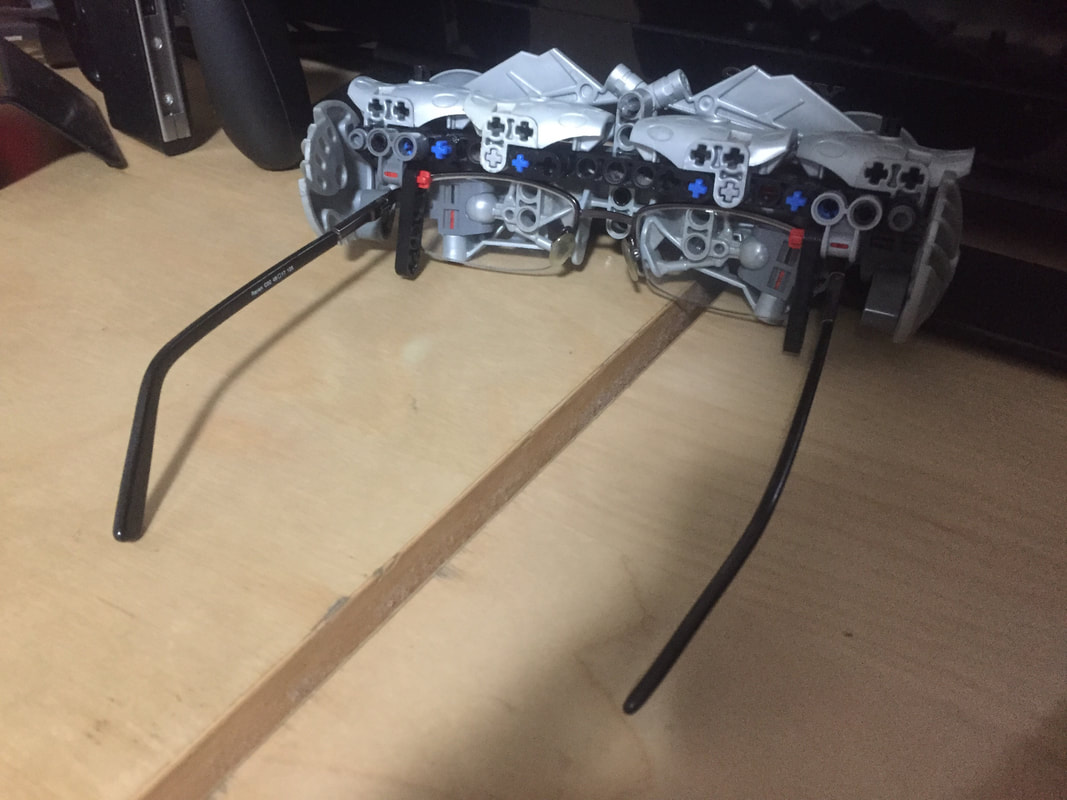 Having the translucent red piece that fit my ideal vision of the build and successfully implementing it was satisfying, but I think it only comes second to Mk. 3's other main improvement: it actually attaches to my glasses.
When it came to mask builds and such, wearing them always presented two problems: I can't wear my glasses in them (i.e. I can't see shit), and the ability to wear them relied solely on the backend assembly (which isn't always comfortable/stable to wear, and made transporting the mask cumbersome because it takes up a lot of space). For this version of the visor, I decided to make a focused effort to rectify these issues, and, after overthinking the design for hours, found a stupidly simple solution that worked perfectly. This backend assembly that allows me to wear the visor on top of my glasses isn't elegant by any means, but it gets the job done. The earlier version of Mk. 3, like the previous visors, had the typical Lego-built assembly that went around my ears; thanks to this solution, I was able to get rid of that often unstable and annoying part of the build. This is my first real step in applying glasses-compatible designs in future wearable builds, and I can only hope to improve upon this aspect. With how the build turned out, I ended up making the visor slightly too wide for my face, which kinda looks goofy (that may be more because of my dumbass face than the visor itself), but doesn't bother me overall. My vision is also slightly obstructed by how the assembly came together, but compared to Mk. 1, there's gaps where I can see through, so it isn't much of an issue this time around. Plus, if you look at it from the side, you'd see that the visor is considerably thicker than how it typically looks in the comics, so slimming that down may be a focus of a future redesign. All this said, I'm more than satisfied with this new iteration of the Cyclops visor. I'm now prepared for a costume party in Halloween, or a screening of a new X-Men movie. For the time being, this idea is going on the shelf, but if I ever come across an assortment of yellow pieces that I can use, I'll build a new version. Per usual, keep on the lookout on my Instagram feed for the latest on my build projects. I also do the occasional story (usually on new Lego sets), if you give a shit about that sort of thing. - end - I haven't written a blog post on builds in quite a while, so I decided to write about the newest build concept I came up with this year: something I nicknamed "Project Chroma". This is my designation to builds that incorporate a green screen element to them. If you aren't already familiar with the concept, green screen (properly known as chroma key) is a visual effects process where you take a picture of/film something against a green backdrop, and replace that background with something else. If you've seen a weather forecaster point at things on a map before, you're familiar with the idea.  Although Project Chroma itself was something I started earlier this year, the roots of the idea go all the way back to mid 2016. I was bored out of my mind during work (I was an OJT intern at the time), and because I had finished my tasks that day, I decided to surf StackExchange for fun. Somewhere down that rabbit hole of boredom, I discovered that typing "Conway's Game of Life" (just look it up, it's harder to explain in text) on Google runs an instance of the game on the browser. The patterns the automaton generated got me thinking, what if I could implement this in a build? What in the goddamn fuck kind of build could I possibly integrate a rather complex scientific concept into, you ask? Well, the first idea that came to my mind was Rorschach's (a character from the Watchmen comic) mask. Rorschach wore a mask which had ever-changing ink blot patterns on it, and the nature of Conway's Game of Life being ever-changing patterns felt like an excellent marriage of two ideas. Unfortunately, I had no fucking clue how to make that into a wearable mask. The furthest I could go was create a template in mosaic form (like the above image), but I had no idea how to integrate it into a mask assembly, let alone animate it.  The key to the Rorschach build came to me much later, in early 2017. I was looking through my bin of pieces, and a 16x16 light green baseplate caught my eye. Some cogs started turning in my head, and the resulting thought was, can I use this shade of light green as a green screen? This reminded me of the Rorschach mask idea, and I jury-rigged the green baseplate to fit on my mask framework (more on the framework in my post on wearable masks). And yes, it looks dumb on its own. Setting up the green screen was the easy part; the real challenge was putting together the shit I wanted to display on it. I took the pattern template I built from before, and painstakingly built, took a picture, dismantled, and rebuilt the succeeding patterns, for a total of 14 times. I then combined these 14 images into a short stop-motion animation. After a quick tutorial on how to use the chroma key feature in iMovie, I was able to superimpose that animation onto a still image of me wearing the green screen mask. And thus, the Rorschach mask idea finally came to fruition. You can see it in action in my Instagram post here. The biggest hurdle in this build wasn't the assembly itself. Sure, it was tedious to create the frames for a stop-motion animation, but what really took the most time was the editing aspect. Most of the builds I put out are one and done; I build, I take a picture/film a short clip, I upload. Having to import the assets into my desktop, edit them individually (if necessary), and put together a final product is a lot of work for a single upload, but thankfully, I enjoy video editing (despite my lack of skill at it), so the extra effort didn't bother me as much. The fact that I pulled off this build opened the floodgates of build ideas in my head. Now that I've proven to myself that can integrate chroma keying into my builds, I started thinking of what else I could do. Unfortunately, the fact that I didn't have a lot of light green to work with severely limited my options, so for the time being, I shelved the idea of making more green screen builds. Fast forward to September of this year, when I felt a little starved for build ideas and wasn't uploading much. For whatever reason, this creative rut led me to think about how my YouTube channel has no content in it at all. After thinking about what kind of stuff I wanted to (and could) upload, I revisited the green screen idea. Thus, Project Chroma was born.  The first build of Project Chroma was this Lego smartphone with a green screen, erm... screen. My plan of action here was similar to the Rorschach build; build the frames for a stop-motion animation, put the animation together, and display the animation on the green screen. What made this different was the green screen itself; instead of a still image, the green screen would be in a video. I filmed myself pretending to use the "phone" (i.e. swiping and tapping on the make-believe screen) and edited in the animation onto the screen. It was in this project that I truly realized the limitations of iMovie as a video editing application. I had serious issues trying to align the stop-motion animation onto a constantly moving green screen, and this led to a bit of frustration. My best friend (a film school graduate and god-tier editor) was able to bring my concept to life in a more refined fashion. Compare his take to mine and laugh at my incompetence. Despite the post-production troubles I encountered, I was encouraged by the success of the concept. I wrote down some ideas for more Project Chroma videos, but (apart from this one and this other one) the issue of the lack of light green pieces to work with plagued me again. The size of the plates simply wasn't enough for some of my ideas. To solve this problem, I saved up some money, went to the Lego store, and bought a 32x32 light green baseplate, which provided me a substantial amount of room to work with. This is the first Project Chroma build using the baseplate: Though the problem of light green pieces was (mostly) solved, I found that some of the ideas I had for Project Chroma were simply too complex for me to put together with the very limited toolkit of iMovie. I spent the better part of a month thinking of new ideas (or ways to implement existing ideas), but many of them required editing tricks that iMovie simply cannot pull off. I'm sitting on a bunch of ideas right now, but I'll probably hold off on them until I get my hands on editing software with more capabilities.
Despite the fact that my video ideas are still stuck in limbo, I decided to keep Project Chroma alive by tackling another angle: still images. Chroma keying isn't limited to video, so I went to the lab and taught myself how to do it on GIMP (my go-to image manipulation application). After a bit of practice, I got a good handle of the process, and that brings us to my latest build: pixel art of the Eeveelutions against the light green baseplate, complete with backgrounds I edited in. Chroma keying in GIMP is fun as hell (and actually pretty easy), so keep your eyes peeled, because I have a bunch of ideas for still image Project Chroma builds (and even a few animated GIF ideas!). That brings us to the end of the history of Project Chroma. It's still in its early stages, and despite the many hurdles, my lack of editing prowess, and the effort required to pull it off, I found it to be one of the most rewarding build concepts to work on. Expect more of these in the future.
Before I go, let's get some self-promotional horseshit (and more) in here:
- end - 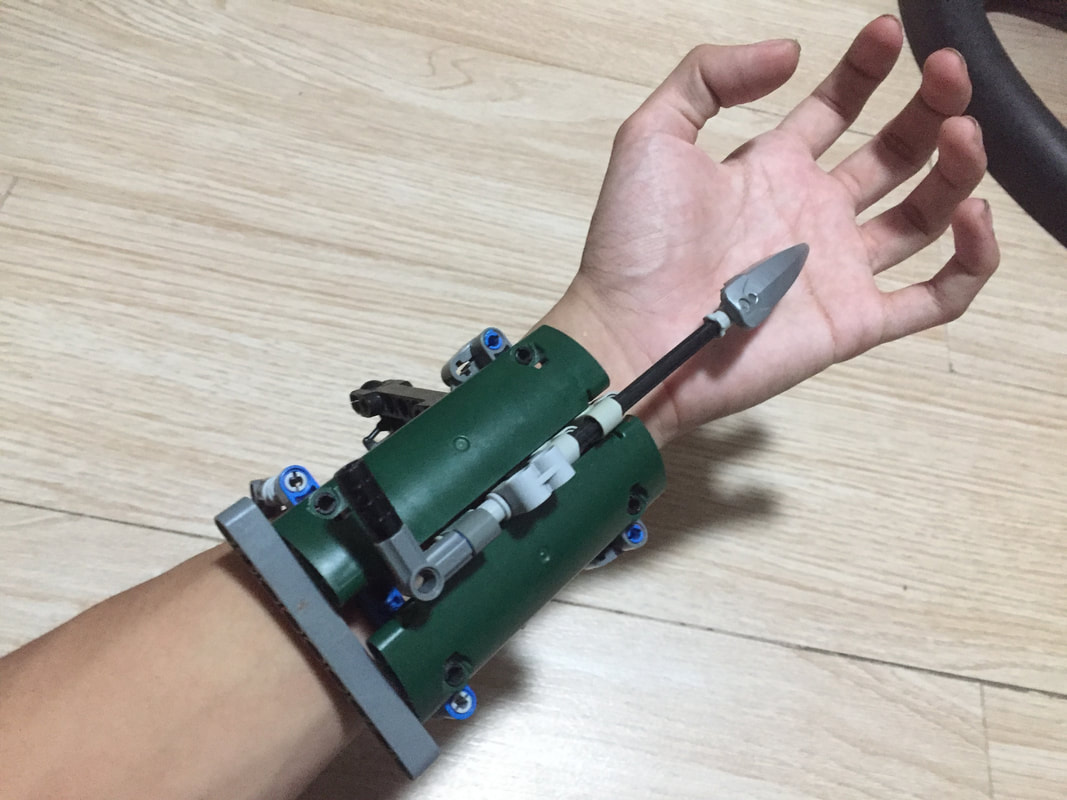 The build ideas just keep coming this week, and the latest of my exploits is the latest iteration of the Hidden Blade (of Assassin's Creed fame). This build, while not as storied as some of my other creations, has a bit of history to it, so I wanted to take a look back at its evolution throughout the years. Unlike most of my builds, the Hidden Blade wasn't an idea I thought up at random. Rather, a friend challenged me to try and build it. Well, "challenged" is a strong word; it was more of a suggestion, but I certainly took it as a challenge. 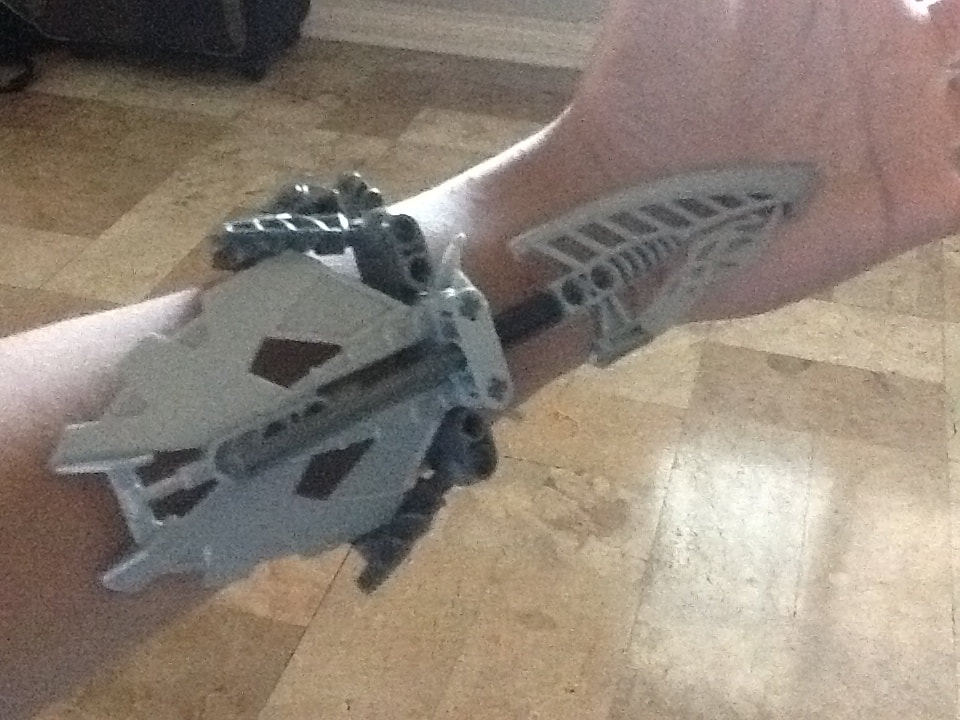 I don't remember when exactly the build idea was suggested to me, but I do know that it took me a long while to create the first version of the Hidden Blade. I put this together in 2015, so by this time, I had a good amount of experience with wearable builds. However, that wasn't the main challenge of this build. As you can see in this video, there is no mechanism to the blade at all. It's just me flicking my wrist like an idiot. It's not fixed in any way, so it moves up and down whenever I move my arm, and I couldn't lock it into place, either. It's very much a proof of concept more than anything, but I'm still quite happy with this prototype, because I proved to myself that the idea was doable.  The second version came about many months after the first. It still operates via a combination of the law of inertia and gravity (as you can see here), but with a couple of key changes. As I mentioned above, the blade in the first version wasn't fixed at all, so I tried to mitigate that by building a sort of "rail" for the blade to go along. However, this doesn't fix the other issue of me not being able to lock the blade in place when I don't want it deployed, so I built a glove-type thing that let me hold the blade when I move my wrist inward. While a considerable improvement from the previous version, I was still not satisfied with how the blade worked mechanism-wise. In the Assassin's Creed games, the blade has an internal mechanism that lets the assassin deploy and retract the blade with relative ease. I was only getting into mechanism-based builds during this time, so I figured I was far off from something like that and decided to hold off on building another version. 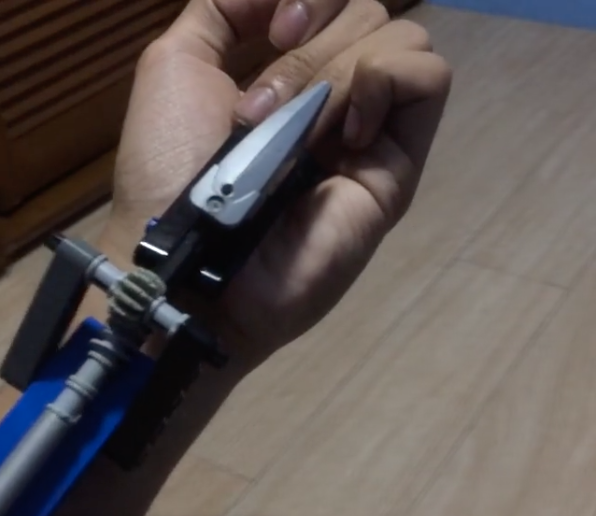 An entire two years later, I decided to revisit the idea on a whim. I had been experimenting with worm gears at the time, and thought it would be the perfect solution to my "locking" problem. Thus, Mk. 3 was born. Again, it still relied on gravity (as shown here), but thanks to the locking mechanism, it was less likely to move around when I don't want it to. While I was pretty proud of myself for figuring out how to lock the blade in place, I was still not satisfied with how the blade actually deployed or retracted. I started experimenting with a rubber band-based mechanism (a common occurrence in Lego Technic sets and the like), and, mere days later, produced Mk. 4: 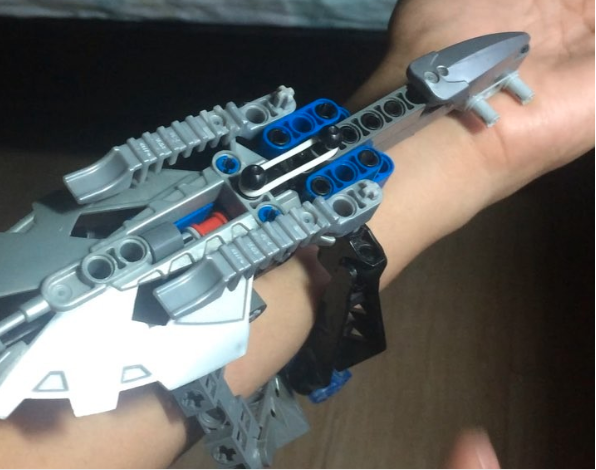 You can clearly see how the mechanism works here; the rubber band locks the blade in one position (in this case, retracted), extends when I move it to its other position (I push the blade forward), and returns to its default position with the application of a tiny bit of force. While effective, it did require the use of my other hand, which kind of defeats the purpose of the Hidden Blade, but nonetheless, I was happy with how this turned out. The mechanism posed a few problems, however; it slightly bent pieces that should not be bent, and the way it locked into the deployed position was... questionable at best. With the next few attempts, I aimed to improve upon the rubber band idea with these issues in mind. 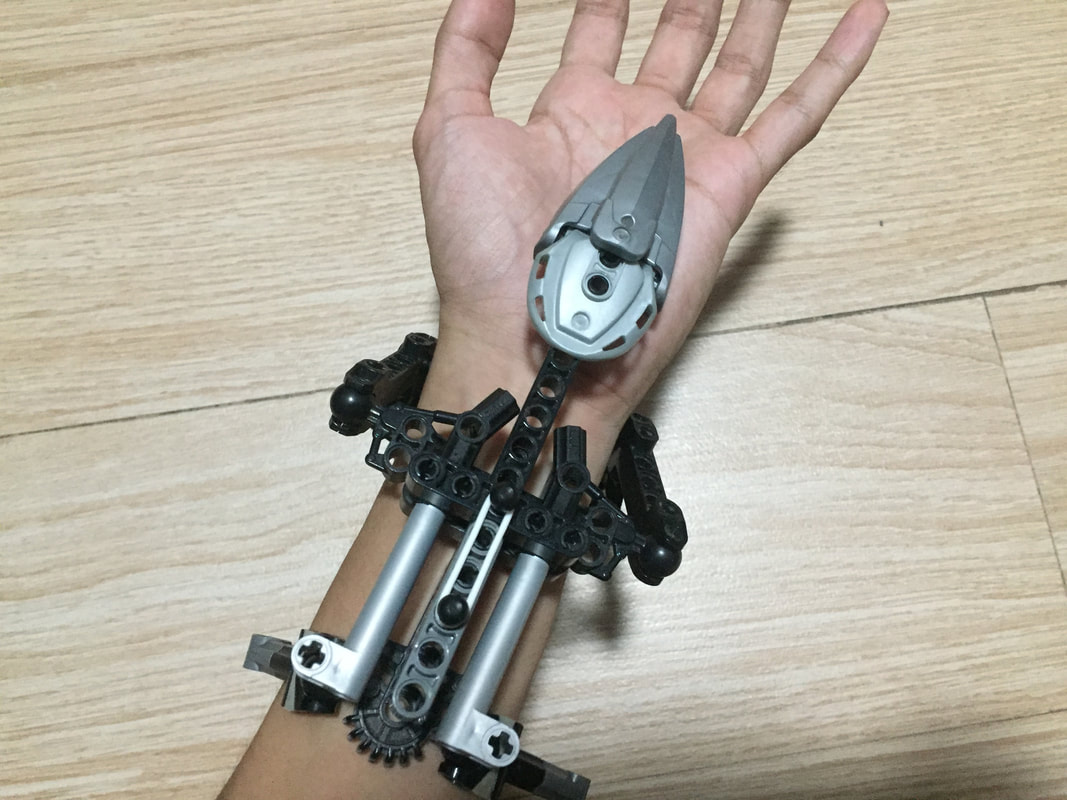 I don't usually document shelved or otherwise failed builds, but I deemed it important to show this unfinished version of the Hidden Blade. As you can see, it uses the same rubber band mechanism, but this time, I implemented it such that it worked in reverse (i.e. its default position is deployed, extending the rubber band retracts the blade). I designed it this way to be more in line with how the Hidden Blade worked in the games, where it pops out with pretty much no effort at all. Unfortunately, the mechanism was ineffective. While the blade deploys with ease, I couldn't devise a way to retract it that wasn't otherwise contrived or potentially damaging to my pieces. I spent a long time trying to figure it out, but I had to concede after a while. It's not often that I just call it quits on a build, but it does happen every now and again. 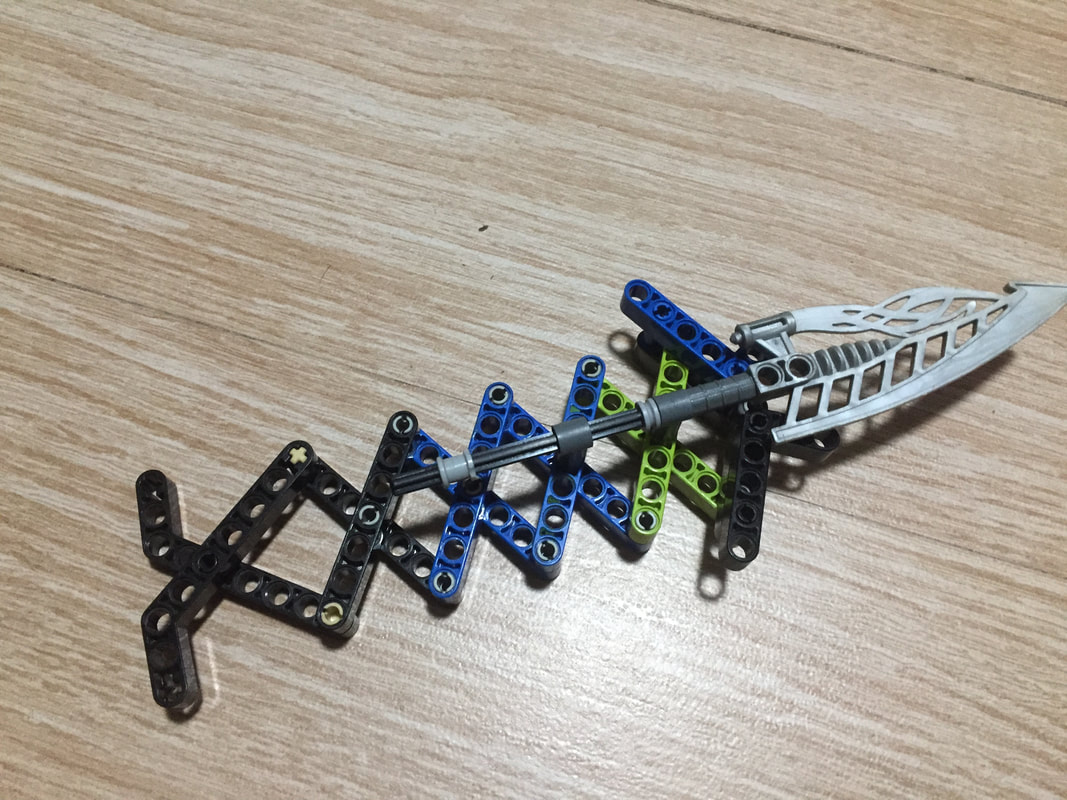 Frustrated by the previous attempt, I decide to try another mechanism for the blade, this time inspired by my retractable claw build. This was even less effective than the last, because there was no way to attach it to my wrist without hindering its movement. Despite being a failed attempt, the resulting build was fun to play with on its own, so I decided not to dismantle it.  And thus, we return to present day. After my attempt at using a different mechanism didn't pan out, I went and gave the rubber band mechanism another chance. This time, it was slightly more successful, as I was able to devise a system that did two jobs: lock the blade into place when retracted, and deploy the blade when moved. See it in action here.
Obviously, I ended up with the "it requires two hands" dilemma again, but seeing how this has been the most stable and effective mechanism so far, I'm still satisfied with the outcome. I even made the entire thing look kind of presentable instead of just a garbled mess of pieces on my arm. That's pretty hard to do with mechanism-based builds; often, you have to sacrifice design for functionality. Whenever I stumble upon that breakthrough that allows me to build a Hidden Blade that operates smoothly using only one hand, I'll get right on Mk. 6, but for now, I'm closing the book on this one. - end - 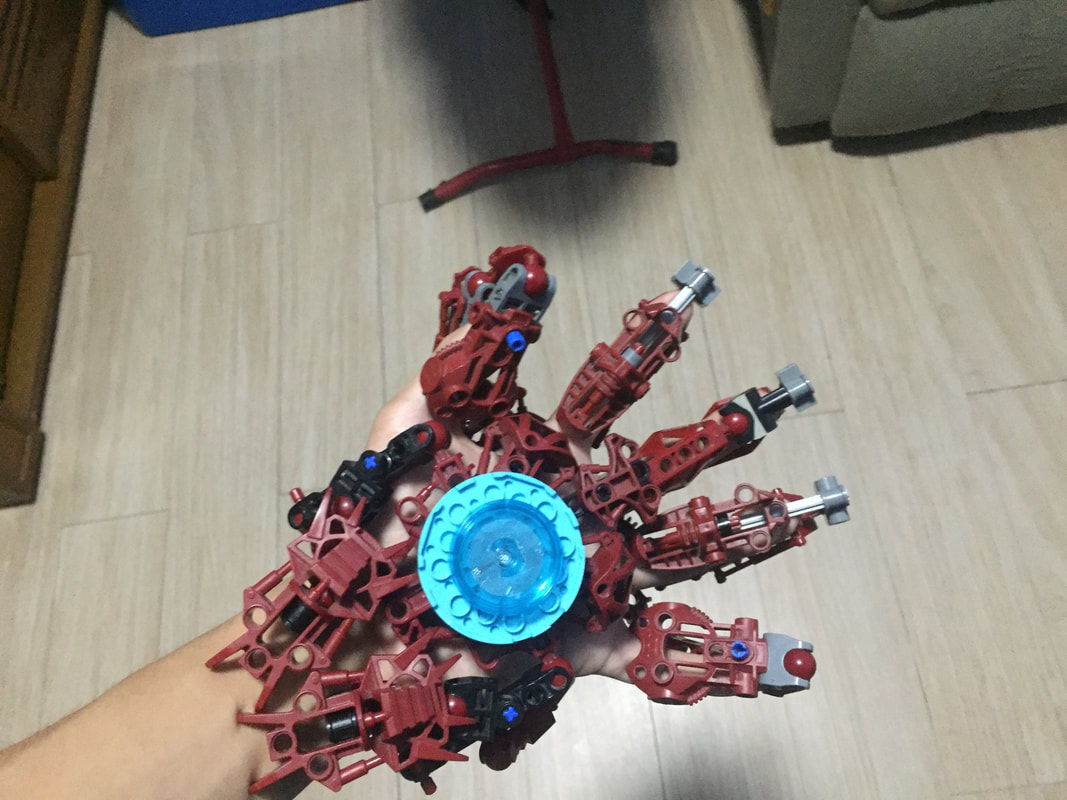 I've been in a building mood this weekend, and one of the things I worked on today is my latest take on Iron Man's iconic repulsor glove. This type of build has a special place in the pitch-black chasm that is my heart, so I felt like it deserved its own blog entry. 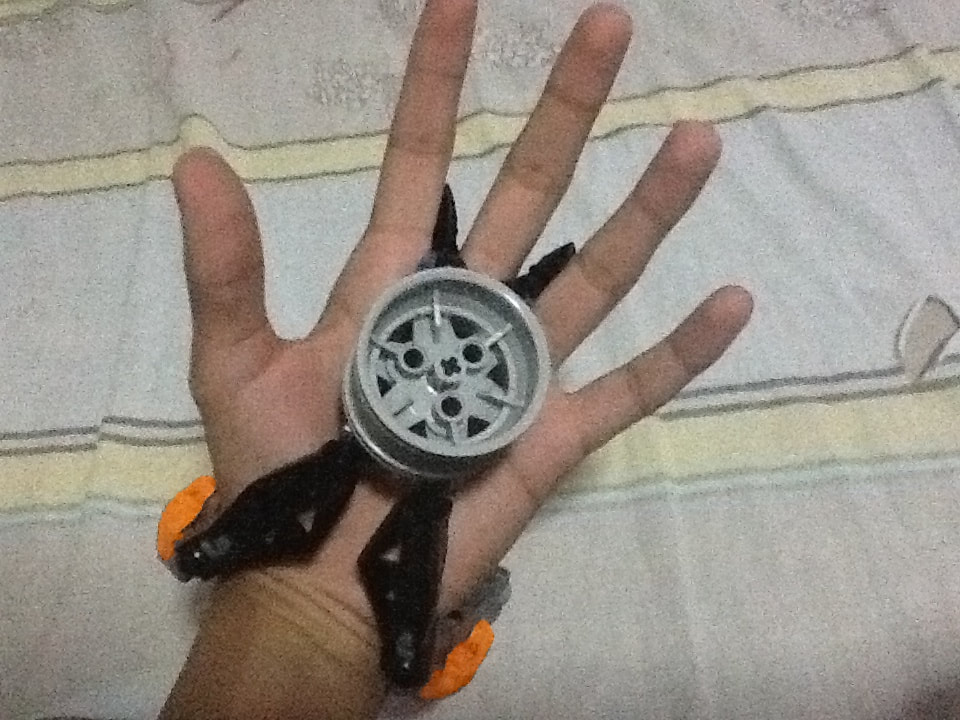 Like most of my builds, the first repulsor glove was born because I had a random idea in my head. To be specific, I felt compelled to build the glove because I saw that wheel piece and thought, huh, I could probably build Iron Man's glove with this. Of course, this was in 2013, long before I hit my stride with wearable builds, so this "glove" wasn't much of a glove at all, but more like the portable repulsor blaster Tony Stark had in Iron Man 3 (which was my main inspiration for this first build). As I mentioned on my blog entry on wearable Lego masks, Lego isn't something that's made to be worn, so this first build really did a number on my wrist. Unlike the subject of masks, though, the repulsor glove idea felt doable to me, so I was compelled to keep iterating on the build. 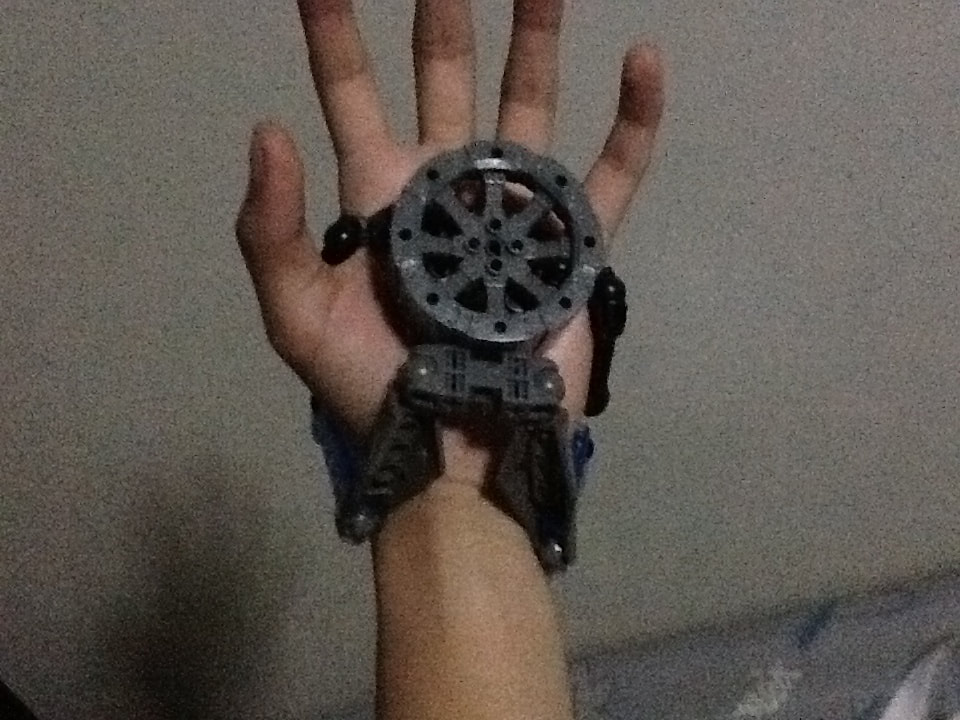 I felt a lot better with my second go at the glove. Not only did it not cut off the blood to my hand, I thought it looked cooler. This was the build that bolstered my confidence in my ability to assemble wearable builds. In addition, this was the first build where I felt the need to expand on the original idea. This is what the "enhanced" version looked like: 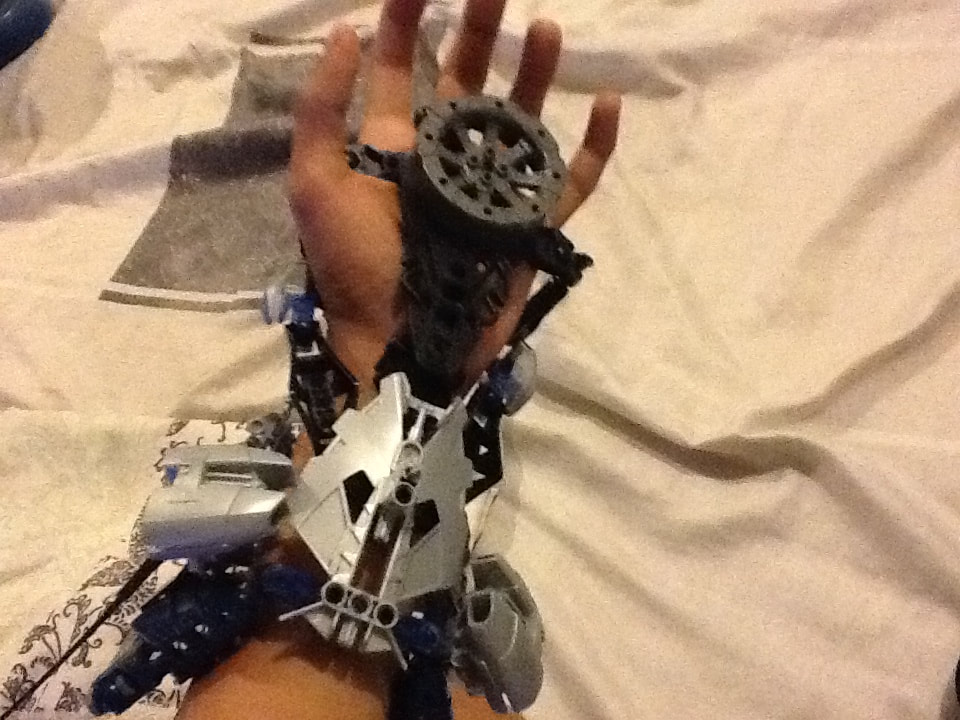 While it's still nowhere near a full-on glove, I was pretty proud of myself for figuring out how to expand the build to partially cover my forearm. This build got me to go all in with glove-type wearable builds, and it ended up being my springboard to more ambitious builds. One of these builds ended up being a pivotal inspiration for a lot of my recent work: 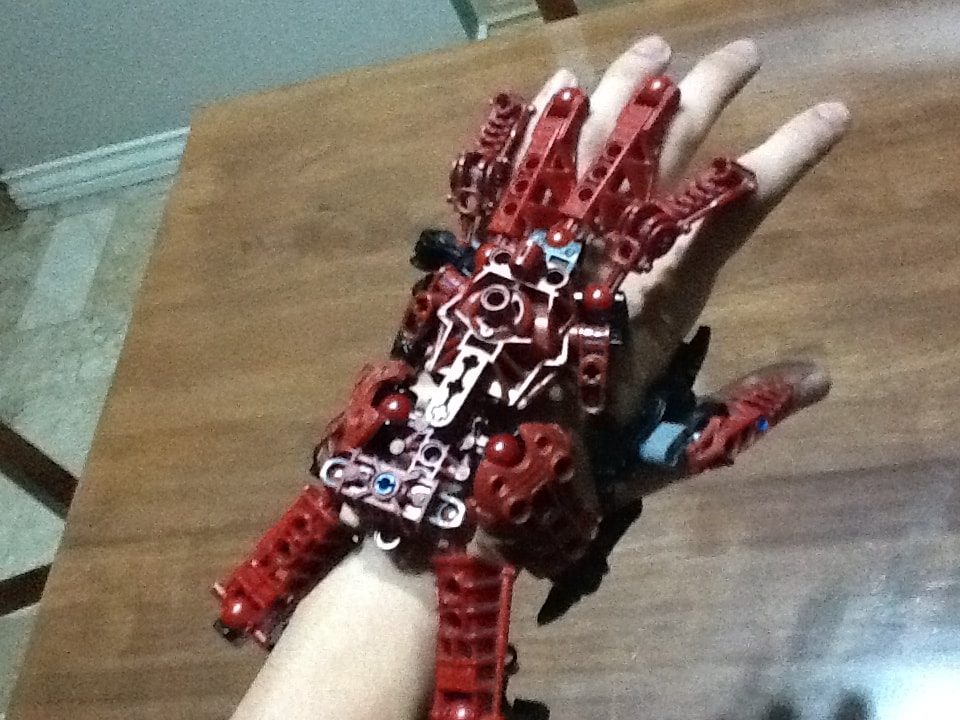 This red glove build (inspired by Baron Strucker's signature weapon in the comics: the Satan Claw) was, at the time, the culmination of my foray into the repulsor glove build. It's the first of my glove builds to feature fingers, and while it'll be a long time before I figure out proper articulation, this felt like such a massive accomplishment all those years ago. I was so proud of this build, I didn't disassemble it for at least two years. During this time period, I was starting to put out a lot of wearable mask builds. Not to be left behind, my list of glove-type or otherwise wrist-mounted builds started to grow as well. It was also during this time that the genesis of my Infinity Gauntlet build came about (a story I've already told). Here are a few examples (featuring my attempt at a Winter Soldier robot arm, which is something I'll have to try again in the future):
Though it may seem like I put out a lot of these types of wearable builds, I haven't actually built that many. As the years went on, my focus shifted more to masks and pixel art (and more), which led to wrist-mounted builds falling to the wayside. Of course, there are notable exceptions, like the aforementioned Infinity Gauntlet, and the Hidden Blade (a story for another time), but if you look through my work from 2015 to now, you won't see too many of these wearable builds. What I find personally interesting, though, is that despite all this progress being brought upon by the humble repulsor glove, I never really built a proper, new iteration of it since the third one (which I built all the way back in 2013). That brings us to today, when, while working on another project, a bunch of circular blue pieces in my containers caught my eye. And, as if to bring this story full circle, I thought, those would be perfect for a repulsor glove build! Thanks to my work on the Infinity Gauntlet, I was able to make the latest iteration of the repulsor glove actually feel like a glove, as opposed to just a wrist-mounted blaster. The fingers aren't as well articulated as the Gauntlet, however, but that's an improvement to strive for in the next iteration. For now, I'm simply in awe of how far my builds have come seeing today's build and looking back at where it all began, which seems to be the overarching theme of this blog series. I love taking these trips down memory lane and looking at old builds, and I hope you, dear reader, enjoy my ramblings about them. Of course, the future is just as exciting, so if you want to see my future builds, keep your eyes on my Instagram for the latest on my shenanigans. Also, stop by my YouTube channel; there'll be more Lego-based shenanigans heading there that I can't wait to share (and possibly write about here)!
- end - 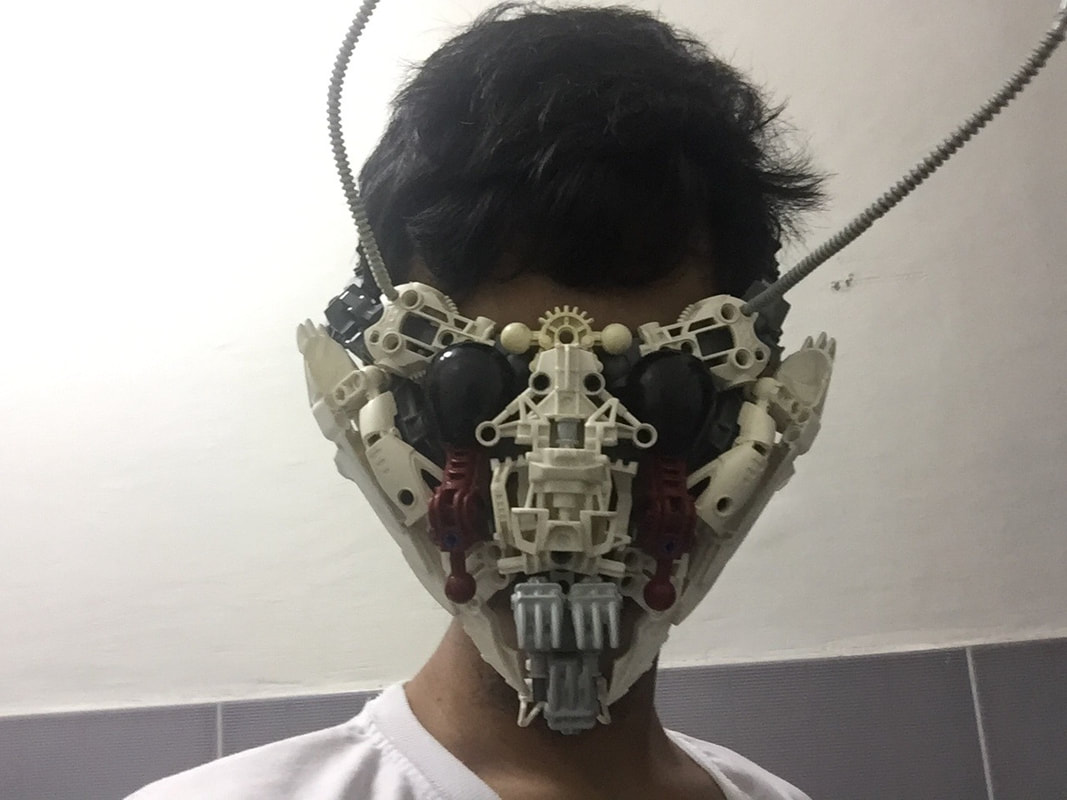 I've been meaning to write this blog entry for a while now, but I waited on doing so until I built a new mask. Now that I've finished my latest design, there's no better time than now to talk about one of my favorite Lego builds to work on: wearable masks. I've always been big on masks; I'd like to think that it's because I'm such a huge fan of Bionicle. Bionicle, for those of you who are unfamiliar, was a line of buildable action figures Lego put out from 2001 to 2010 (and again in 2015 and 2016). It is a defining (if not the defining) aspect of my childhood, and I have the collection to back it up. In the Bionicle lore, there are items called Kanohi masks, which, when worn, grant the wearer all sorts of abilities. When I was a kid, I'd make cardboard Kanohi masks all the time, either based on the ones that already exist in Bionicle's story, or new designs with bullshit powers like... "all the powers". I still love the concept of Kanohi masks to this day, so much so that my username on everything is 16N1K4, which is a play on the Kanohi Ignika, the Mask of Life. If you ever wondered why my blog is called The Mask of Life, well... there you go. 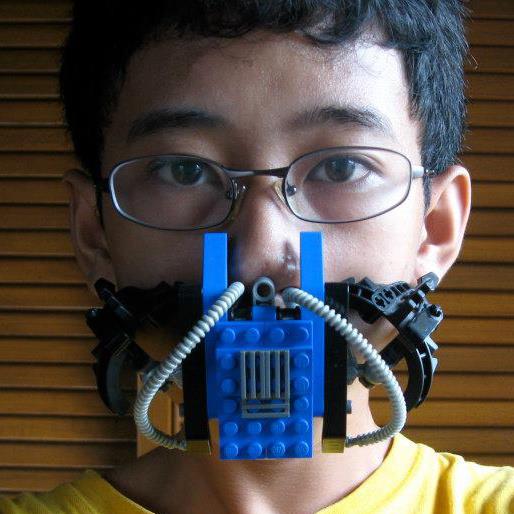 When I was still getting into making Lego MOCs (My Own Creation; this is how Lego fans refer to their builds), one of my long-term goals was to make a wearable mask out of Lego. I was inspired by a wearable Lego helmet built by Pee Herron, which was featured on The Ultimate Lego Book (a book I owned as a kid, and actually still have). Like most high-level builds, shit like that felt like it required some dark magic (and lots of glue), so I never really made any serious attempts at making wearable masks. Fast forward to 2012, during the time when The Dark Knight Rises came out. I mention this because in that movie, their take on Bane has a mask that I thought looked cool. At this point in my building "career", my furthest venture into wearable builds was some shitty-looking wrist blaster thing. Inspired by Bane's mask (and Tom Hardy's weird voice), I put together my first wearable mask (pictured above). As you can see, it looks nothing at all like in the movie, and as an added bonus, the backend assembly (the obfuscated parts that actually allow me to wear the mask) really hurt my face. Lego bricks aren't exactly meant to be worn, and I found that out the hard way in my early stages of working on wearable builds. Regardless, I was still happy with this build, as I basically proved to myself that building wearable masks is possible. However, it'll be a while until my mask designs get any better. 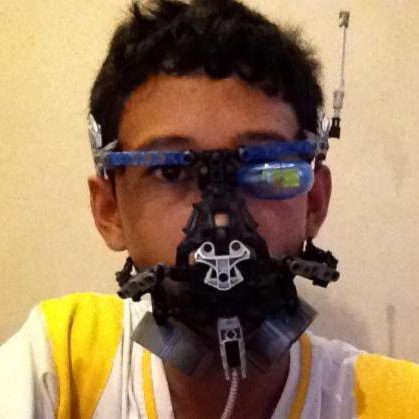 Roughly one year later, I put together my second wearable mask. This was an original design, and while the overall look of the mask isn't really remarkable, what makes the second mask important is how I managed to attach it to my face and have it not hurt (that much). The key to this particular build is this piece pictured below: 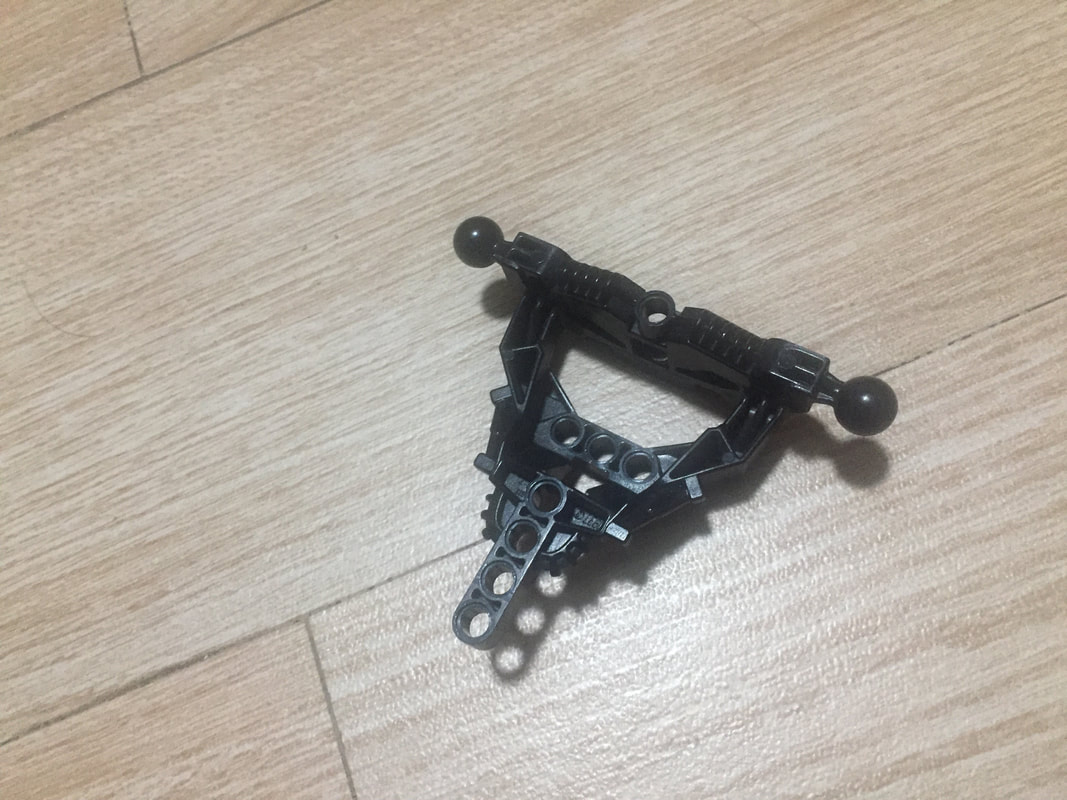 Officially, this piece was designed to function as a torso piece for Bionicle figures. This particular torso piece has space in the middle to attach a gimmick play feature (a story for another time), and as it turns out, there's just enough space for my nose to rest comfortably if I wear it like so: 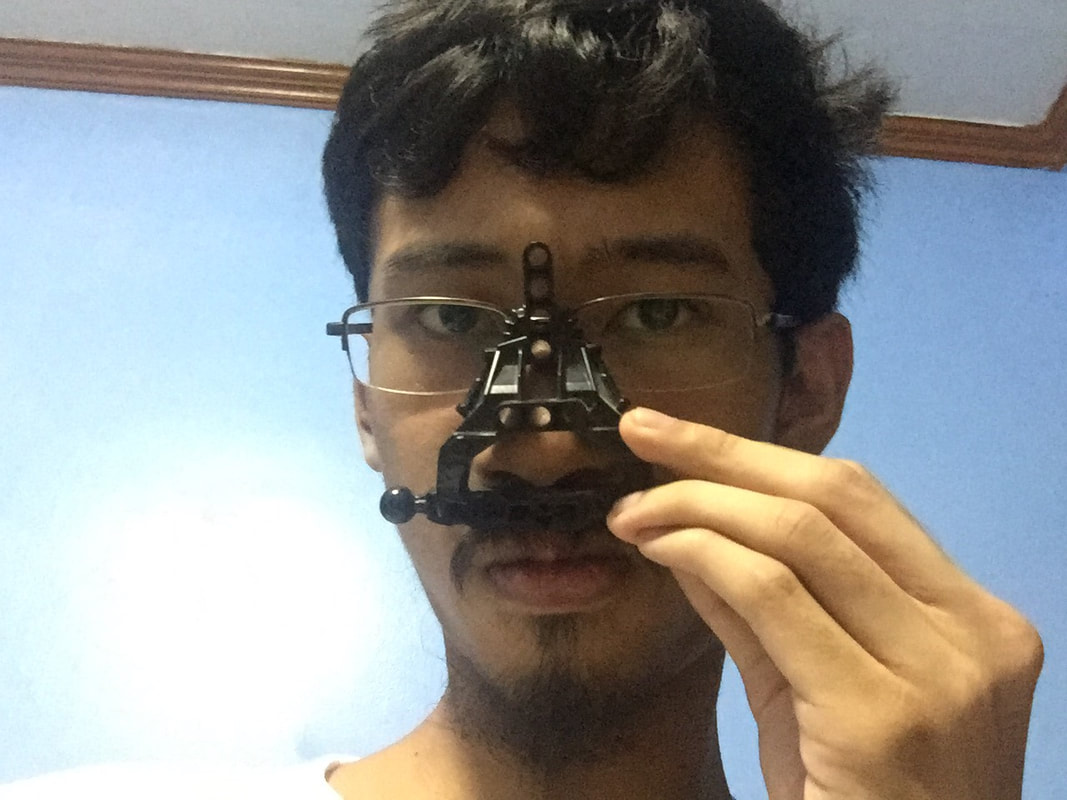 I only discovered this by messing around and putting various Lego pieces on my face. All I had to do now was build the backend so that it's wearable, and voila! I now have a mask "base", and all I have to do is build my design around the base. Having this as the foundation of my mask builds saved me a lot of grief, because all I have to worry about now is the design. Here are a few masks that used this base (featuring a Bane mask that's way better than the first one):
While I got a lot of mileage out of this mask base, there were only so many connection points available for me to work with, so I found myself actually not using this base for a lot of my mask builds. A fair amount of my favorite masks have entirely different internal structures to accommodate the designs I wanted. Two of my all-time favorites fall into this category:
For the next two years or so, I alternated between using the base and building custom structures for mask builds, to varying degrees of success. While a lot of the builds from this time period drew inspiration from existing ideas (mostly comics), I started coming up with more and more original designs as time went on. One of these original designs ended up being rather important: 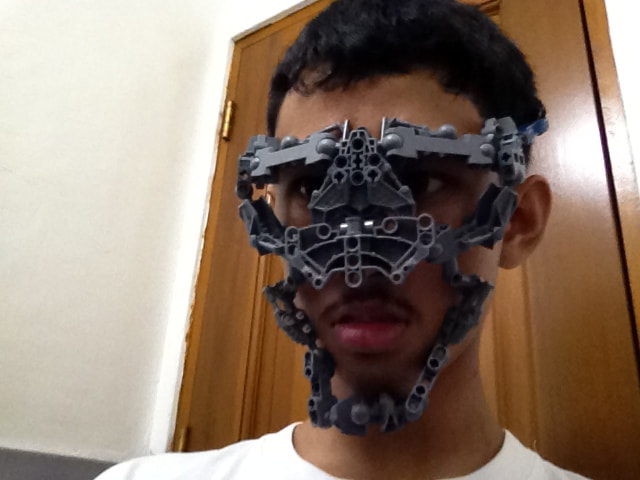 This plain, gray mask you see here ended up replacing the black torso piece as my new mask base. Compared to the original base, this was easier to put on, slightly more comfortable, and addresses a major flaw: the eyes. Since the original mask base primarily covers my nose, I often had to build something from the ground up to cover the eyes. The new base already goes over my eyes, so all I have to do is build around the base to cover the upper half of my face. Because it had more connection points to work with, I found this mask base significantly easier to use as a starting point, and I still use it for mask builds to this day. In fact, my latest mask is built on this very base, though it's not obvious at first glance. Over the three years I've been using this base, I've gotten better at obfuscating the underlying internal structure. A couple of months after the new mask base was born, Bionicle's official Facebook page announced a mask building contest, with the prize being some exclusive collectibles and all the 2015 Bionicle sets. I've never seen people other than me build wearable Lego masks before this contest, so I was excited to see how other people approach the challenge. Obviously, I didn't win, but my years of experience helped me put out a lot of masks just for the contest, which impressed a lot of fellow builders. Here's a few of my favorites from that period (they all used the new mask base):
By this point, most of my mask builds were entirely original designs. There's really no rhyme or reason as to how I come up with these designs; I often just stumble upon them by messing with a combination of pieces I thought up in my head. Sometimes, designs would come about because I had a specific concept or goal in mind (e.g. build with this color scheme, build a plague doctor mask, build a mask reminiscent of Two-Face, etc.). In the rare occasion my mask design was based on something, I often go the extra mile and build a few accoutrements to complement the mask. For example, I built a repulsor glove to complement my Iron Man mask. In an extreme case, I bought a foam sword to tie in with my Katana mask and looked like a complete doofus at that Halloween party I went to.
As of late, however, I haven't been building masks as often as I used to. I think I'm having trouble thinking of new concepts or ideas to base designs off of. It's also rather challenging to figure out new piece configurations to experiment with. I often find myself looking at my previous mask build (I don't disassemble them immediately) and thinking, "have I finally scraped the bottom of the barrel?" It's not the end of the world, though. If today's build is my last mask build, then I'm more than satisfied with what I've put out for the past six years. If not, then the next big idea will come to me one way or the other. In any case, I'll still be building in general. Hopefully you, dear reader, found this little retrospective on my mask builds enlightening (or at least mildly interesting). It's pretty fun to look back on my progress as a Lego builder (and shit on my old builds), so look forward to more blog entries like this in the future. In addition, you can check out my Instagram for my Lego exploits, past, present, or future.
- end - 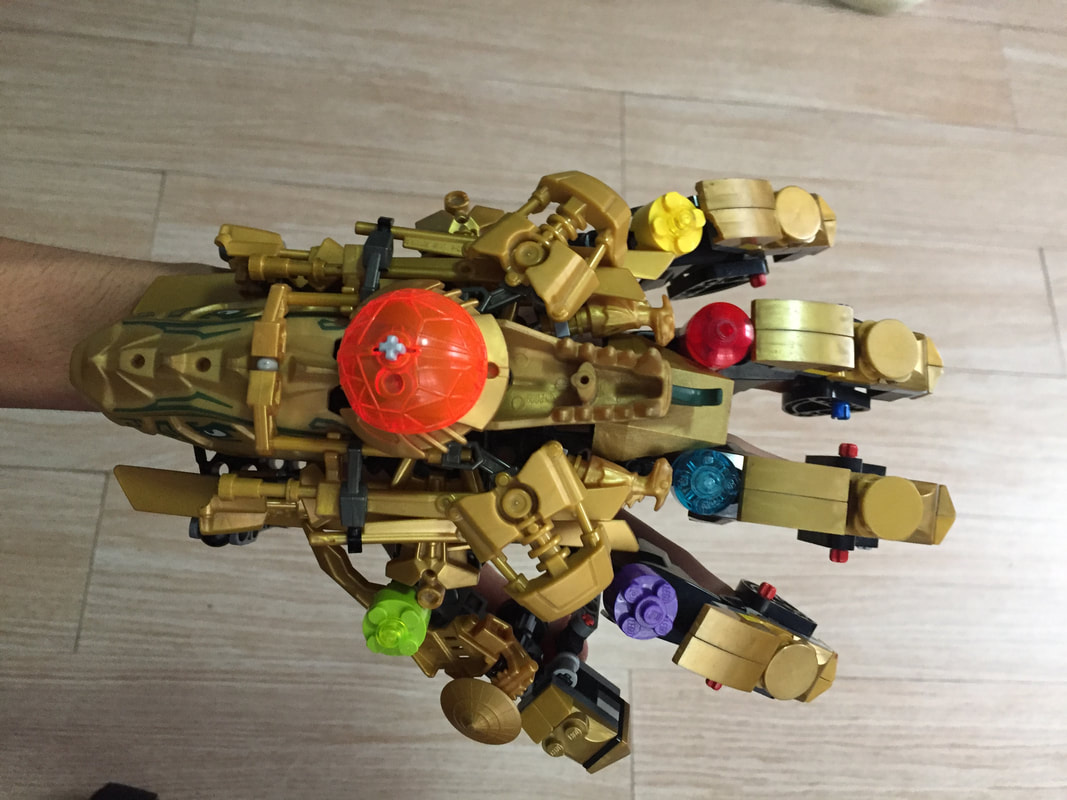 After 3 hours of trial and error last night, and a couple more hours this morning to polish everything, I'm proud to present the eighth iteration of my wearable Lego Infinity Gauntlet build. While I give myself some reprieve for working on this longer than usual, I want to talk about how this build got to where it is, starting from the very beginning. 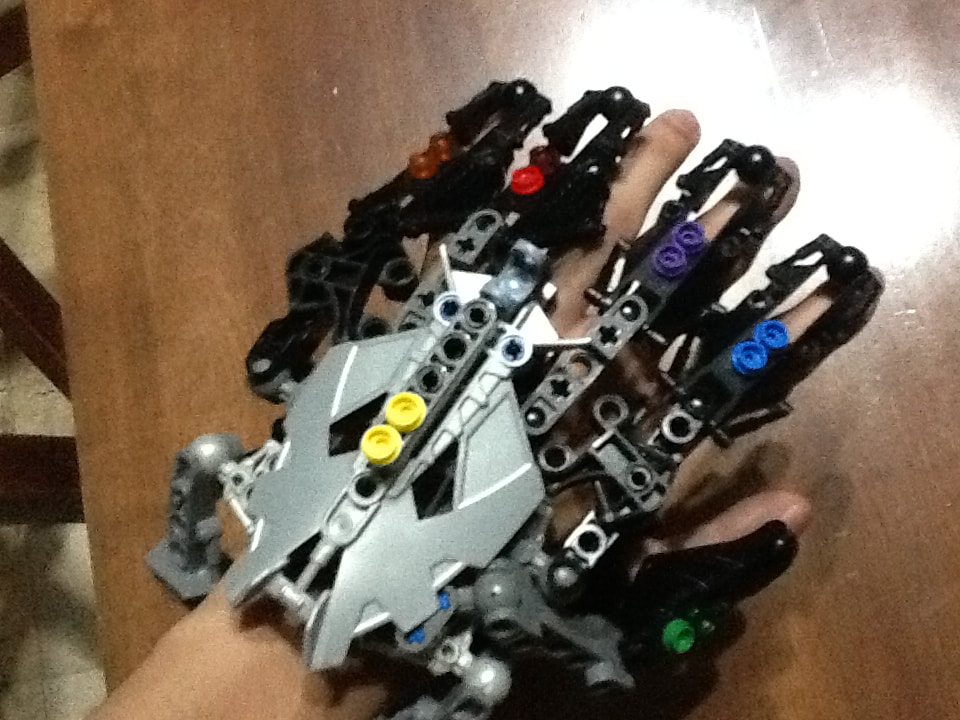 My earliest attempt at a wearable Infinity Gauntlet was hardly an attempt at all. Back in 2014, I was working on a gauntlet/glove build for some other project, then I had the silly idea to get some colored 1x1 round plates and incorporate them into the build. While this first attempt is largely something I made as a joke, I still consider it Mk. 1. 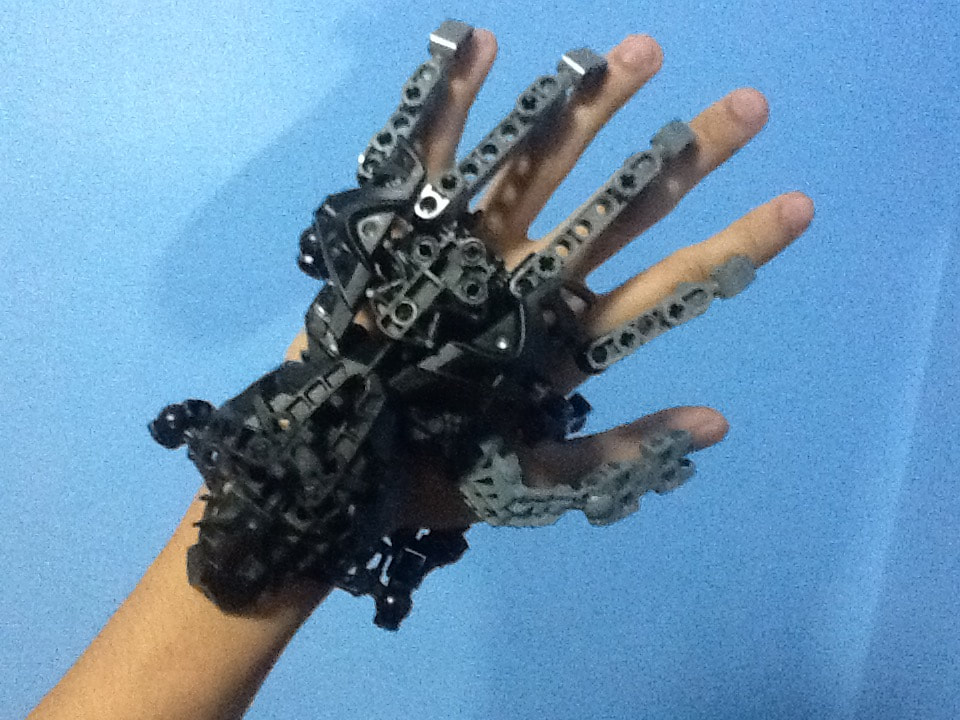 The beginning of the Infinity Gauntlet build as people know it actually started out back in late 2015. The prototype gauntlet you see above was never intended to be the Infinity Gauntlet; it was actually just something I felt like building that day. I liked the design so much, I snapped a pic and shared it on Instagram. Given that this was more a spontaneous build, I didn't really know what direction to take the design afterward, so I just thought, "fuck it, let's make a super discount Infinity Gauntlet." 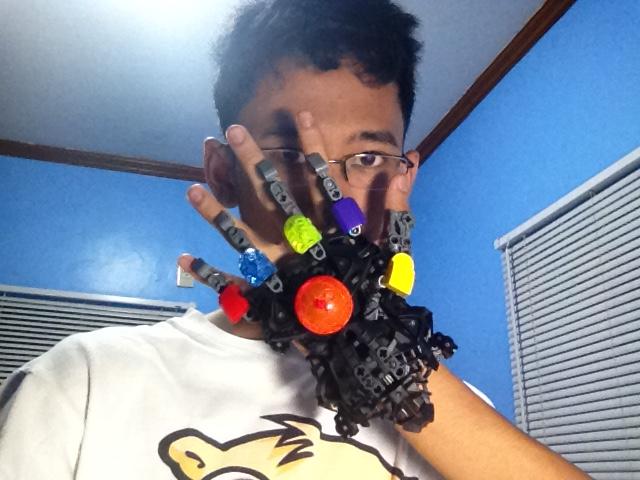 A couple of days later, Infinity Gauntlet Mk. 3 was born (Mk. 2, in case you're curious, is literally this same build, except the Infinity Gems are regular bricks, which looked dumb as shit). This version was nothing more than the prototype that I bulked up a little bit with some colored bits slapped on to represent the Infinity Gems. I recall being dissatisfied with this build, because not only was it not gold, the pieces I used for the gems weren't the same (I had to do some serious mental gymnastics to make the yellow one even remotely similar to the others). However, during this time, I had next to no gold pieces, so I couldn't improve the build despite really wanting to. Thus, I shelved the idea of an Infinity Gauntlet build, and decided to use the prototype gauntlet as a base for other builds in the meantime. I have a couple of examples here.
On the left, I retrofitted the gauntlet with claws as part of my Black Panther build in 2016. Nothing remarkable design-wise, but I put it together mostly to complement the mask (which was the focal point of the project), so it served its purpose. The other build (also from 2016), which I made for my college yearbook creative shot, features the same prototype gauntlet, but expanded to go the length of my entire forearm. This is one of my favorite projects mostly because of the mask build, but how I stumbled across the idea of extending the gauntlet to go to my elbow is one of those unforgettable eureka moments.  Let's fast forward to early 2017. At this point, I had access to a more respectable pool of gold pieces. It's not a lot by any stretch of the imagination, but it's certainly more than what I had two years ago. It was then that I made my first serious attempt at the Infinity Gauntlet. I took the original prototype gauntlet and started incorporating the gold pieces into it. I had a rather peculiar assortment of gold pieces (i.e. they were really hard to retrofit into the prototype gauntlet), so this took a significant amount of trial and error. Nevertheless, Infinity Gauntlet Mk. 4 was born. I will forever remember this iteration of the build, because not only was it the culmination of a dream build I had inside my head, but because BZPower (a Bionicle/Lego fan forum I'm a member of) featured this version of the Infinity Gauntlet on their news page! It was a tremendous honor to have something I made be worthy of a feature piece, and it made me feel like the Infinity Gauntlet is my magnum opus. Despite all this, I knew I could take this build even further. Notice the pieces I used for the fingers in the Mk. 4 version. They look more like claws than fingers, and had no joints to them. I couldn't come up with the design then, so in the meantime, I worked on Mk. 5 of the gauntlet, which wasn't much of anything other than me reworking the gold on the gauntlet. 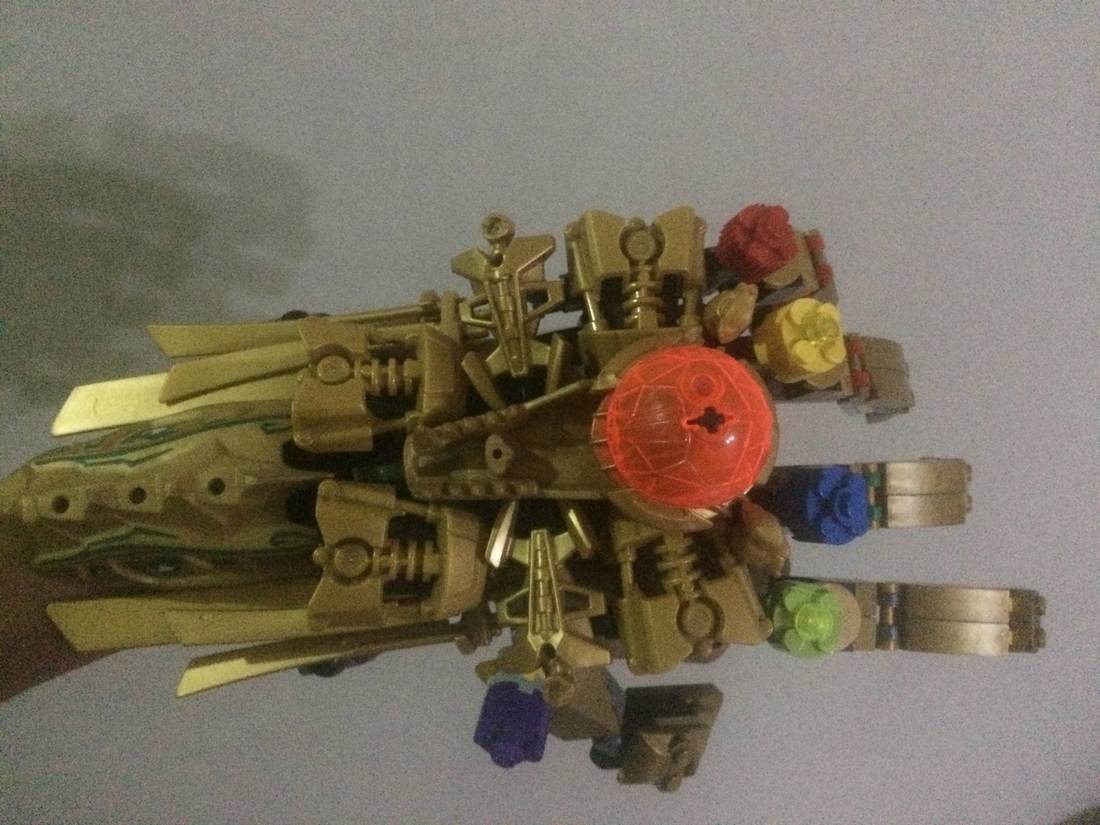 By the tail end of 2017 (a literal day after the first Infinity War trailer dropped), Mk. 6 was born, It was in this iteration where I finally worked in proper fingers. They had points of articulation and everything, but the catch is that they're all for show. At the time, I hadn't figured out a way to attach the gauntlet fingers to my actual fingers, which made the gauntlet rather unwieldy to wear because the fingers would either get in the way or fall off. 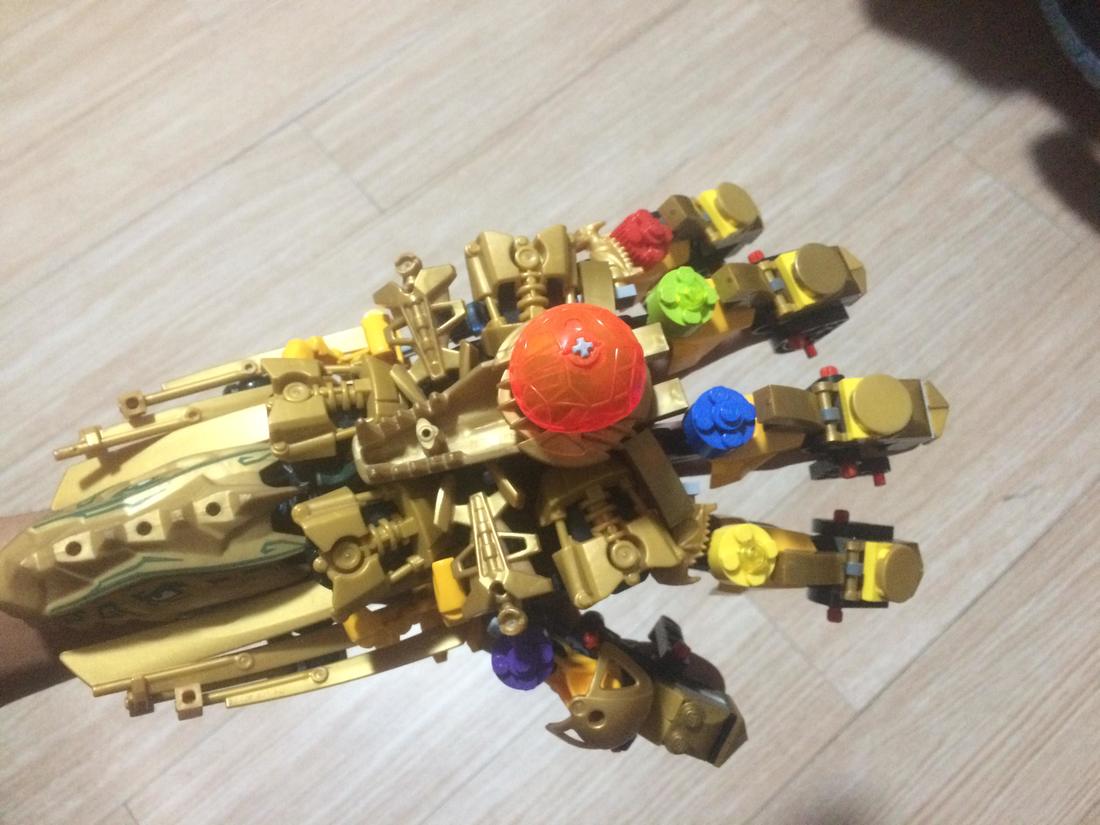 With the hype for Infinity War at a fever pitch, I went back to the Infinity Gauntlet yet again earlier this April, and after a ton of painstaking, finger-crushing experimentation, I solved the finger dilemma. Granted, there is a very limited range of movement (read: I cannot do the snap, stop asking), but the main boon of figuring out the problem was that it makes the entire gauntlet more wearable (if that makes any sense). After altering the internal structure of the prototype gauntlet I've been using as the base this entire time (something I had never done since I first put it together), Mk. 7 was stable (and comfortable) enough that I can wear it for a good amount of time without any problems. In fact, I wore this version of the gauntlet to a screening of Infinity War, drawing a good amount of attention. I also wore it during Free Comic Book Day last May. Thus, we return to present day. Mk. 8 was a spur-of-the-moment build; I only intended to replace the Space Gem with a translucent blue version of the piece (which looks more fitting as an Infinity Gem), but I ended up completely overhauling the design from the ground up.
If you compare Mk. 4, Mk. 6, and Mk. 7, you'll notice that the main body of the gauntlet is largely unchanged in terms of design. I dismantled all of that and built an entirely new design from scratch, and reduced a substantial amount of bulk from the build. I also removed the unsightly yellow-orange pieces I used in Mk. 7, which really distracted from the gold color scheme. The only elements from previous iterations that remain are the finger designs (all I did was bulk those up), the internal structure, and the pieces I used for the gems. For now, I'm pretty happy with where this build is currently at, and even happier with how far it's come. I'd still love to improve finger articulation, as well as polish the aesthetics a bit more, but that's work for another day. If or when I get more pieces to work with, or I somehow think of a design that might push the build in the direction I want, Mk. 9 will surely come. But for now, Mk. 9 won't be coming for a while. - end - Mosaics are very popular in the Lego creation scene. While most Lego displays in places like LegoLand or a Lego store are full-on sculptures, dioramas, or scale models of things, mosaics appear pretty often, and a lot of the ones you'll see are huge. A lot of Lego builders have likely dabbled or at least attempted to make some form of mosaic, and that includes me. I've just finished a pixel art build (which you can view on my Instagram here), and with that still fresh on my mind, I thought now would be a perfect opportunity to write about how I go about building Lego mosaics. I'll cover the building aspect first, then I'll get into how I make custom mosaics. I started building Lego mosaics in 2015. The reason I remember this is because I was taking a course in assembly language (a programming language with a rather steep learning curve), and we had a project that required us to code a short animation. It wasn't some Pixar shit; just something on the level of what MS-DOS games were able to do back in the day. Being the video game geek that I am, I decided to do a short animation of Mega Man shooting his Mega Buster. You might be wondering why I'm sharing this anecdote; to that, I respond with this photo of Mega Man's sprite from the original NES games: As you can see, video game sprites/pixel art (especially those from the 8-bit/16-bit era) are essentially mosaics, with your "pieces" being individual pixels. To make the above image, I had to fill in each square with the appropriate color. While working on the animation, I thought to myself, I could probably do this, but in Lego. After I finished the animation, I brought out the bricks and got to work. This was the result: 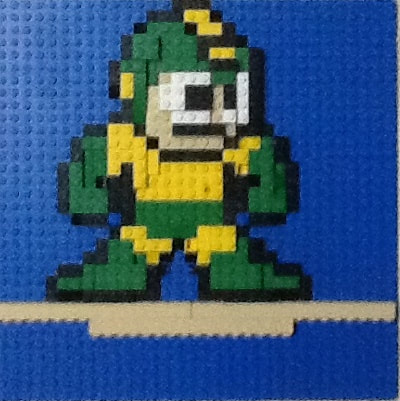 Working on this first build made me realize something: it's not the build itself that's challenging. All one has to do is have a template (in the case of pixel art from games, I use a sprite sheet; you can get sprite sheets of games over at spriters-resource.com) and follow it, with one stud equal to one square unit. Simple enough, right? It is, but it becomes a challenge when you realize that you don't have unlimited resources. If you have a massive collection of Lego pieces, resources aren't an issue. However, I don't have the luxury of having all the pieces I want. The fact that I don't have pieces in a certain color, and a lot of the pieces I have are hard to use (or straight up useless) in a mosaic severely limits the kinds of images I can make. But, as I like to say: limitation breeds creativity, and managing the resources I do have to make the image I want is where all the fun lies. Look again to the above image. Notice how the pieces aren't on the same plane; that is, some are raised more than others. This is a consequence of having limited resources. If I had my way, I'd just build every mosaic using only 1x1 plates in varying colors, and everything would look perfectly level. Unfortunately, a) I don't have access to, let alone can afford to acquire such resources, and b) there's no fun in that. As such, I have to work with what I have, and what I have presents two hurdles when we're talking about building mosaics. One of these aforementioned hurdles is the problem that having a wide variety of pieces at my disposal poses, Variety is usually a boon when discussing Lego pieces, but when it comes to mosaics, that same variety can prove to be detrimental. Sure, I may have a good amount of pieces in a certain color that I need, but they're all different types of pieces. I'd have plates, bricks, and slopes in green, for example, but the nature of each piece can affect where I'm able to place it relative to other pieces; hell, some types of pieces are straight up unusable in mosaics. In this case, I have to plan ahead and figure out where to use x piece, because depending on the type of piece, I may not be able to use it in other regions of the mosaic. The other (and perhaps more daunting) hurdle I deal with is working with pieces that have vastly different measurements. I touched on this in my previous blog entry, but to reiterate: the unit of length and width when building in Lego is studs. When identifying pieces, you usually specify their length x width in studs (e.g. a 2x4 plate, a 1x3 brick). In an ideal world, you'd work with 1x1 pieces for mosaics, as those pieces are more or less squares, and tiny squares are great for mosaics. Unfortunately, this isn't an ideal world, and I'm stuck with a mix of pieces all coming in different dimensions. This becomes a problem when, for example, I need to cover a 1x2 area with black for Mega Man's eyes, but all I have are 2x2 bricks. While many may find this frustrating, figuring out how to get around this kind of obstacle is the exact reason I love building mosaics. The way I get around the issue I describe above is overlapping pieces. For example, you only need to cover a 2x3 area with orange for your mosaic, but all you have access to are 2x4 orange pieces. You don't have to physically break the piece apart (do not do that, please); just take the piece you already have, and cover up the excess area with another piece. To better illustrate this point, allow me to show you this pixel art build: 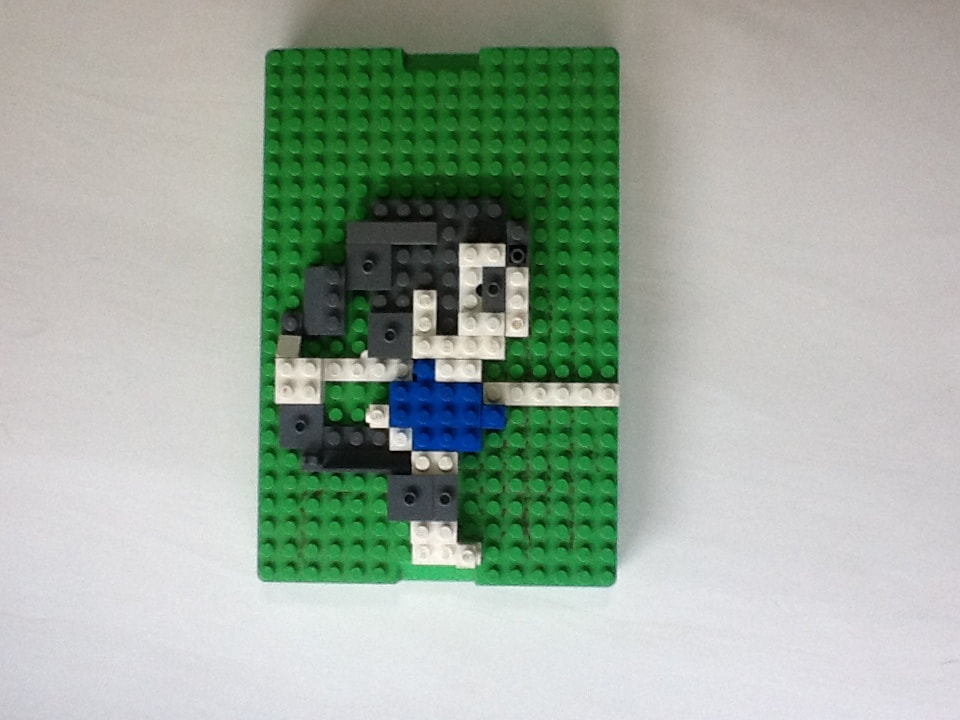 Now, direct your attention to the eye of the character here (the dark gray 1x2 piece). It's not evident in the image, but that piece isn't resting on the base; I attached the 2x4 white plate first, and overlapped the dark gray piece in the appropriate region. That's what I mean. Overlapping allows me to maximize my limited resources and pull off mosaic builds that would otherwise be implausible. Overlapping is not a foolproof solution, however; some types of pieces are tricky to overlap (slopes are a good example of these, because you can't attach shit to the slope part), others are nigh impossible to work with. You'll also have to take into account the measurements of the pieces that you intend to overlap as well; there are cases you may want to use x piece to overlap something over y (the most common reason I encounter is that the use of piece y will be maximized in another region). And (if you care), overlapping is very noticeable and really affects the overall look of the mosaic. If you look through my previous work, you can easily observe where I used overlapping. To summarize this first part, what building Lego mosaics boils down to is resource management. Putting it together is easy; it's when you don't have much to put it together with that it gets challenging. 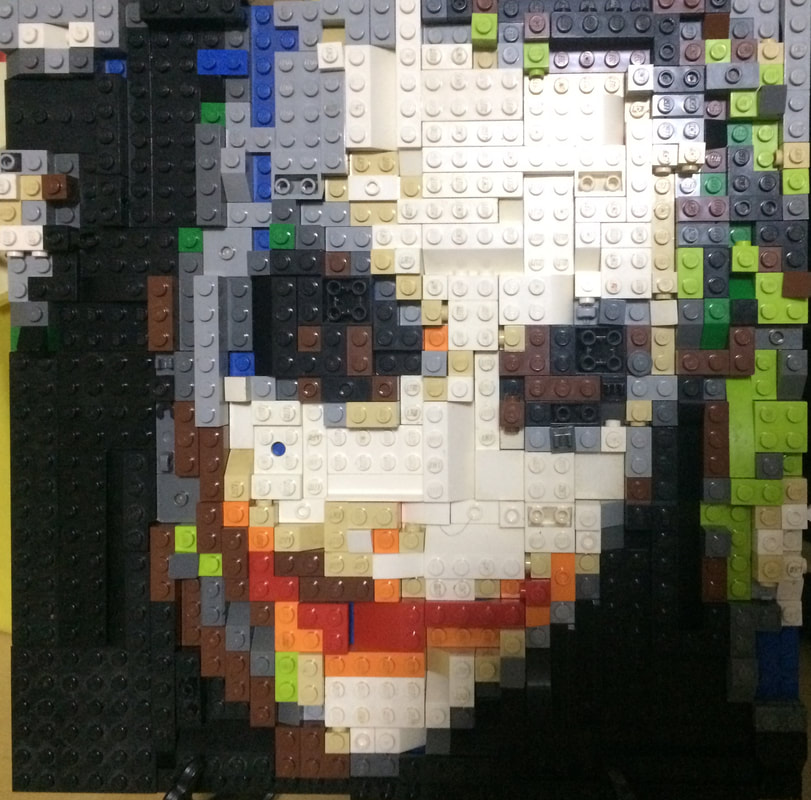 If you go through my early mosaic work, you'll notice that they're mostly pixel art builds taken from video games. In other words, I'm using pre-existing templates as my guides. After a while, I thought, how about making my own custom shit? My first attempt at this was making custom pixel art of a game character from the modern era. The first problem: this asshole doesn't have pixel art; it has a hand-drawn sprite. So, I had to figure out how to convert that drawing into a mosaic template. For my early custom work, I had to load up GIMP and use the Pixelize tool on the image I want to make a mosaic of. As the name suggests, this tool pixelates the image, and I could adjust the size of the pixels as I see fit. Thus comes another problem: I'd have to adjust the pixel size so that it would be a reasonable enough size to work with (if you take a look, a lot of my pixel art work is on a 32x32 base plate, so anything bigger than that is no good). Guess what? Tinkering with the scale to get it just right takes an absurd amount of trial and error, which means it takes too fucking long. And that's not the only issue I have to contend with, either; I also have to edit the image so that it's in colors that actually exist as Lego piece colors, and that's a fuck ton of trial and error as well. Long story short: I spent about thrice as long making my template as opposed to actually assembling the fucking mosaic. Because of this, I gave up on custom work for a time. Fast forward a couple months, I discovered photobrix.com. It's a browser-based application that converts images into Lego-friendly mosaics (i.e. it uses colors available in Lego and uses stud measurements). This made custom work exhilaratingly easy. All I needed was to make minor tweaks to the contrast or the HSV values of an image (so that Photobrix churns out a usable image), upload it onto Photobrix, change some settings, and bam, template's ready to go. Custom mosaics tend to be more exhaustive of my resources than building video game pixel art, so I don't do them as often, but at least I don't have to spend my entire afternoon preparing the goddamn template beforehand. You can play around with Photobrix yourself by going to the link above if you so desire. I build this rather sparingly, but another, more specific type of custom mosaic I build is Lego QR codes. They're very easy to build, and the template's equally easy to prepare: I go to goqr.me (a site that lets you generate QR codes), put in the desired website (I usually shorten it with bit.ly), and use the resulting QR code as the template. It's important that the QR code has high contrast against the background, so I specifically use my beige base plate and build the QR code itself with brown bricks. Here's one of my QR code builds below. Try and scan it for yourself (it should take you to my Instagram): 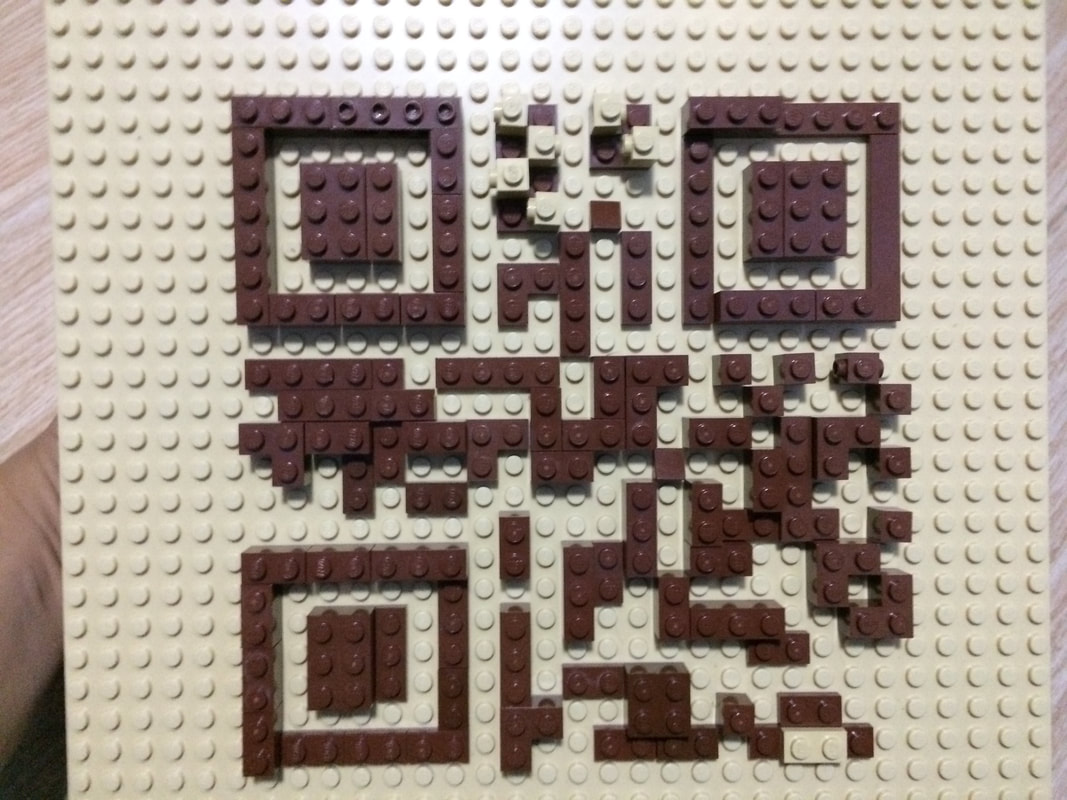 I think I've covered enough ground about my approach towards Lego mosaics, so this is a good place to stop. Hopefully you, dear reader, found this enlightening (or at least mildly amusing) to read about.
- end - |
Categories
All
Archives
May 2024
Derryck
|
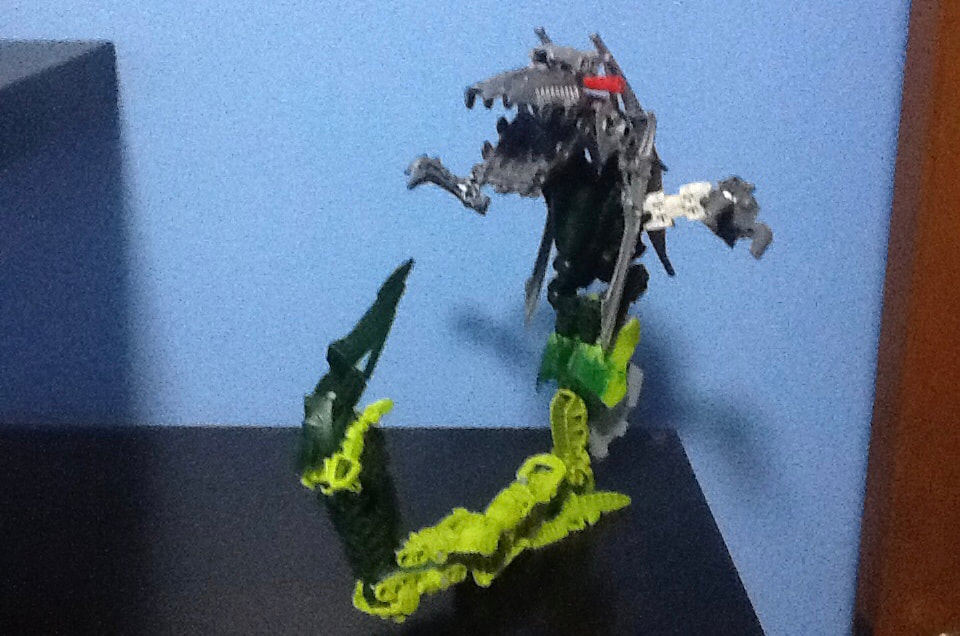
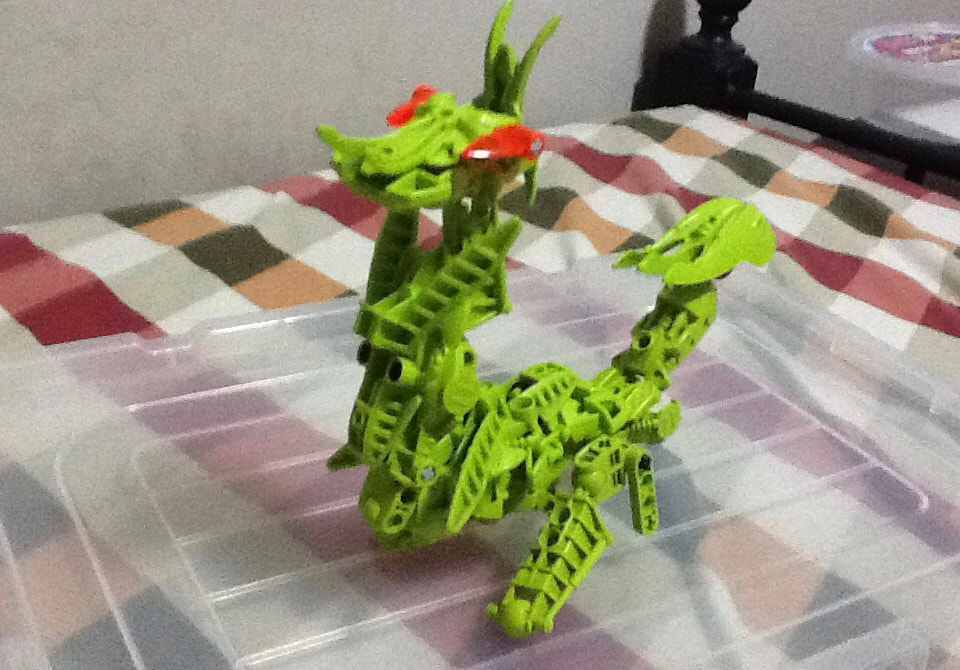
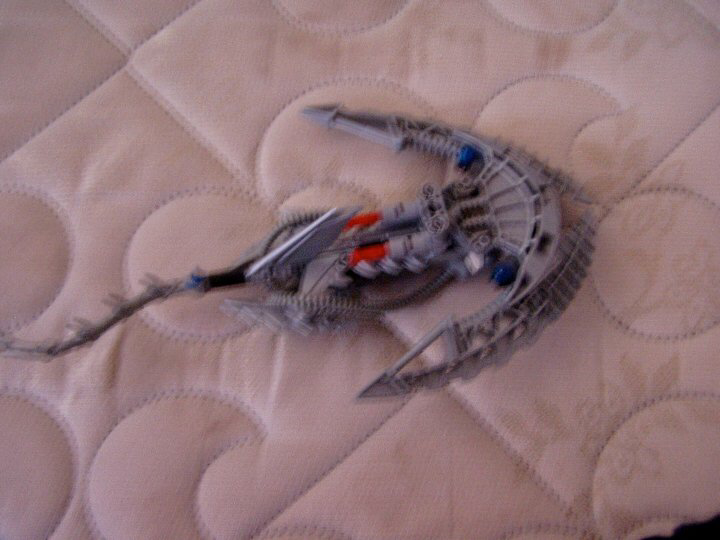
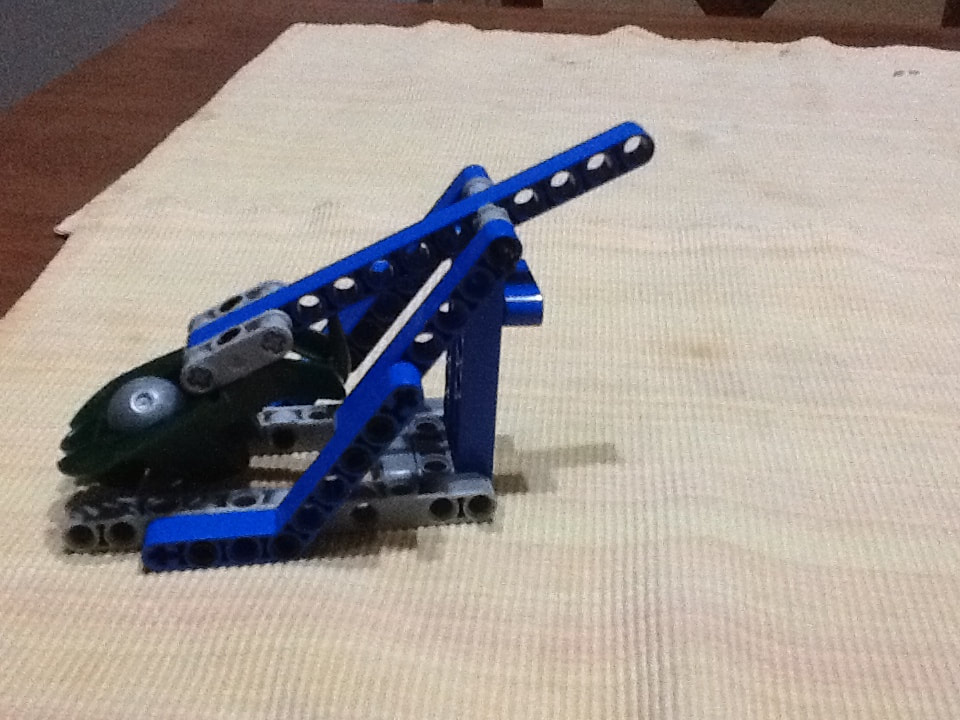
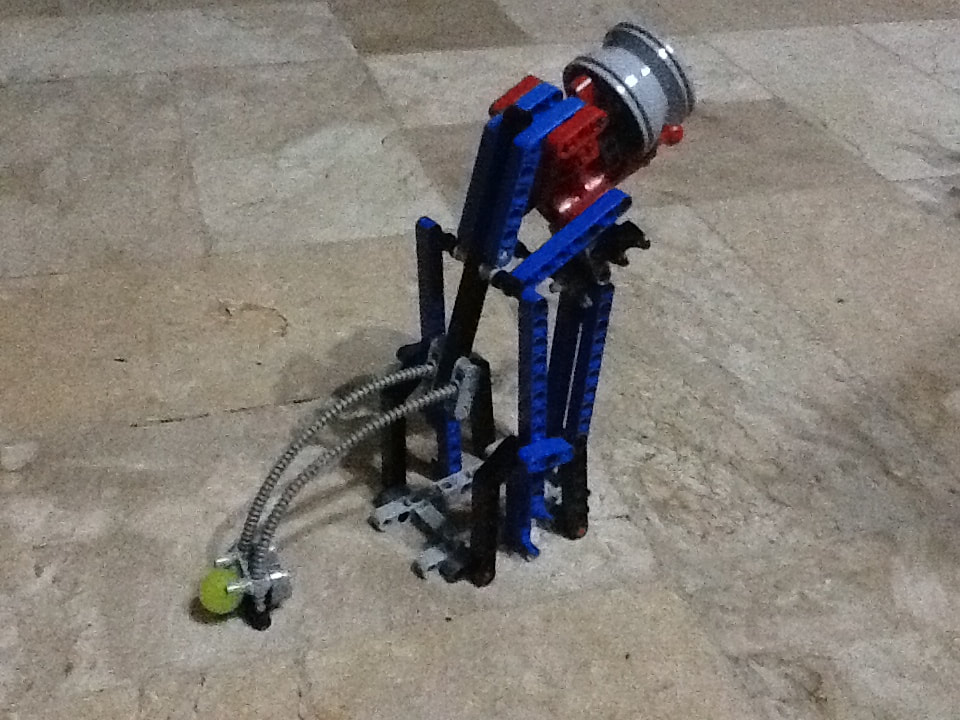
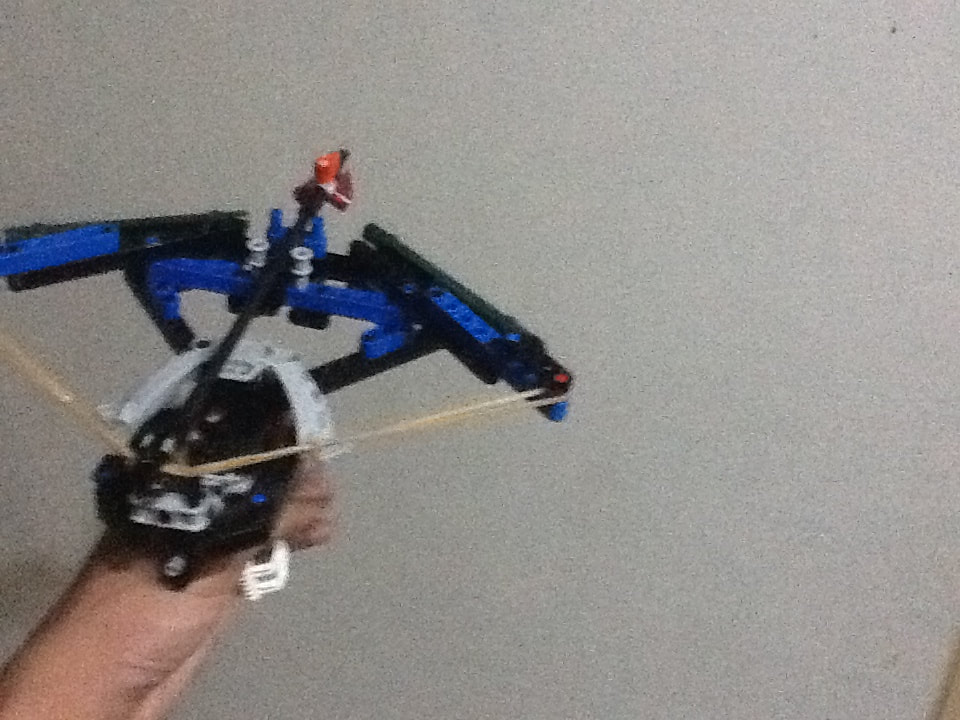
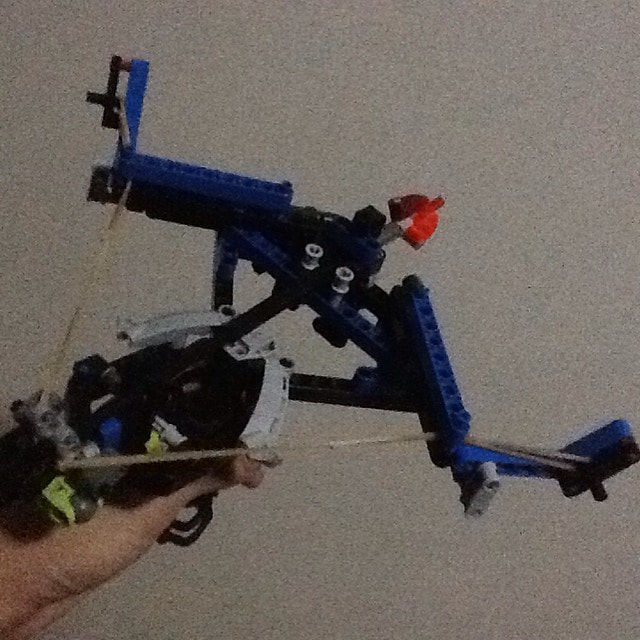
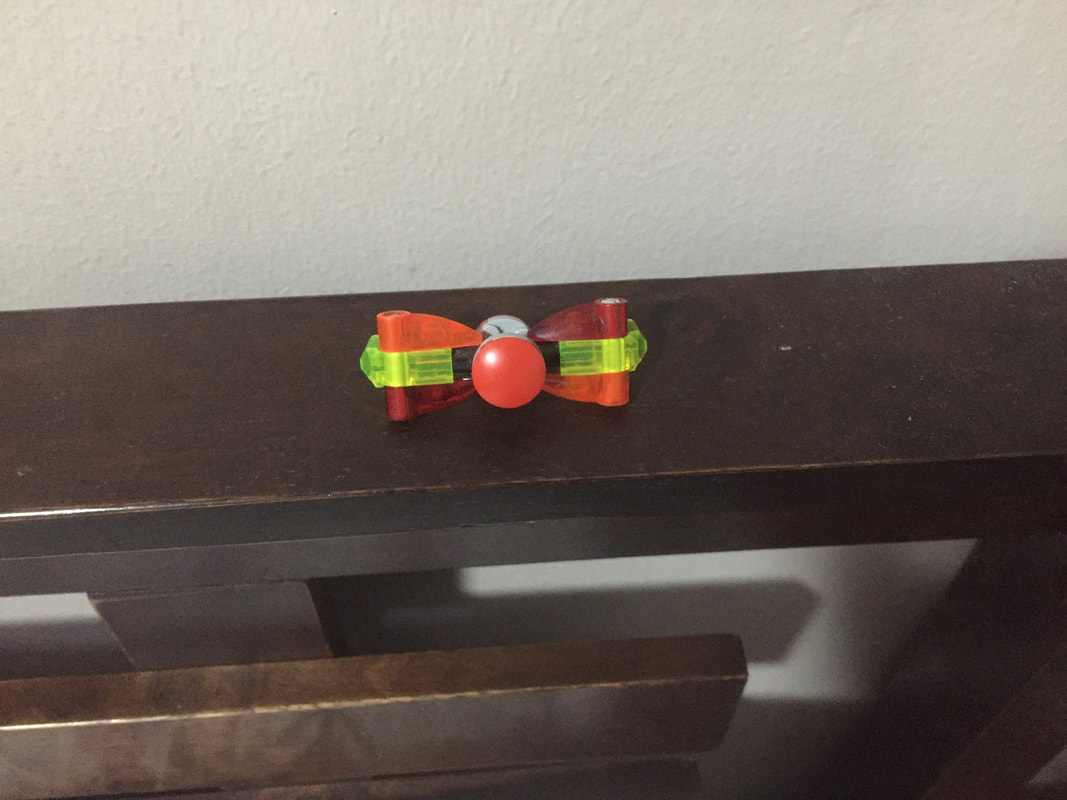
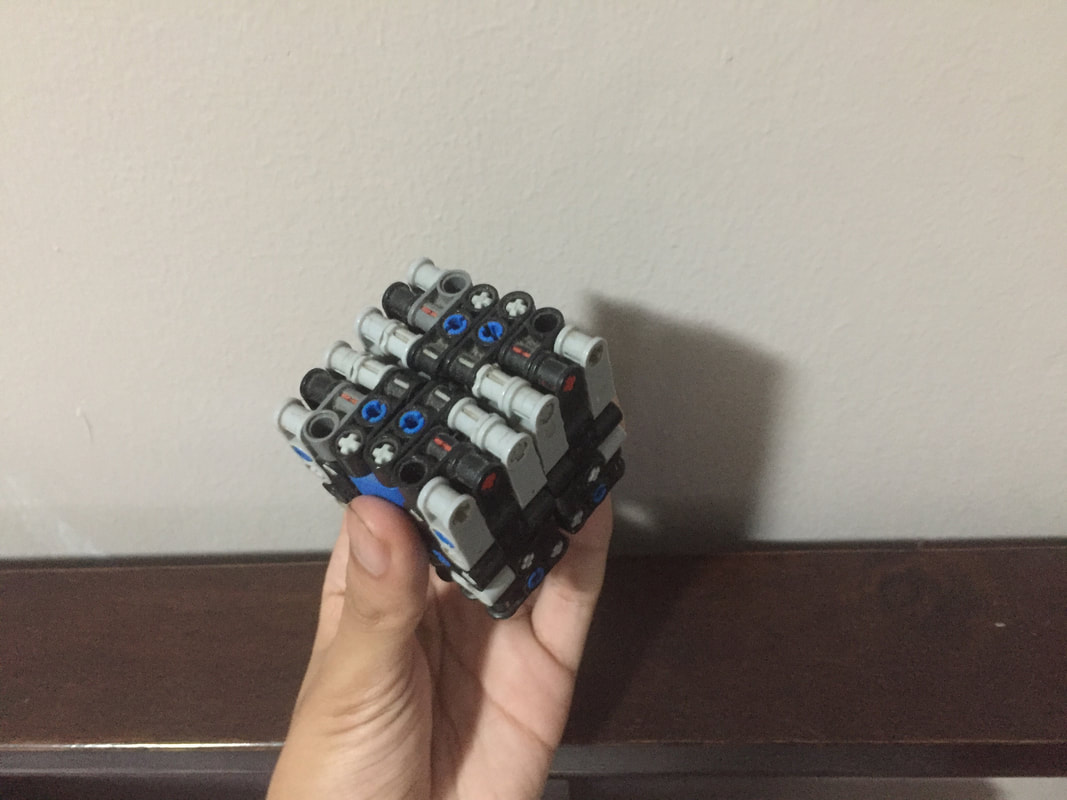
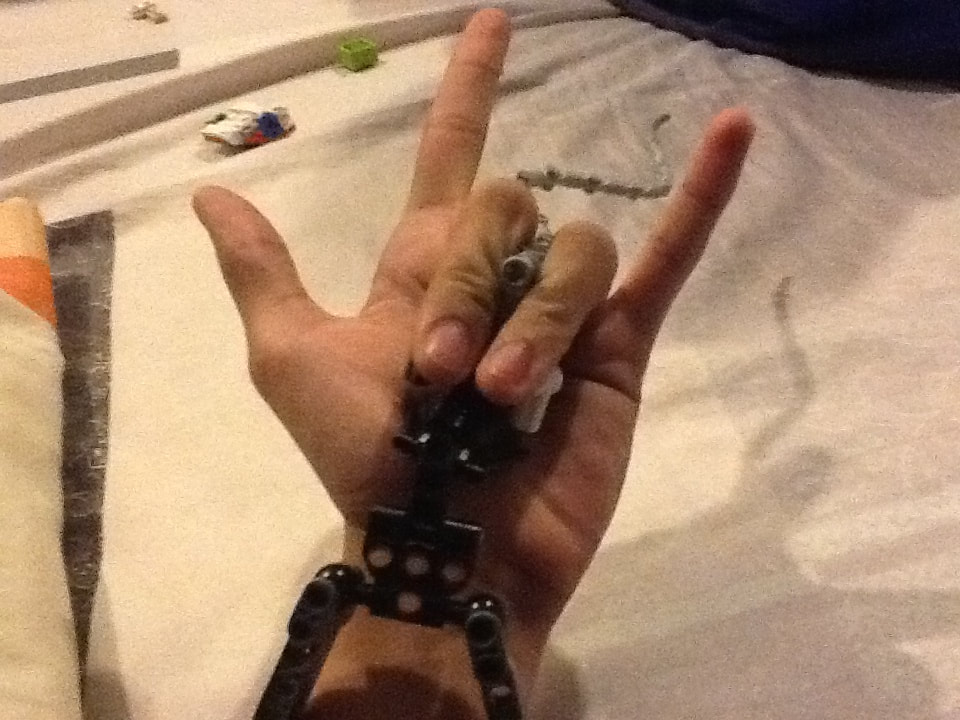
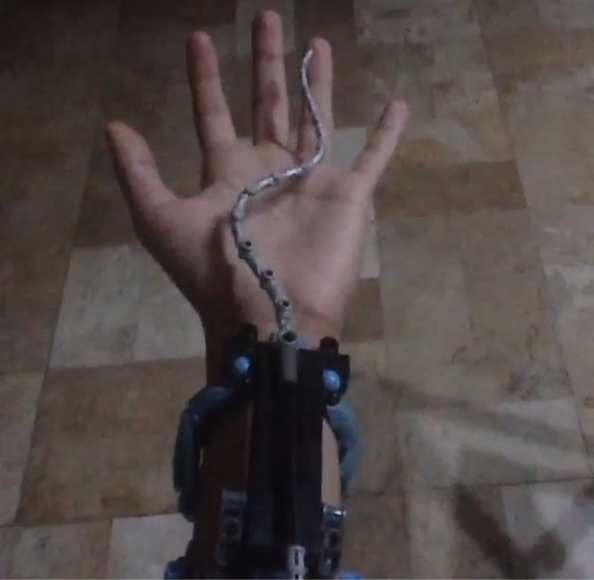
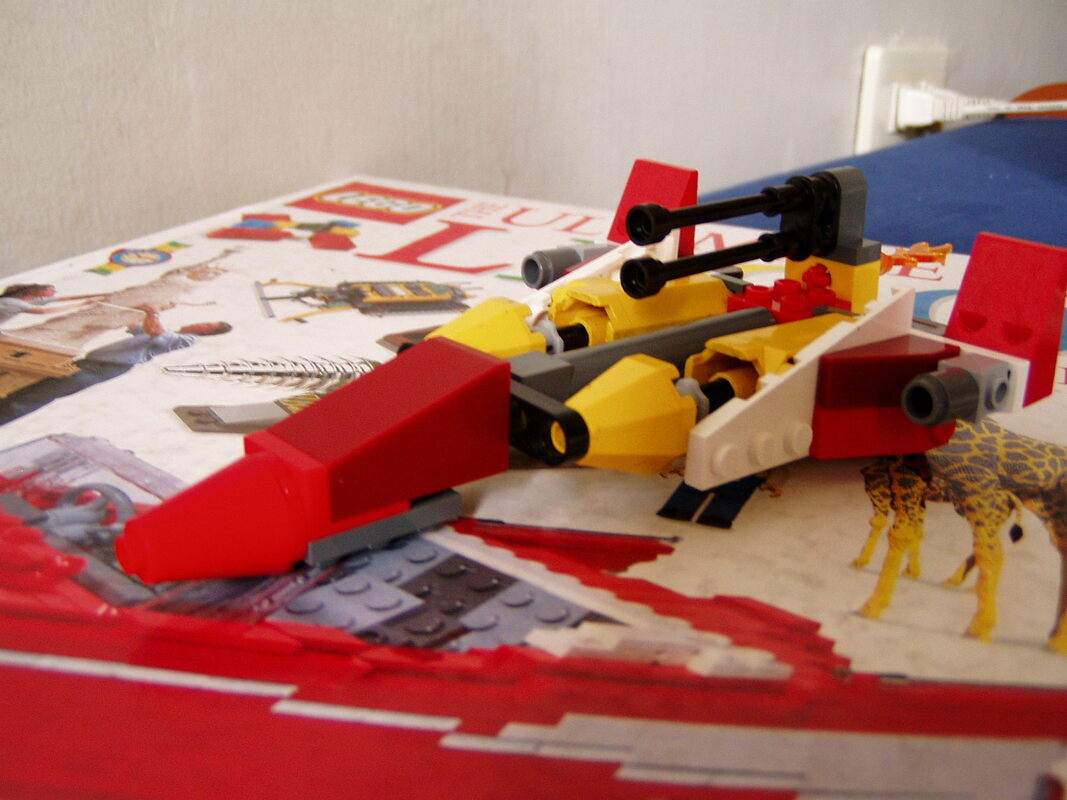

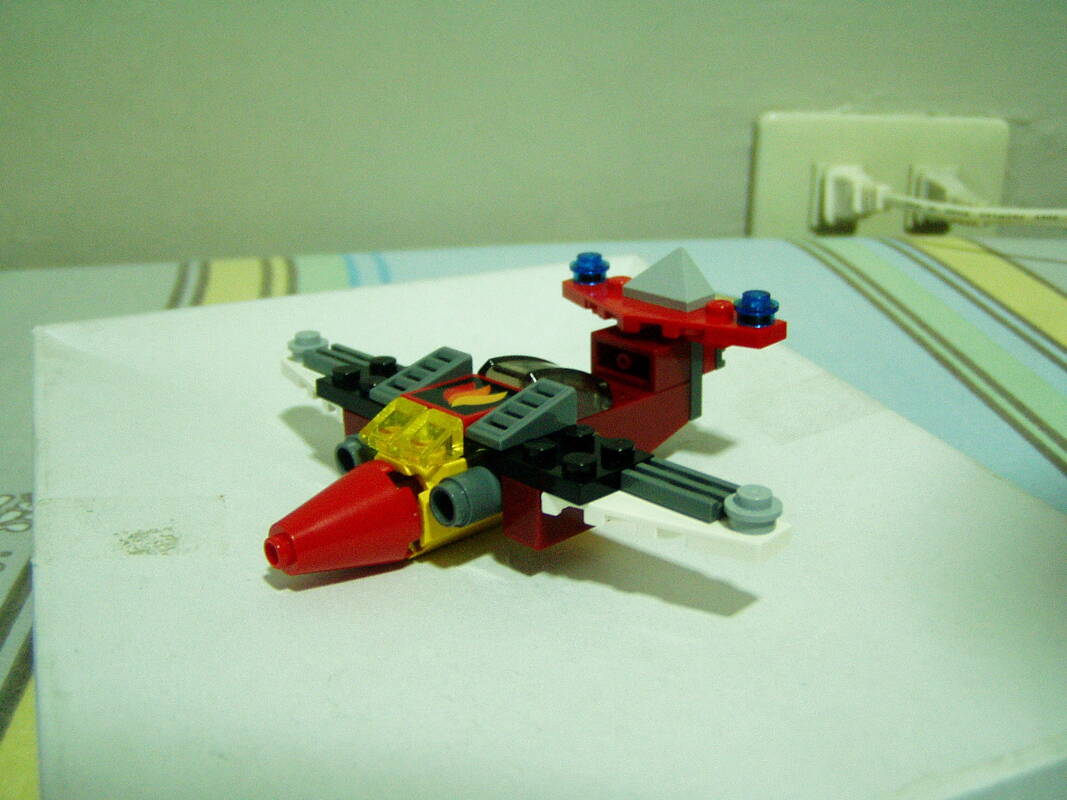
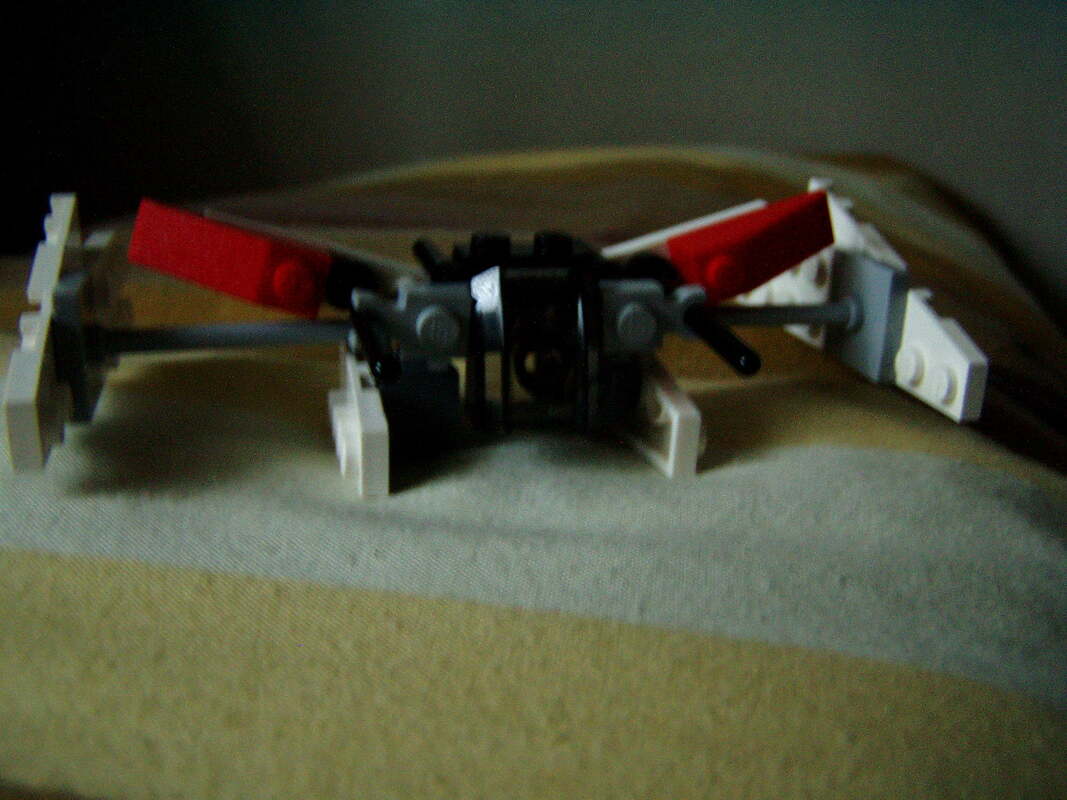

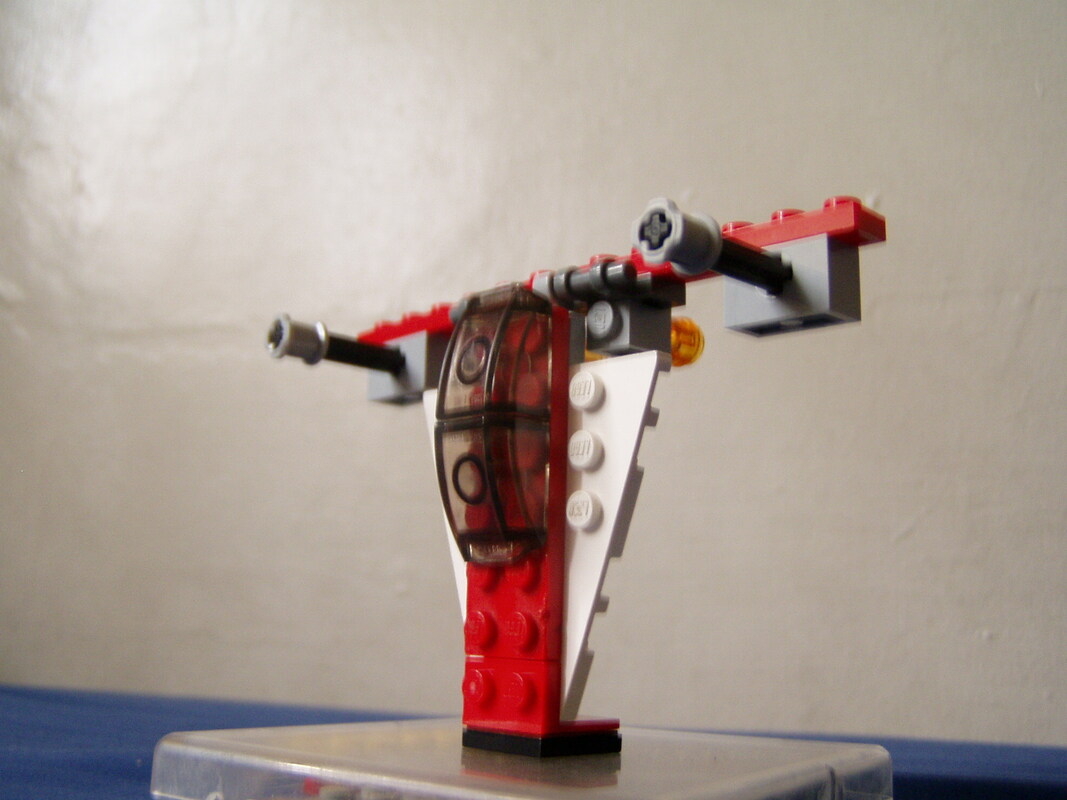
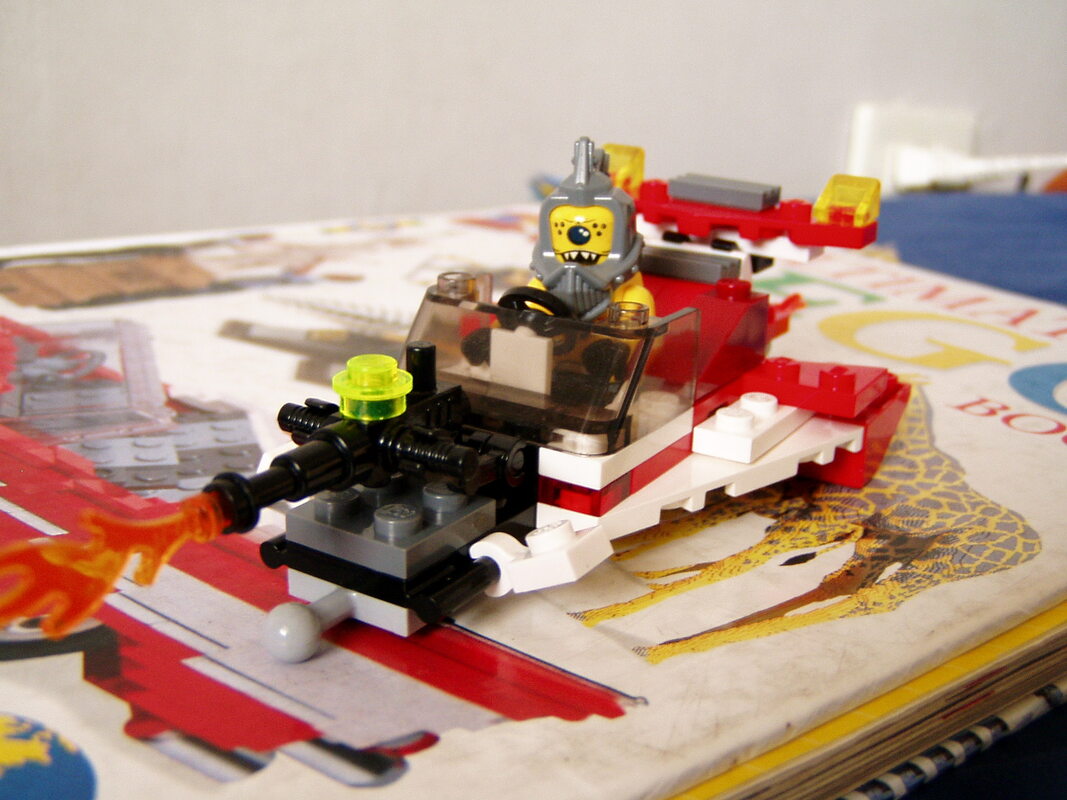
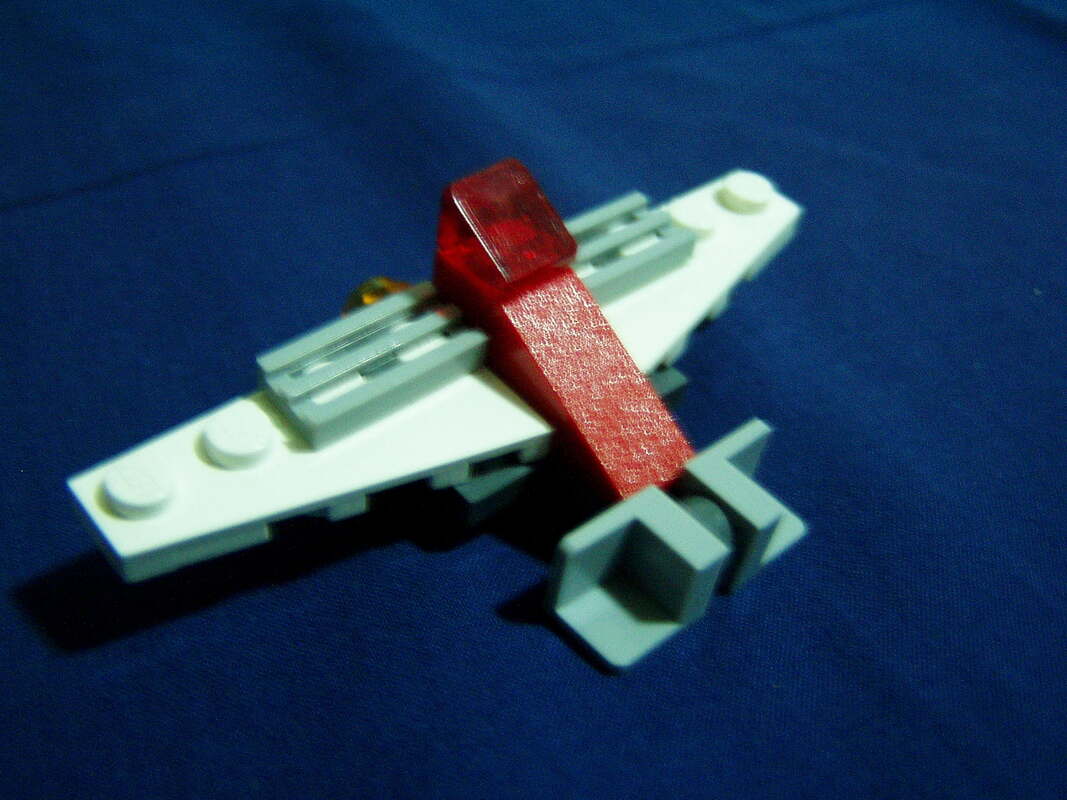
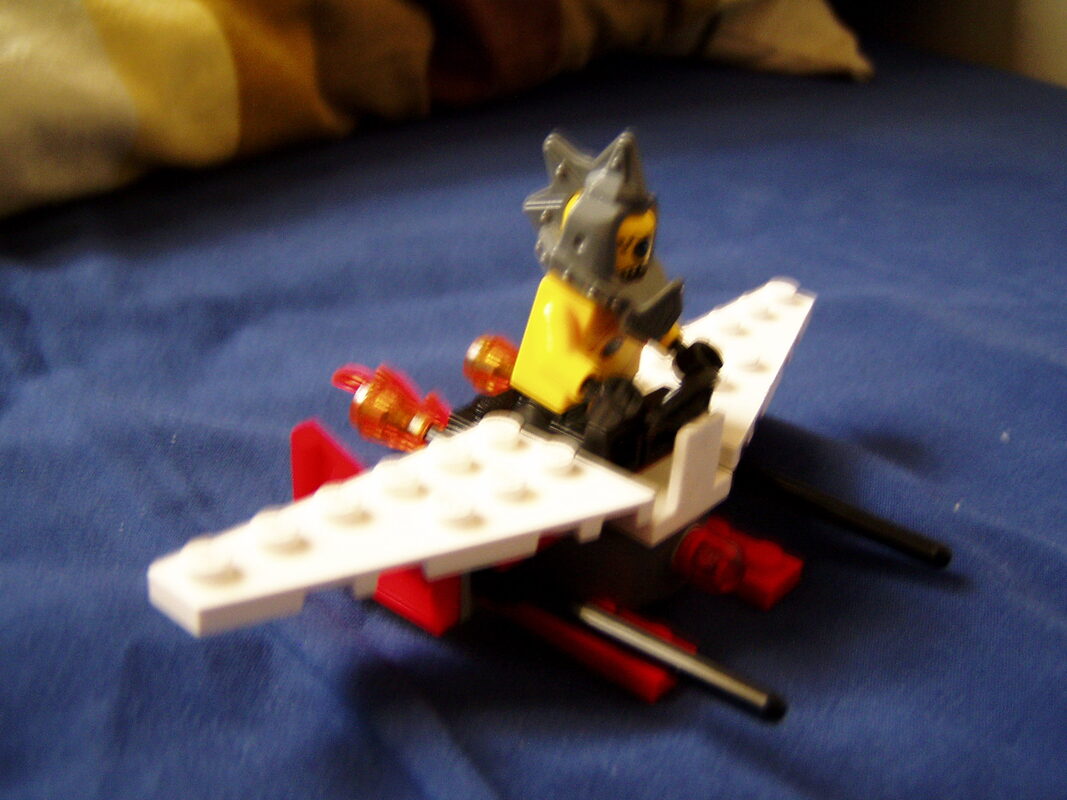
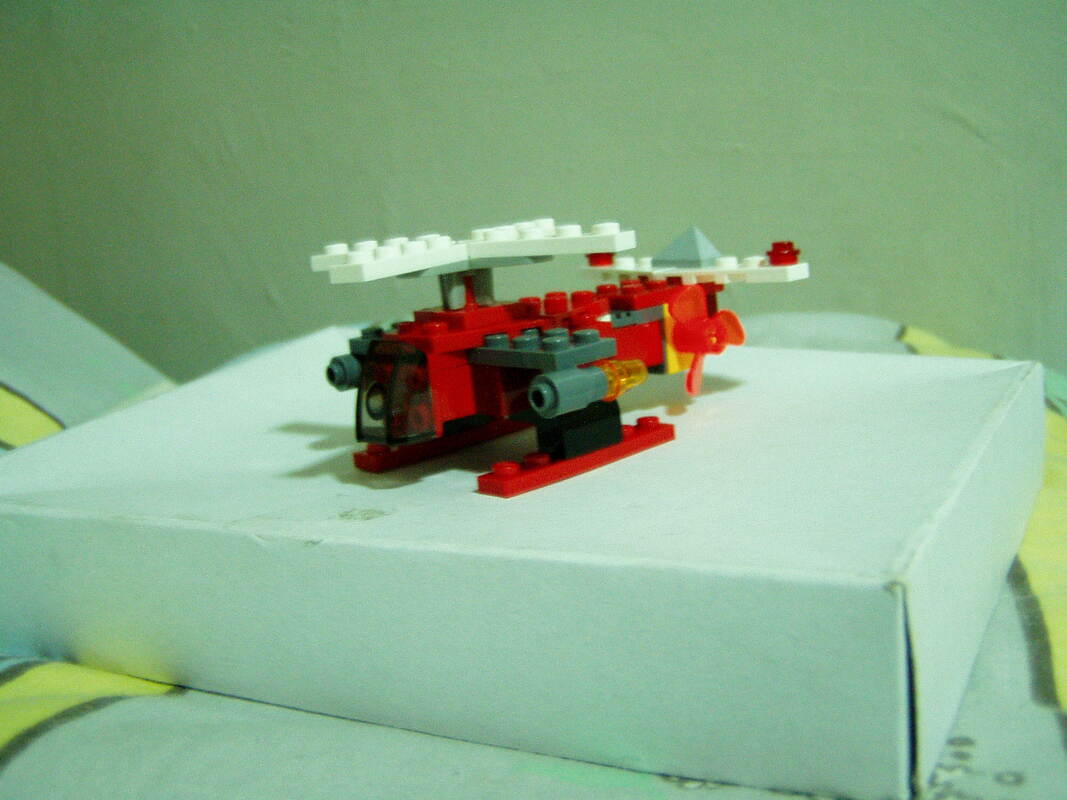
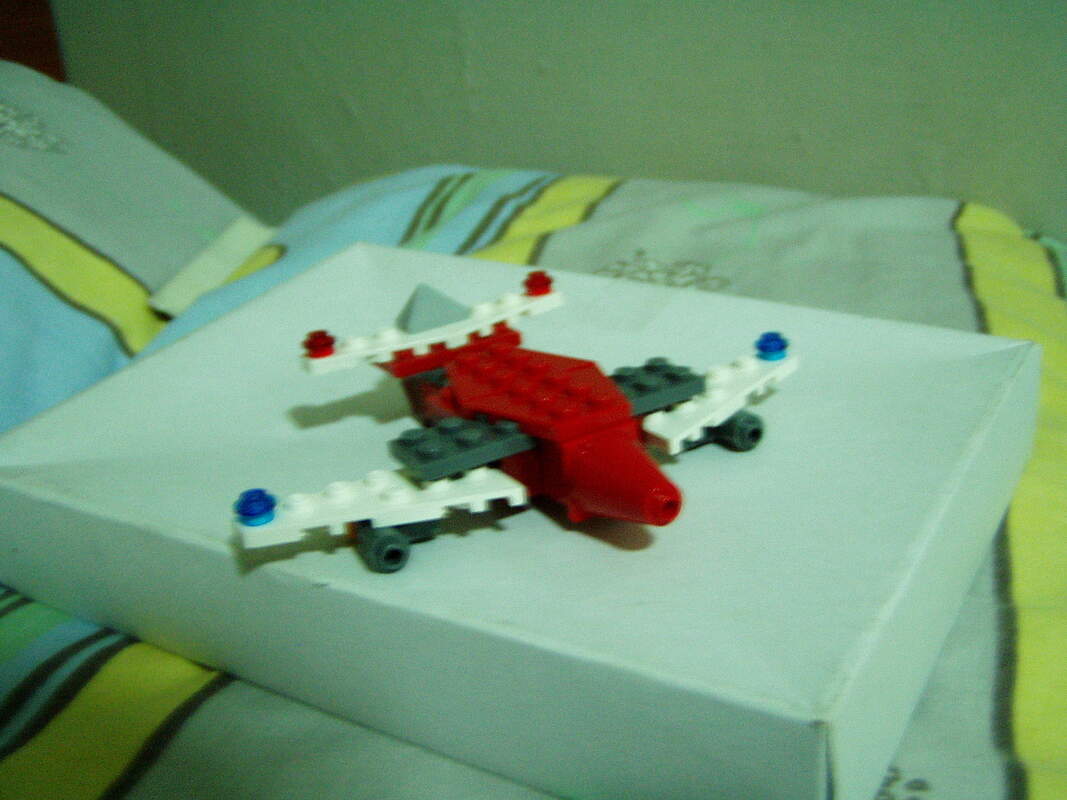

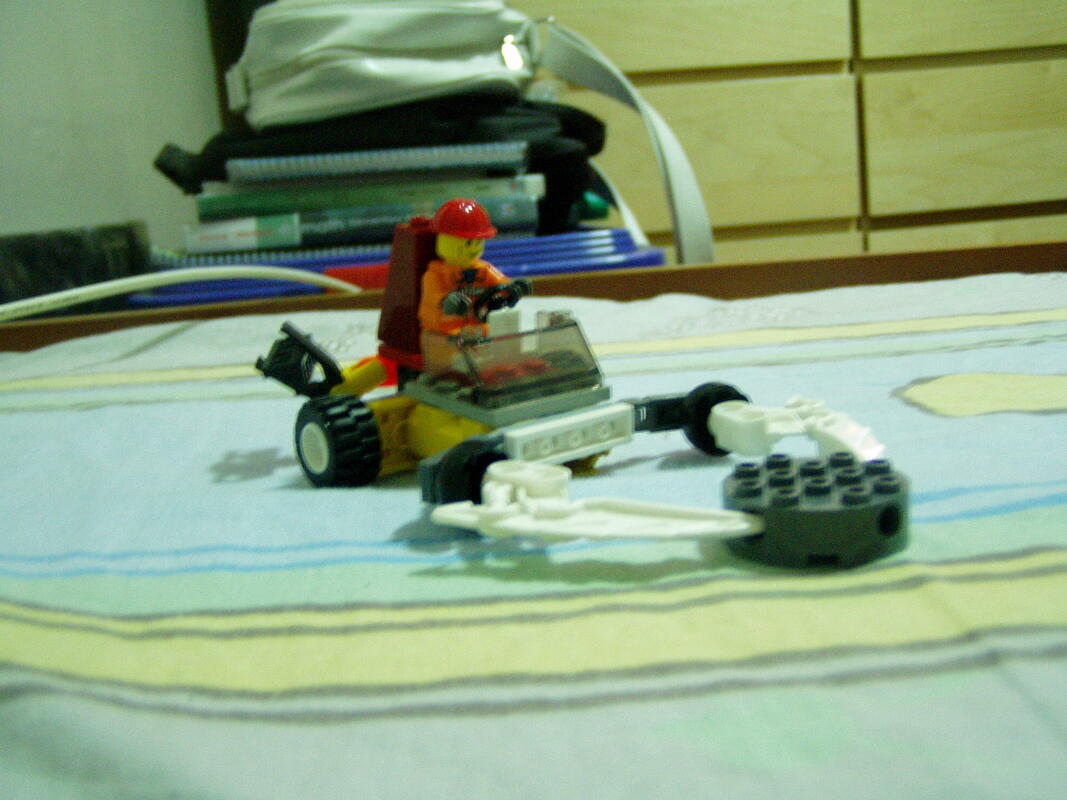
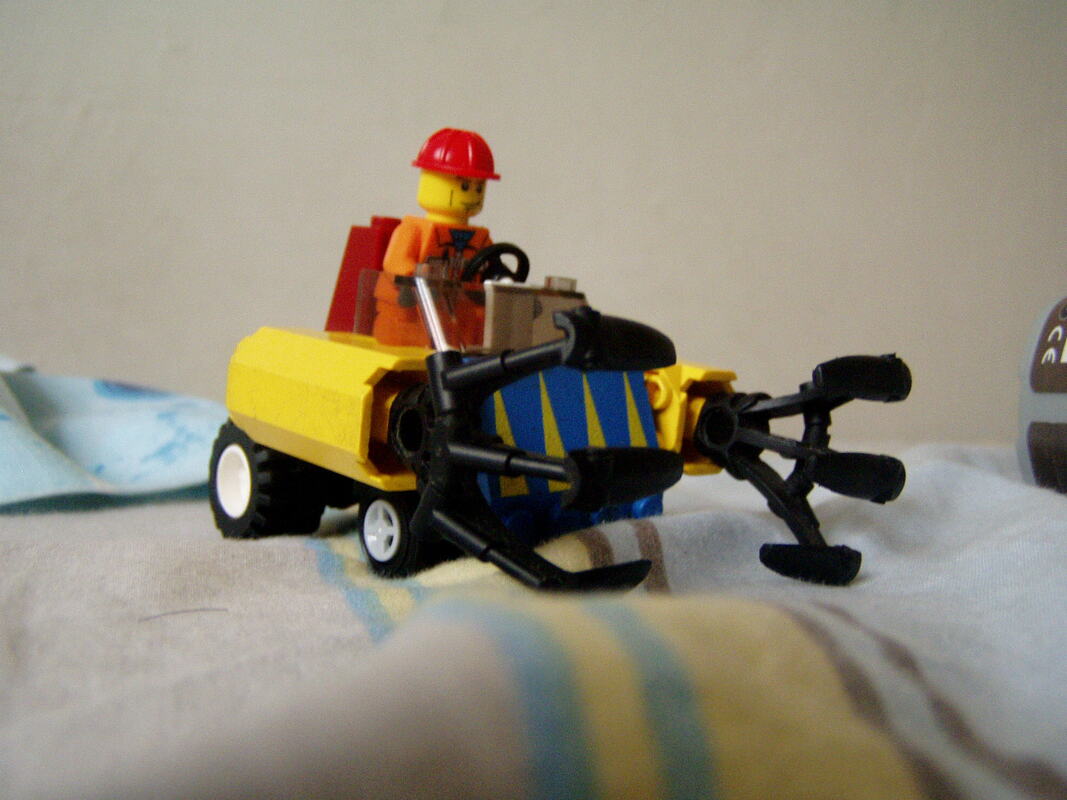
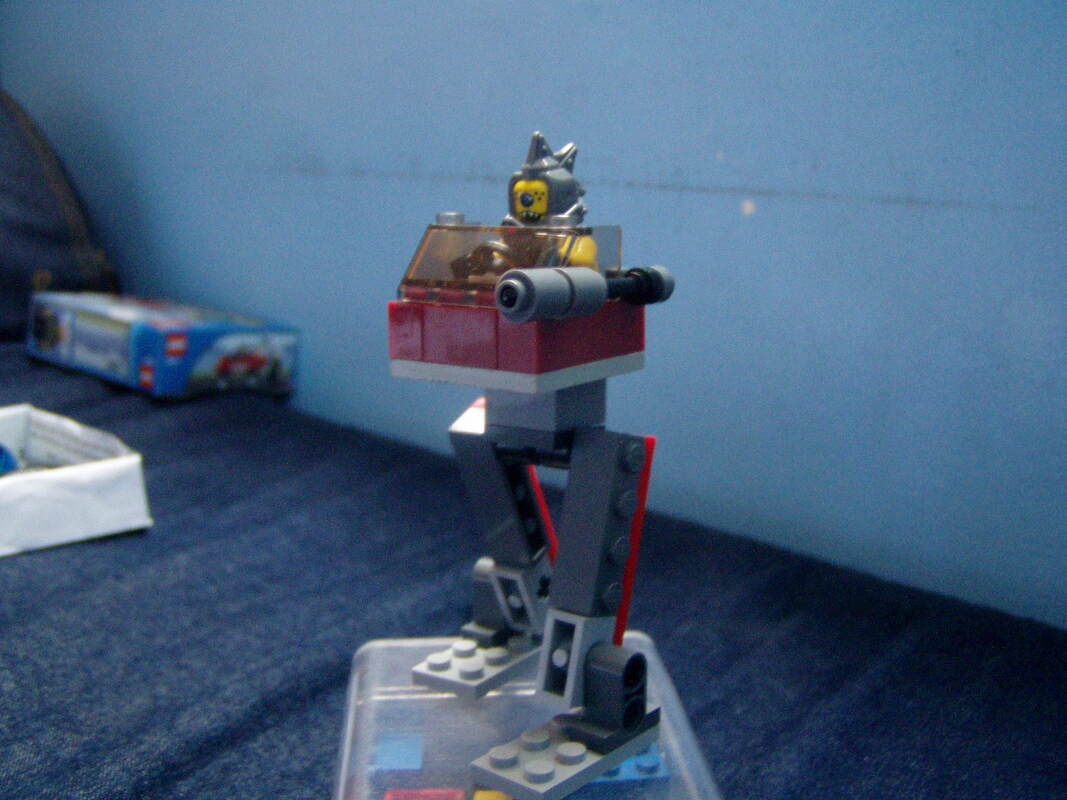
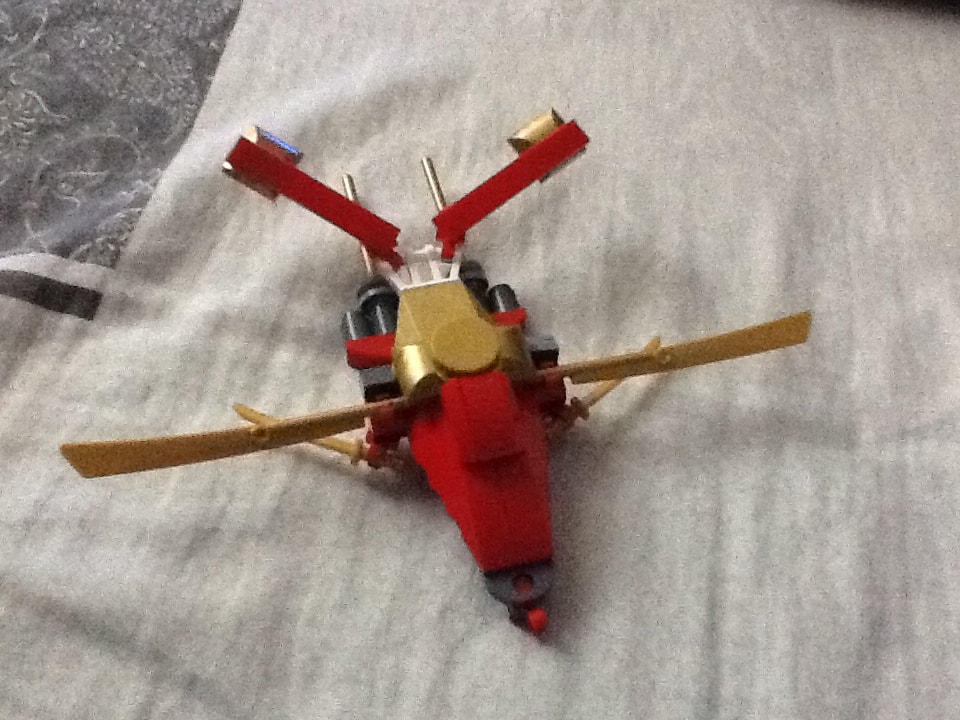
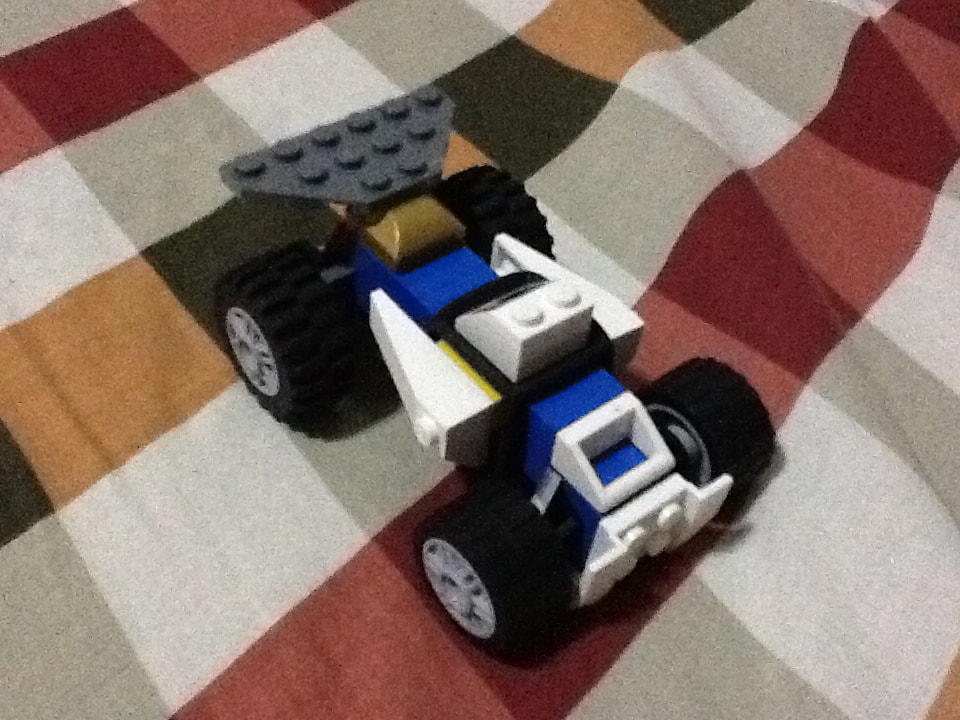
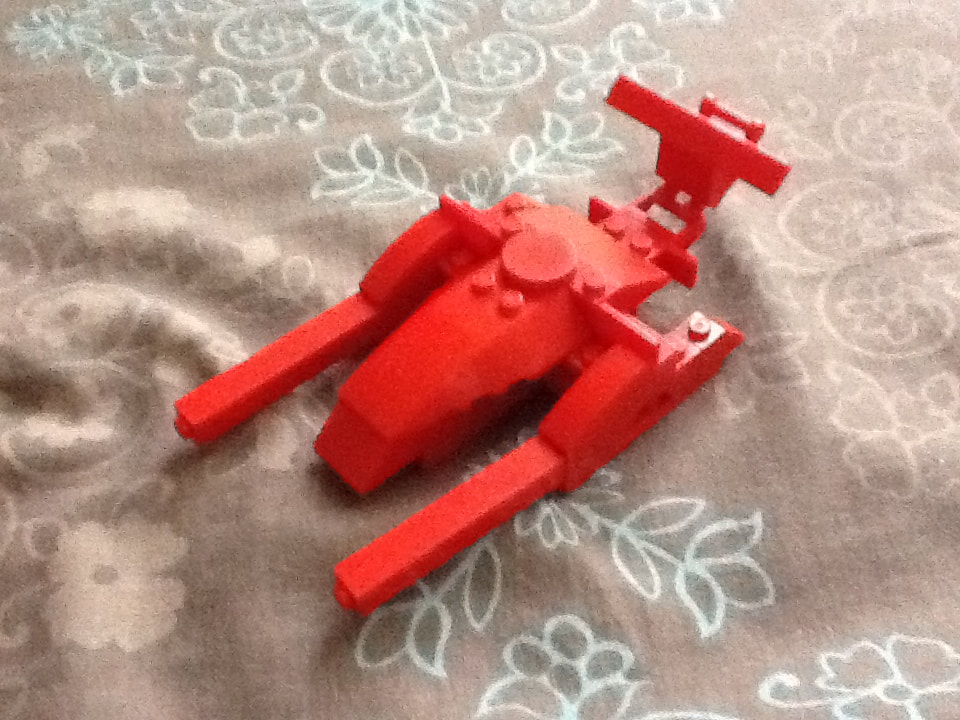
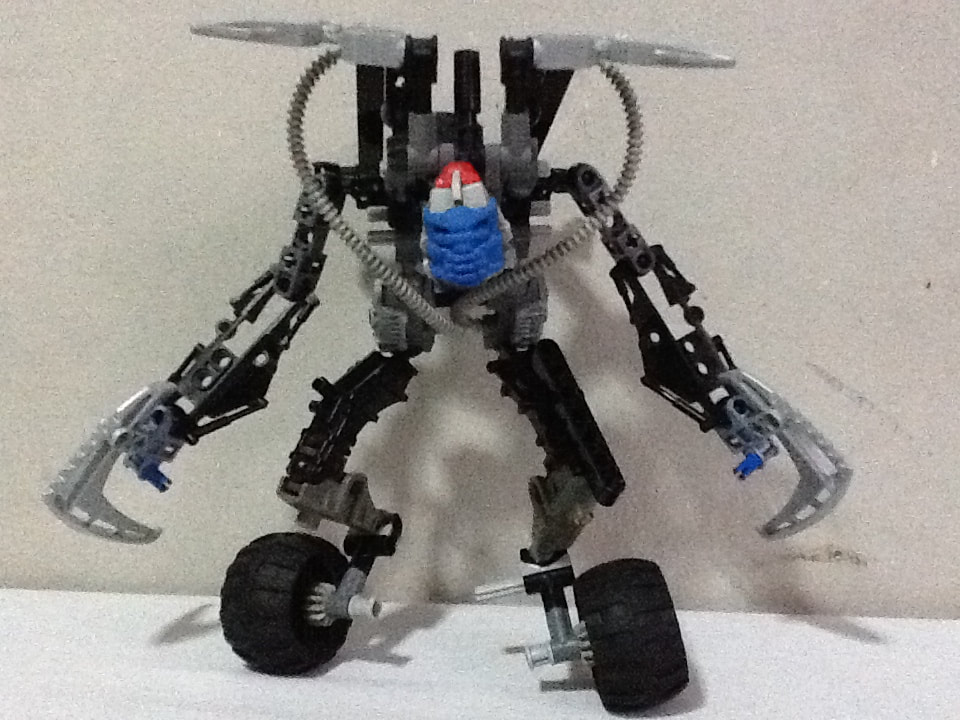
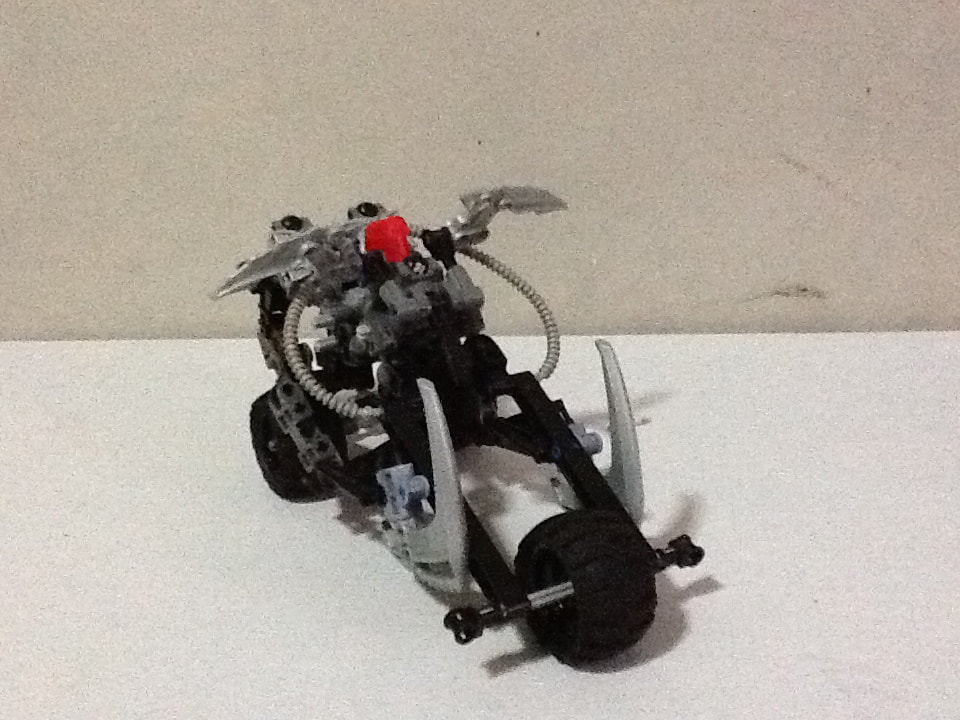
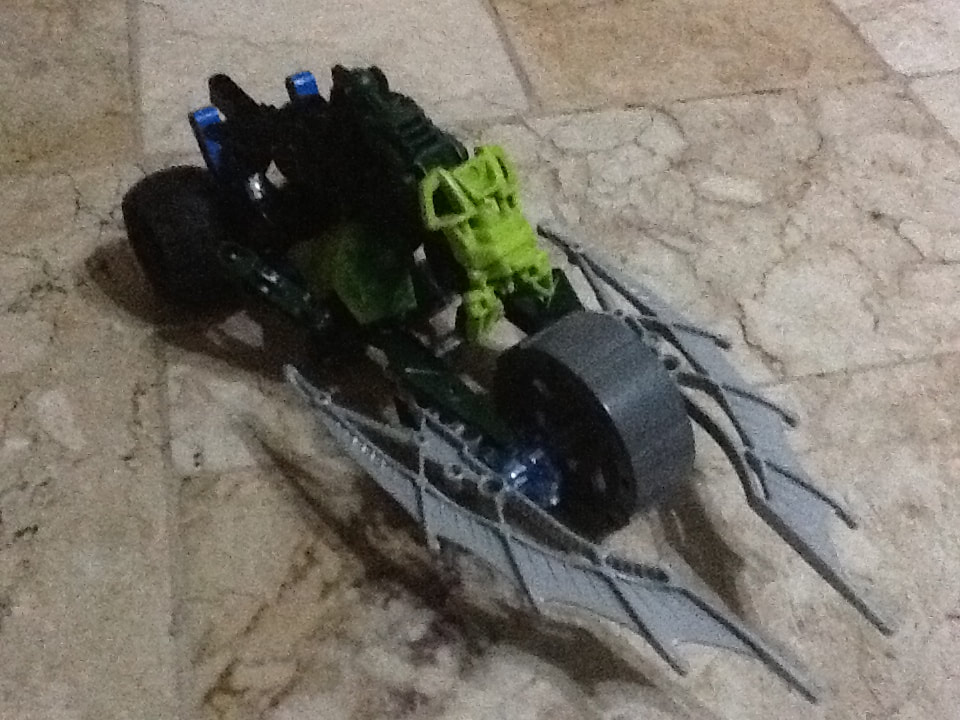
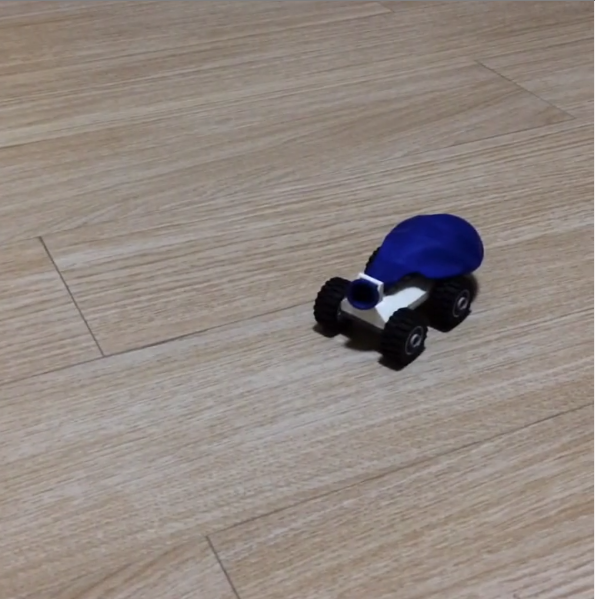
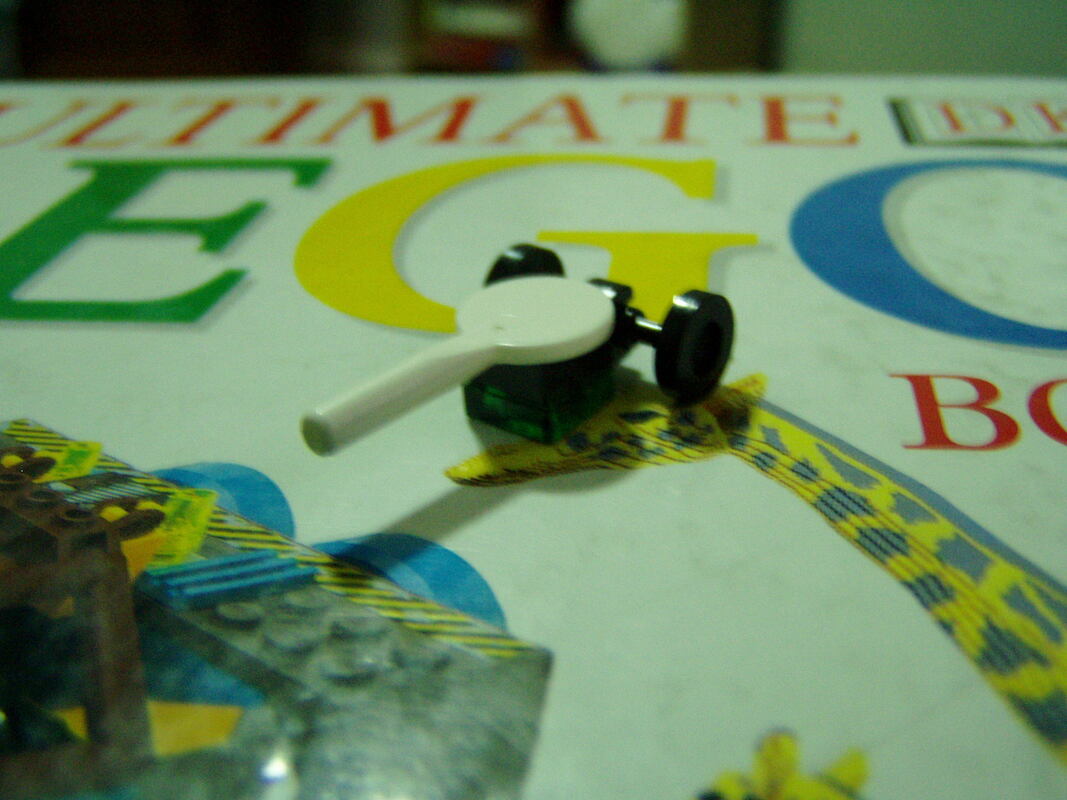
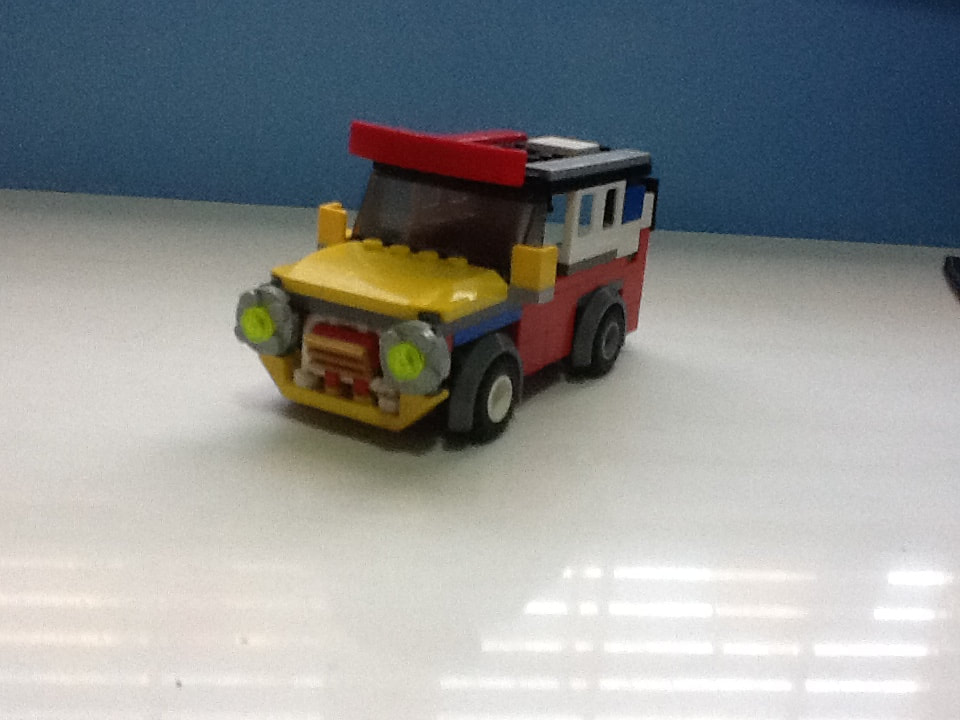
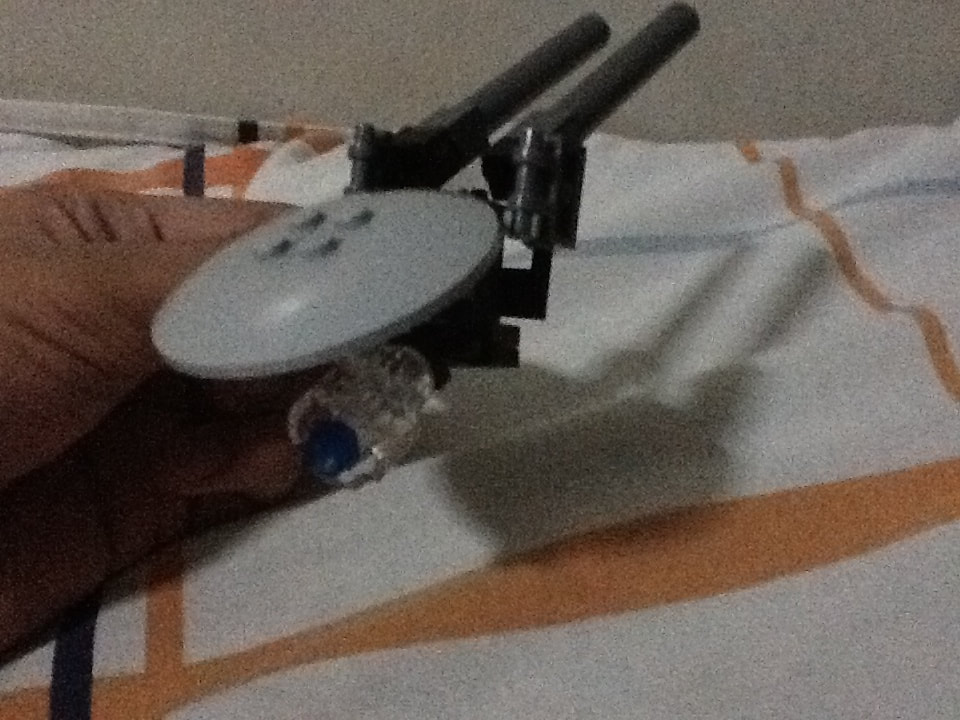
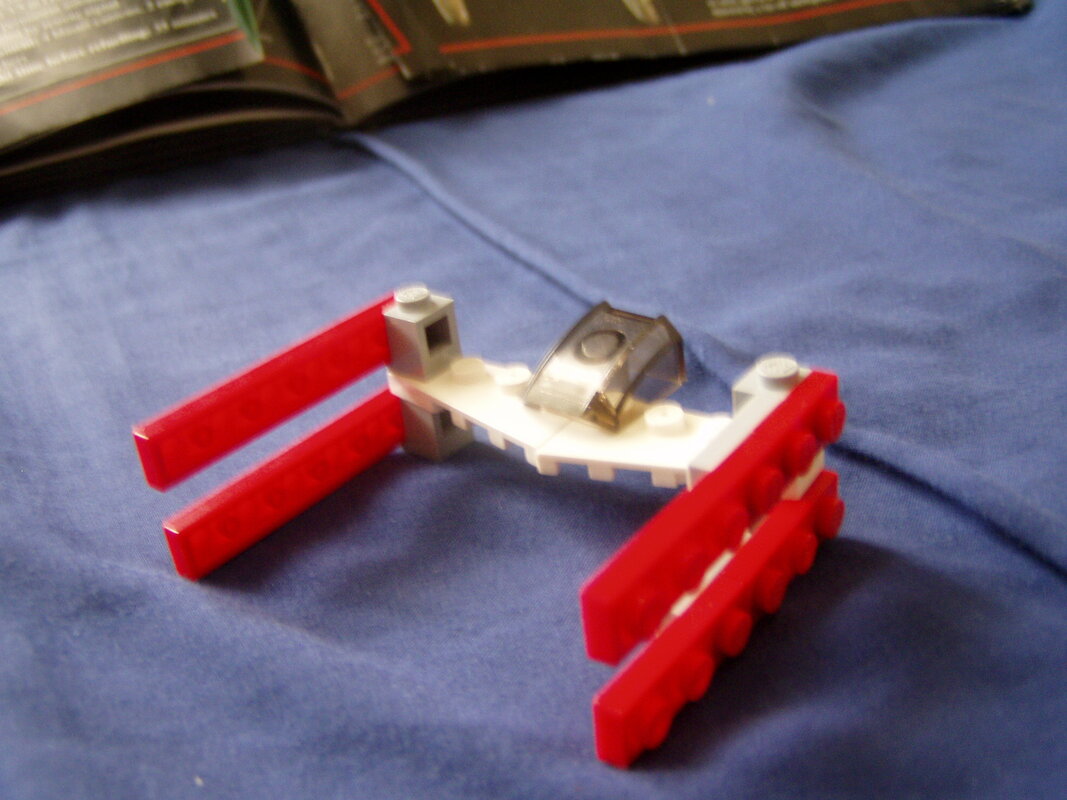
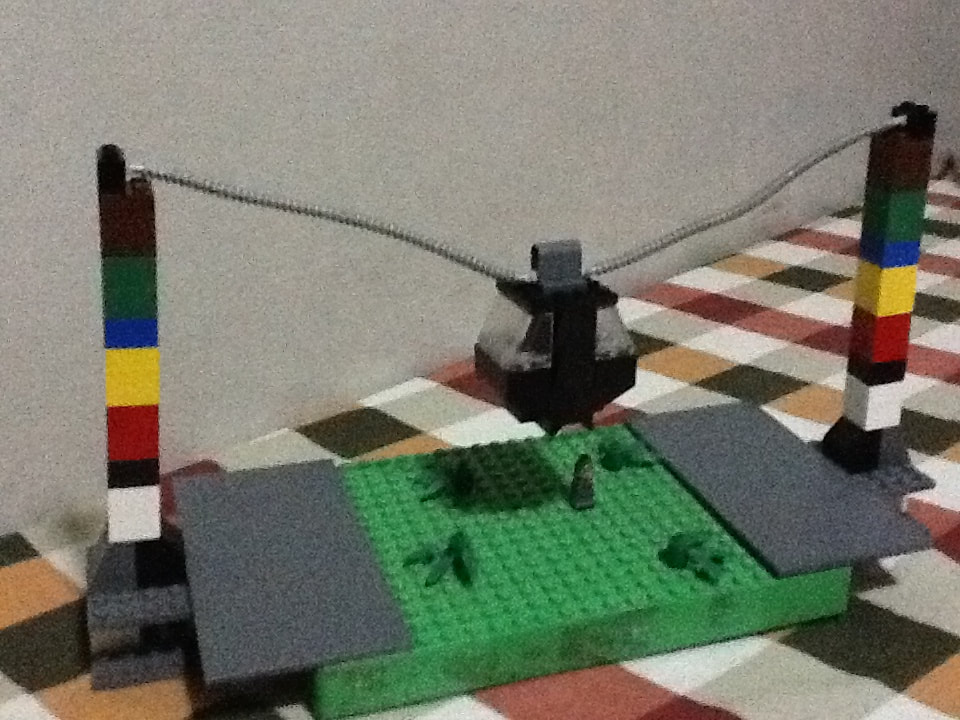
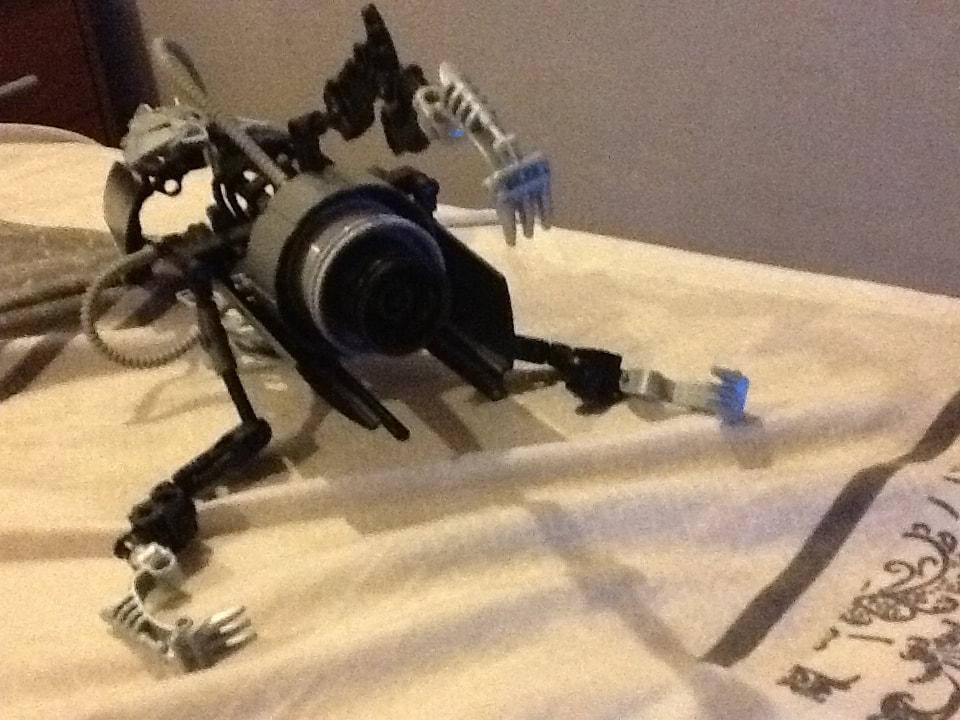
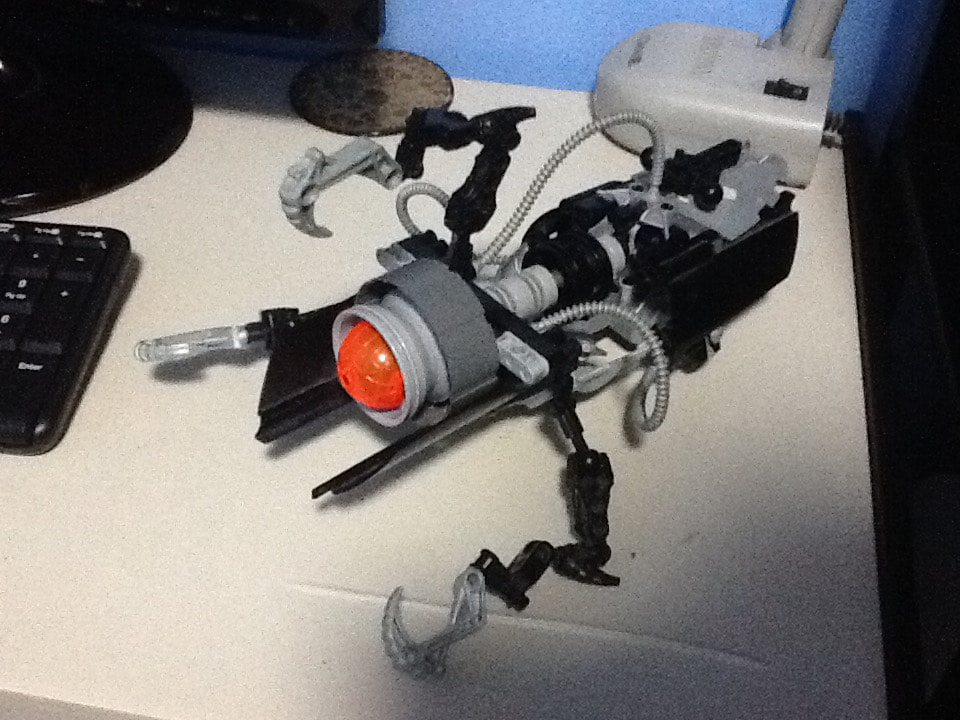
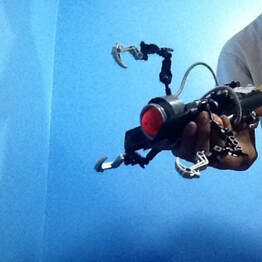
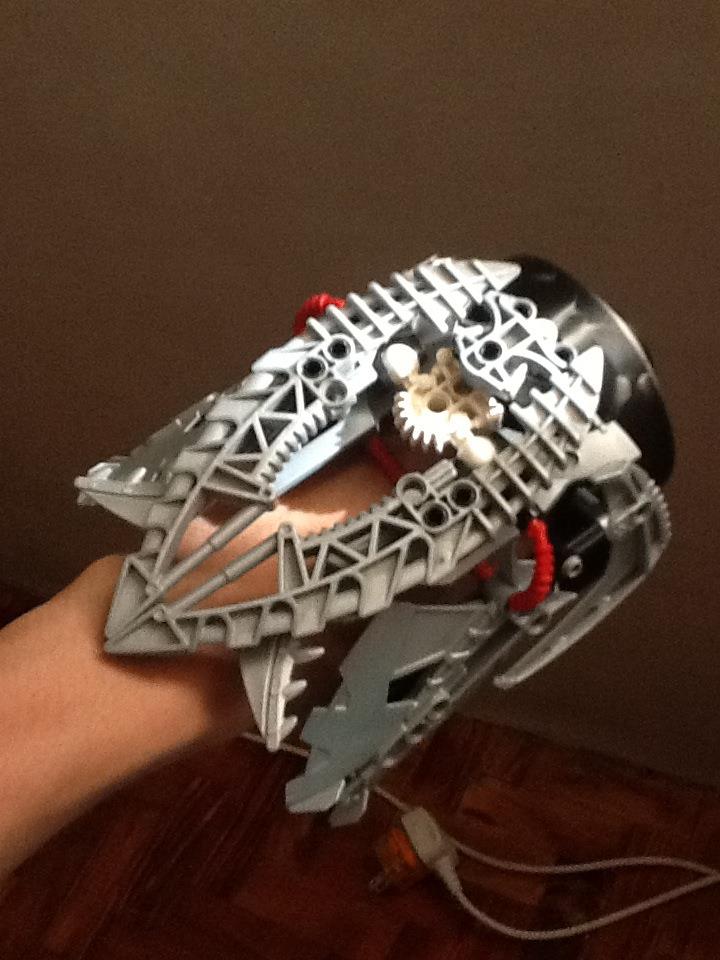
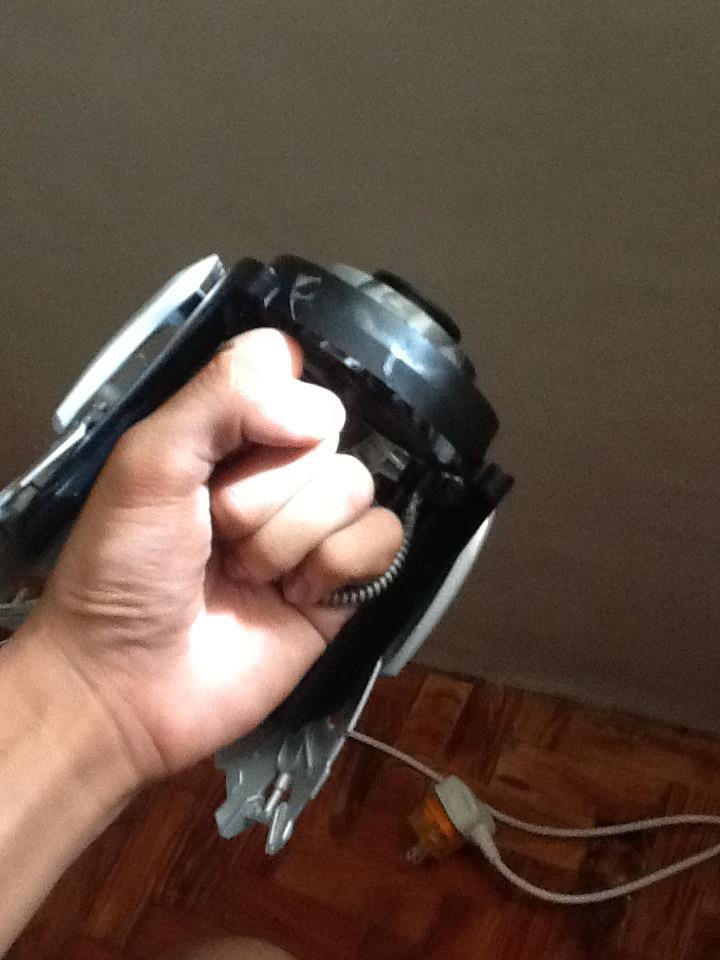


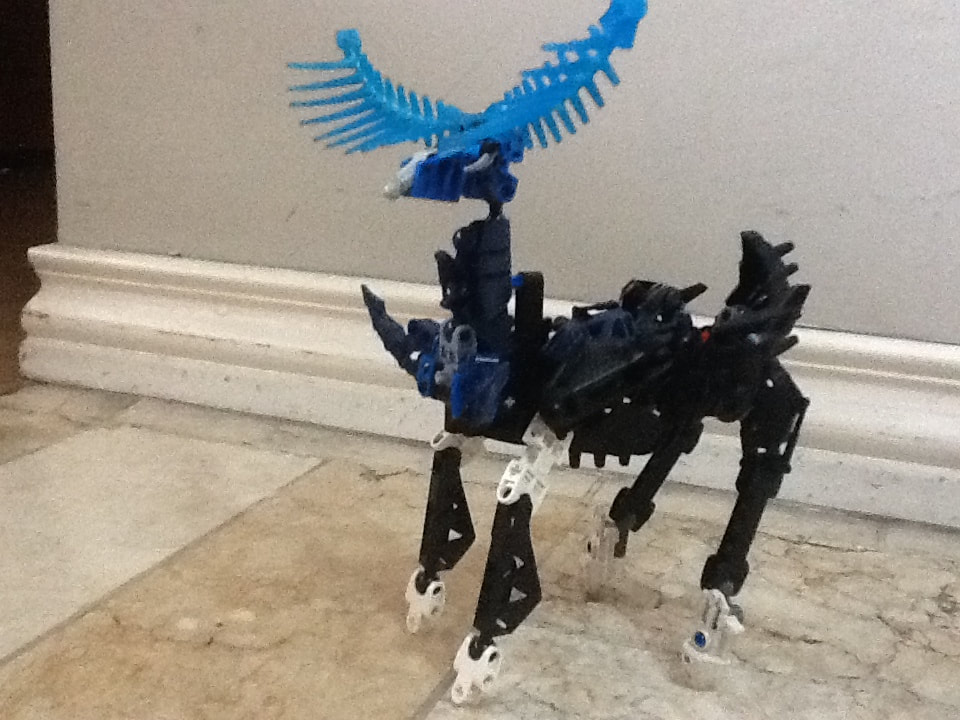
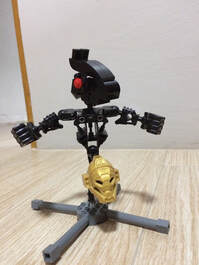
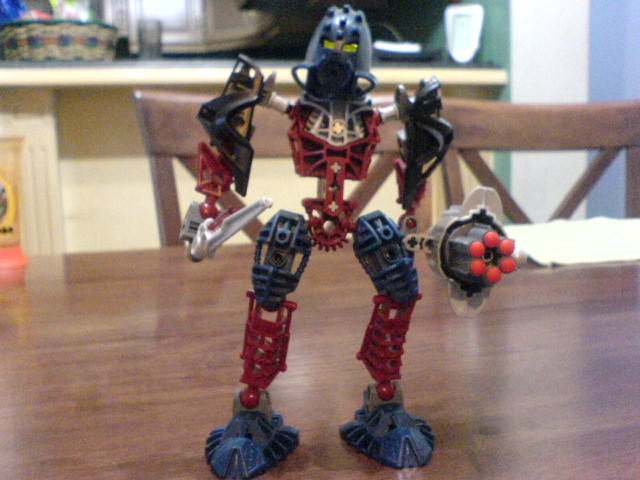
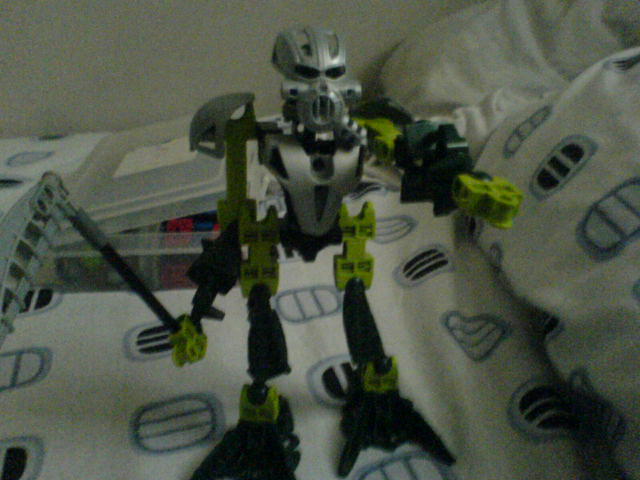
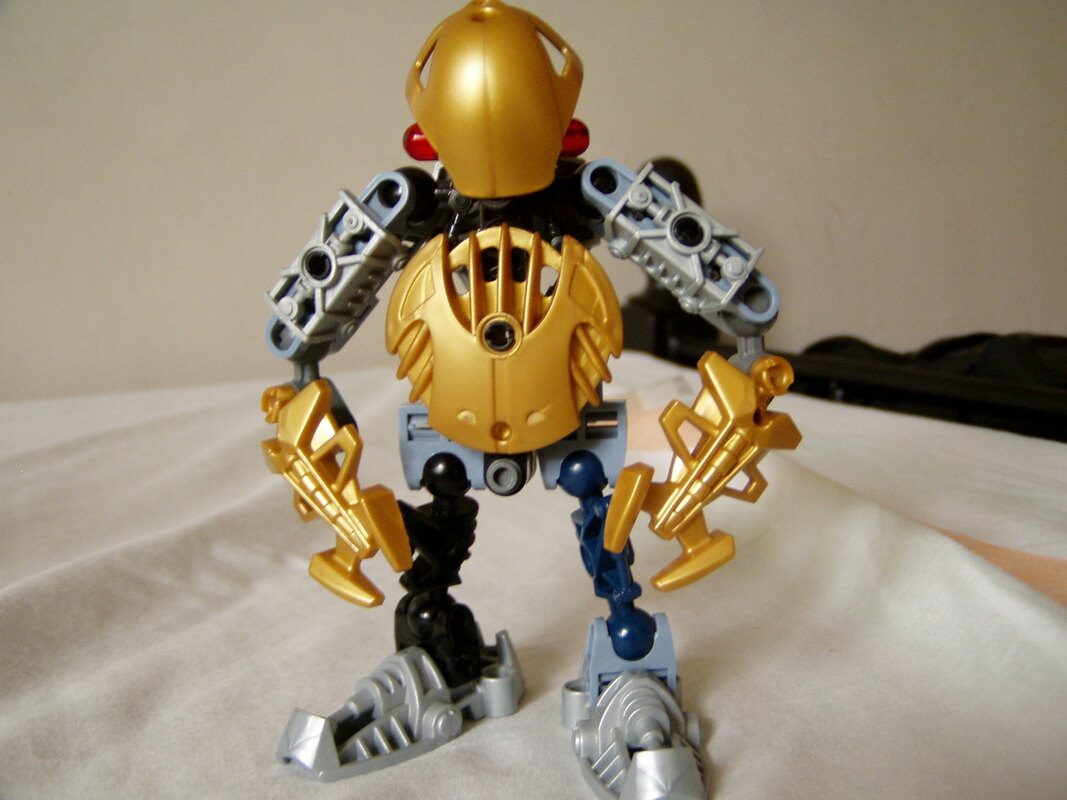
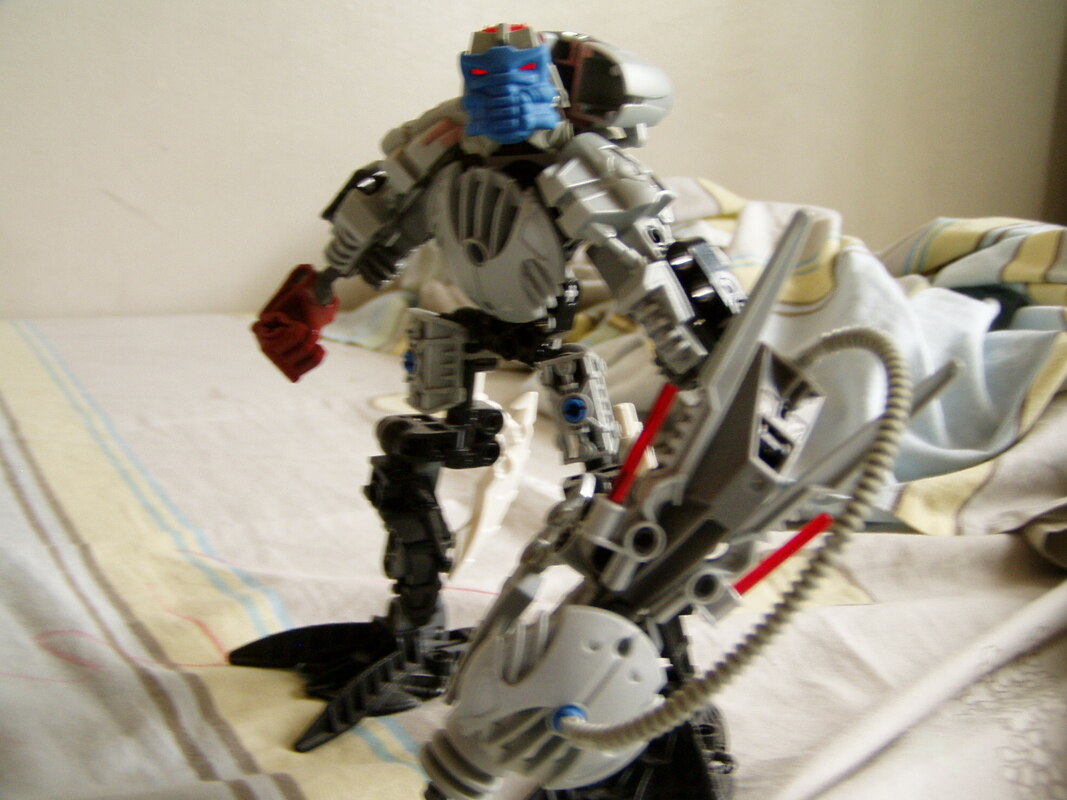
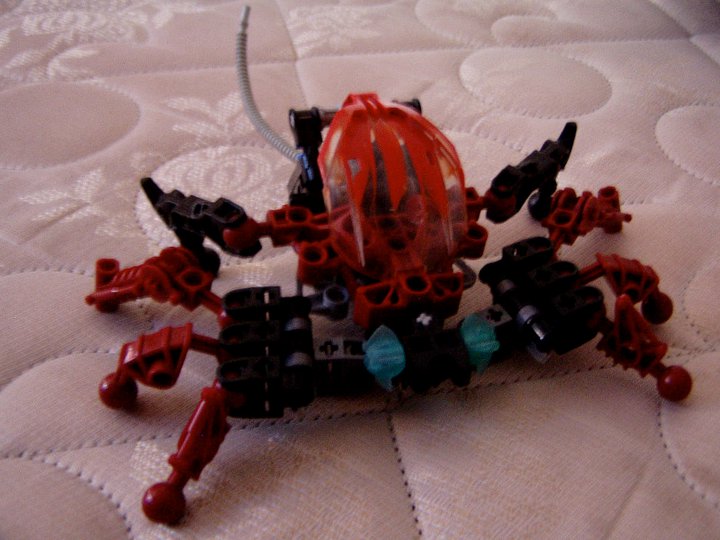
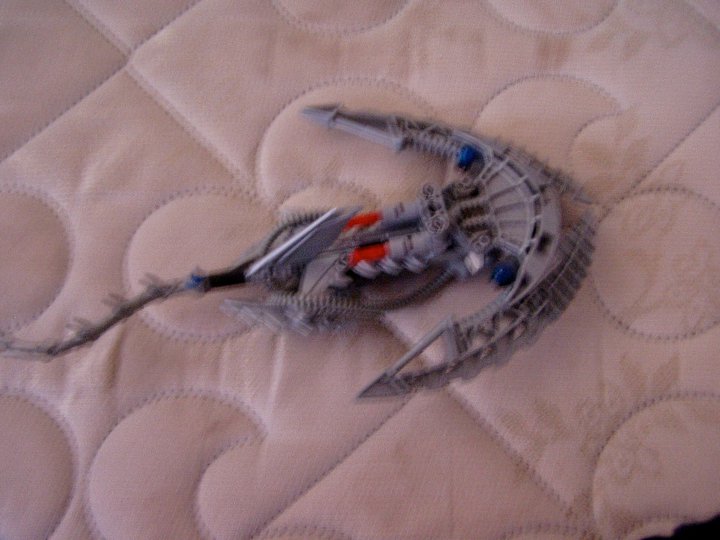
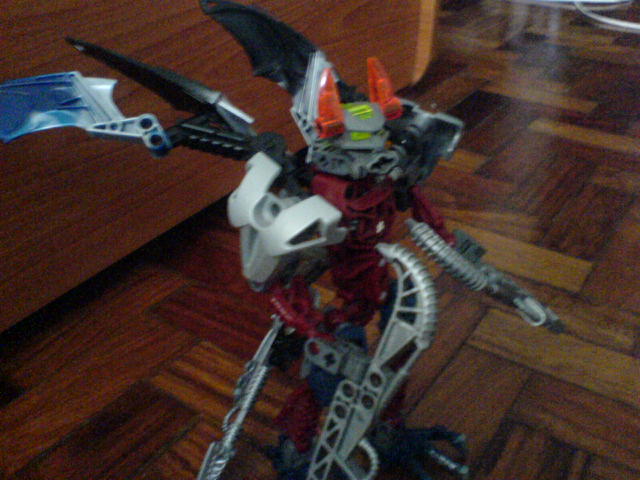
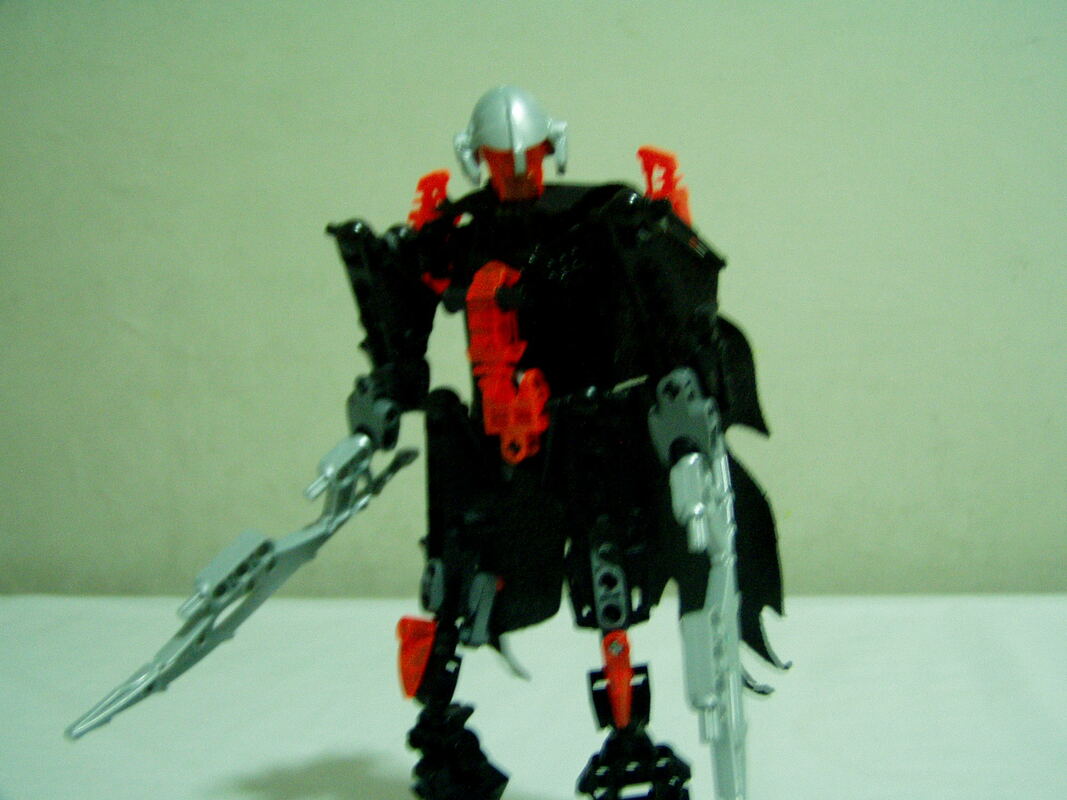
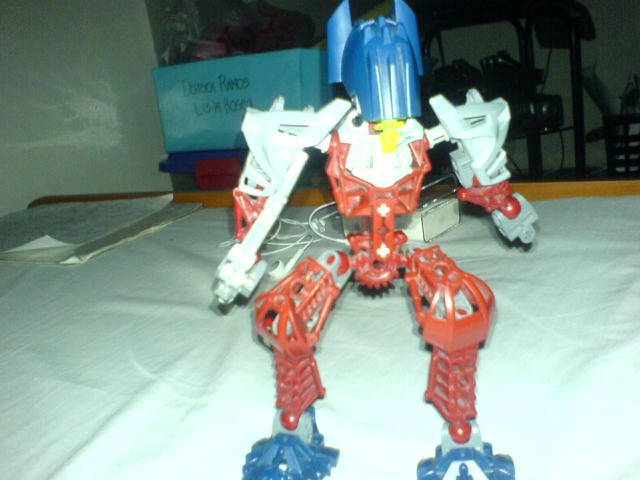
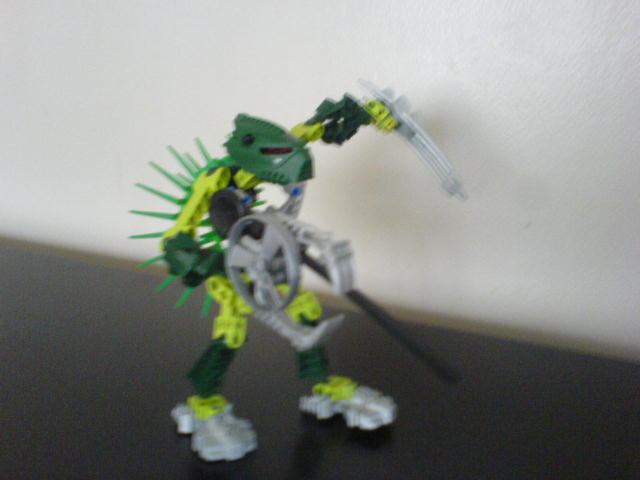
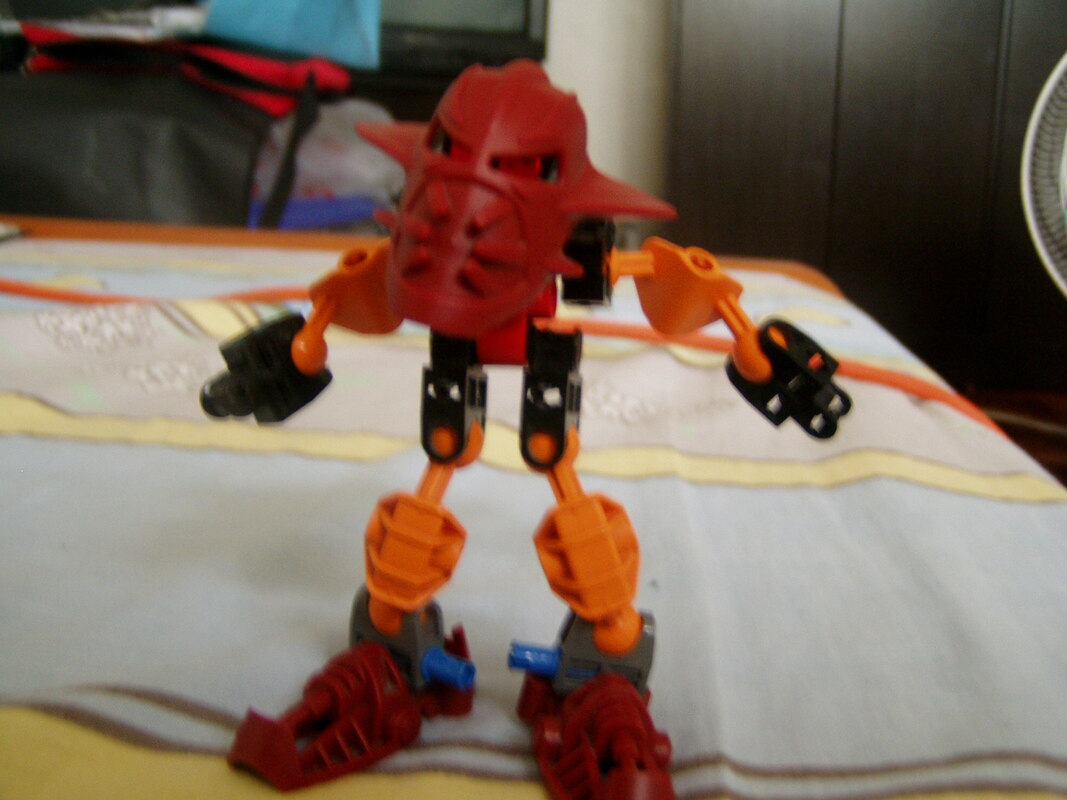
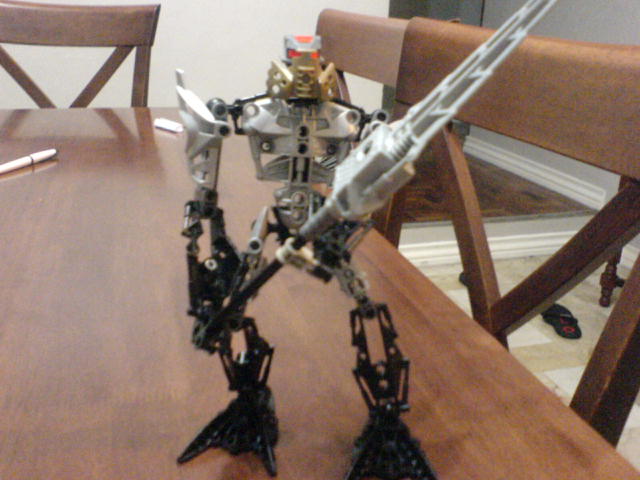
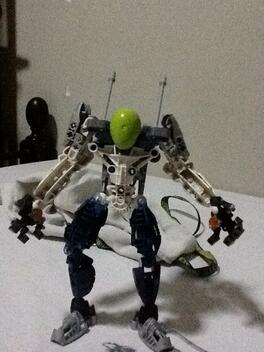
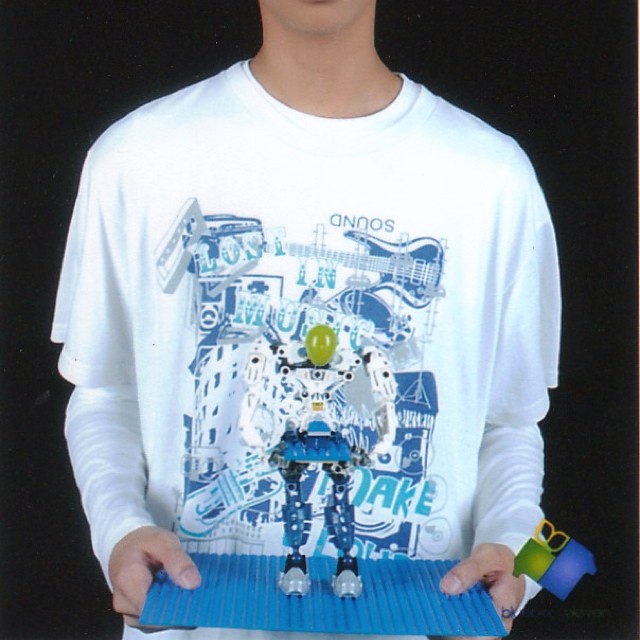
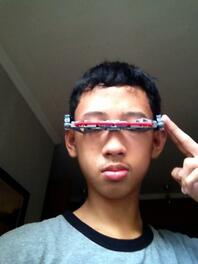
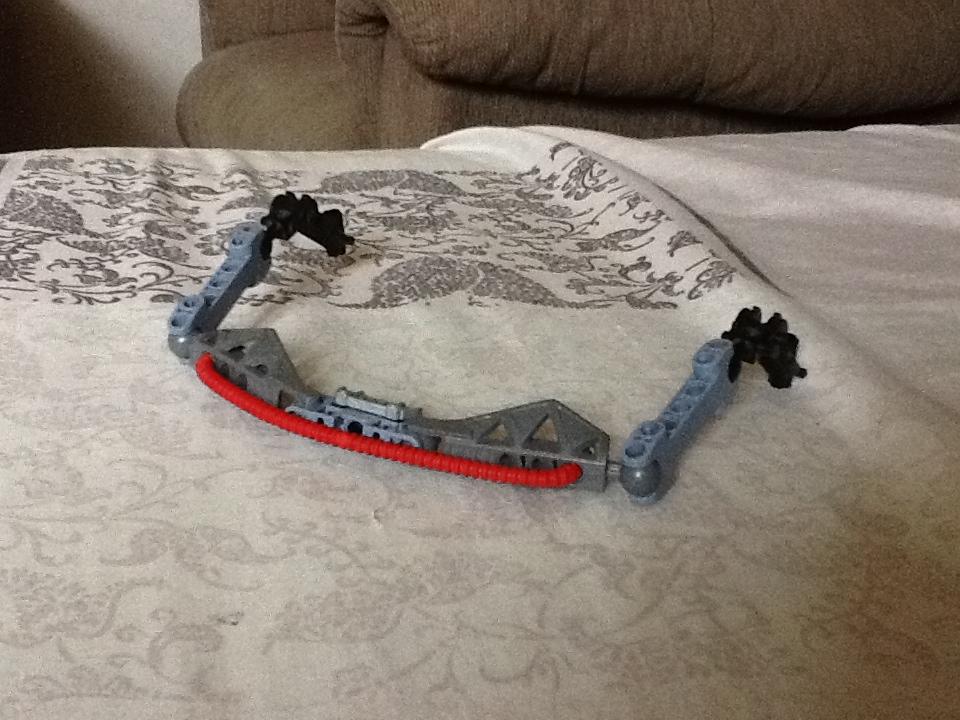
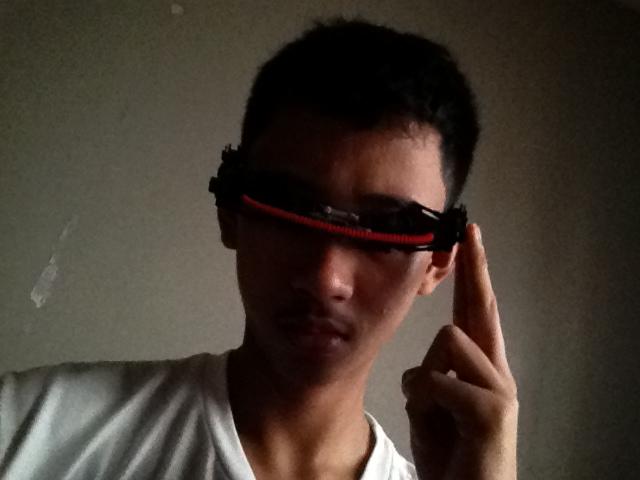
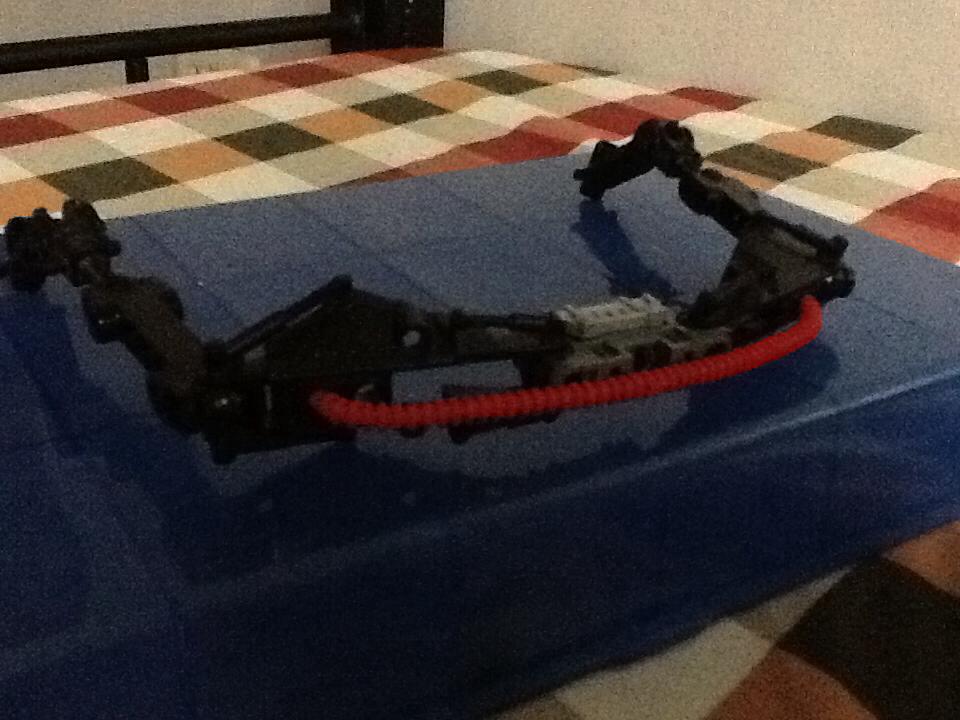
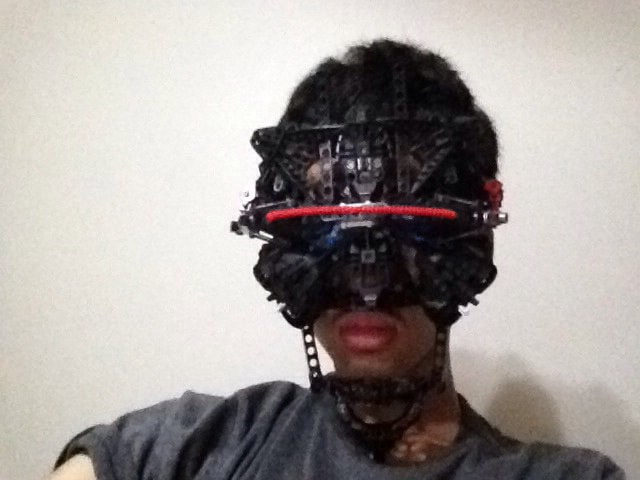
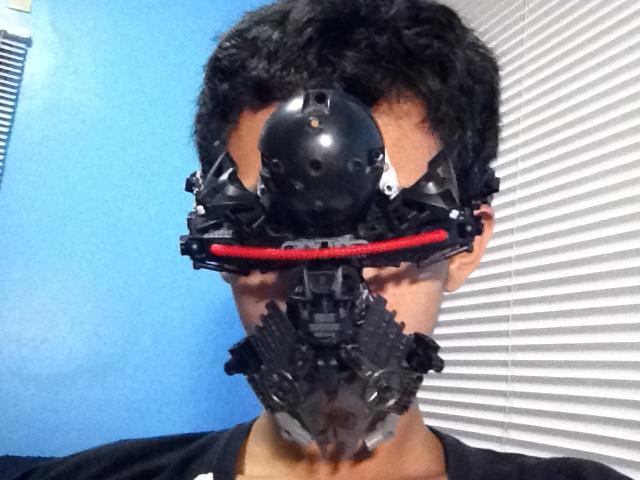
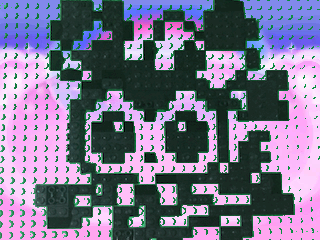
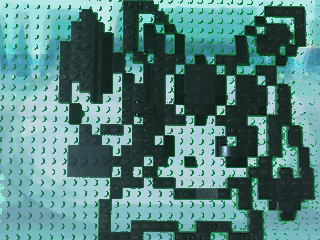

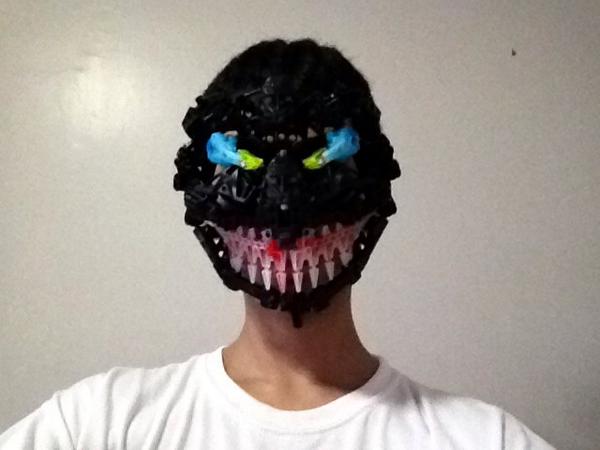
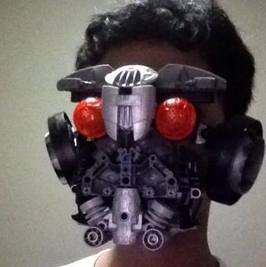
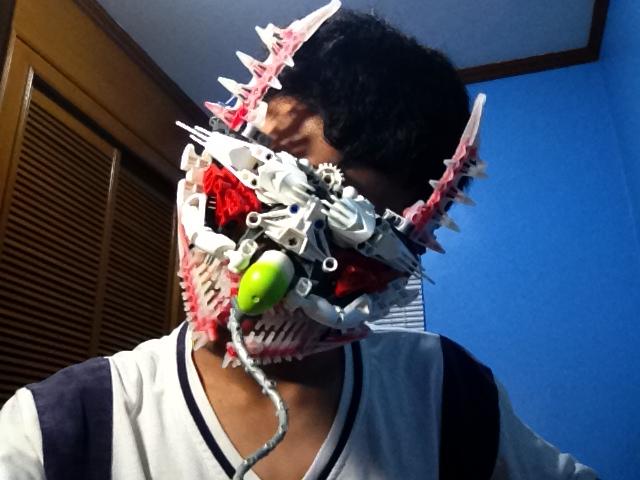
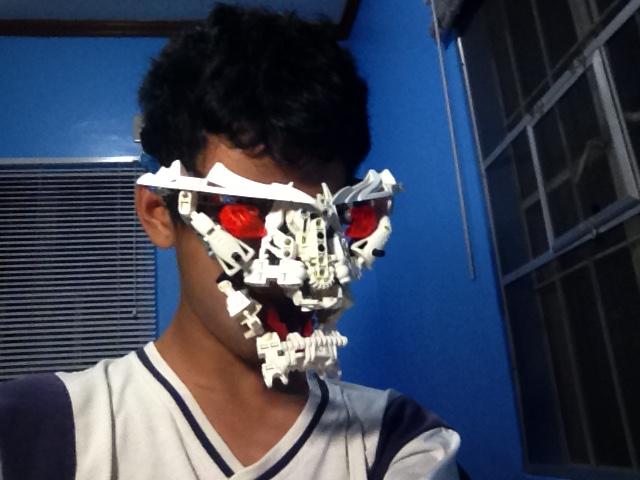
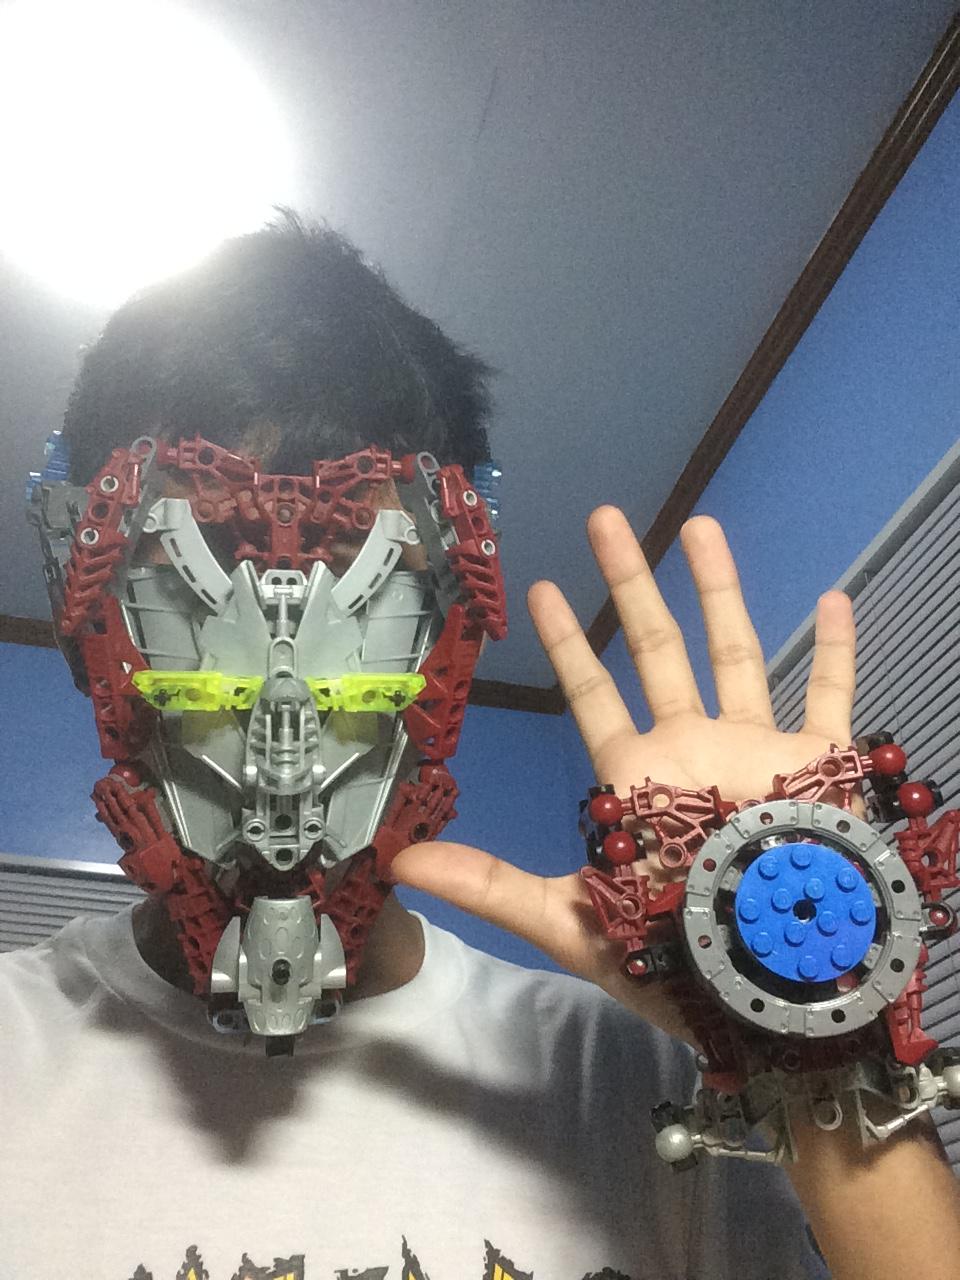
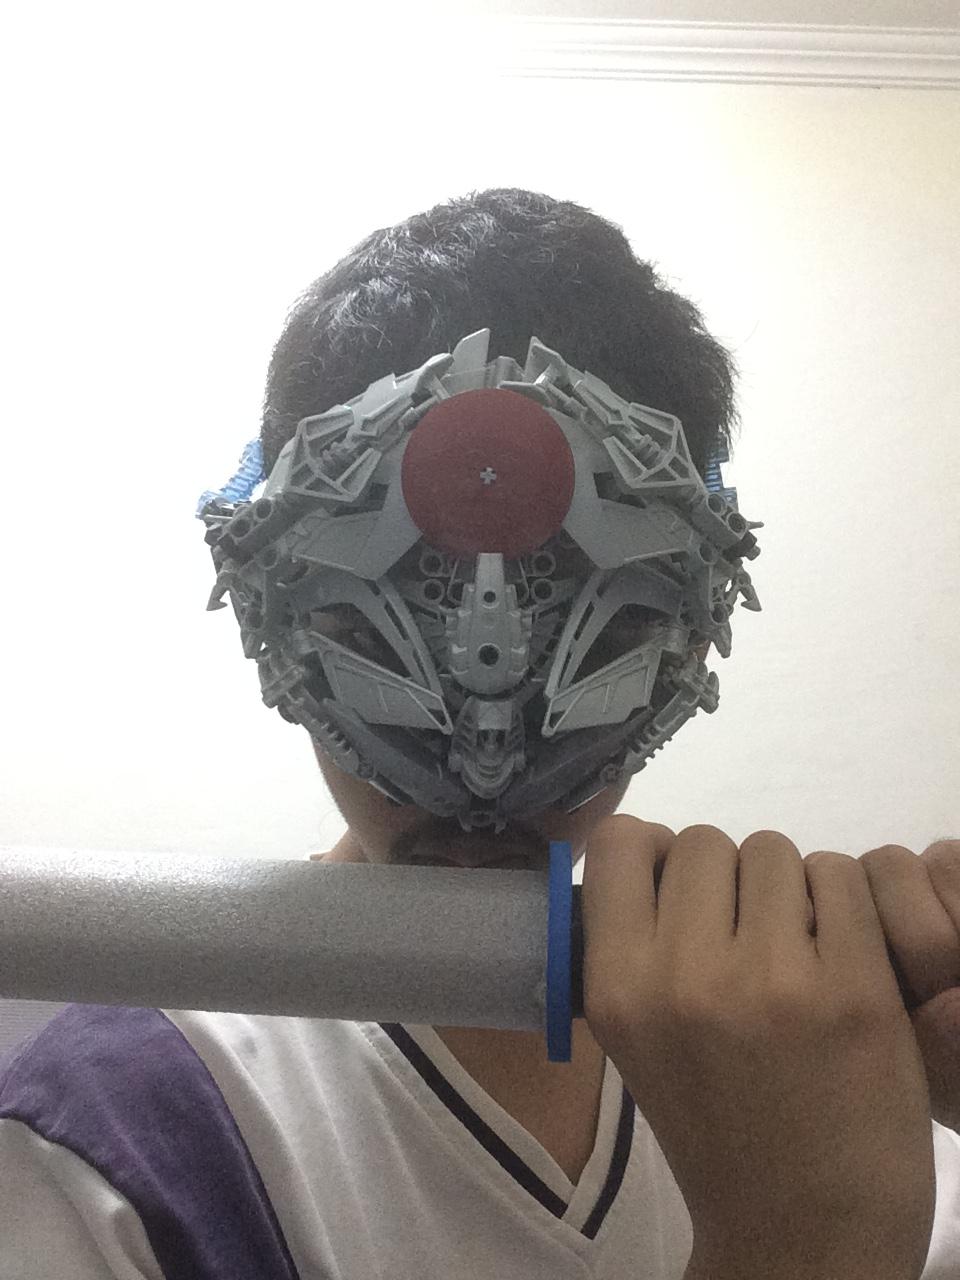
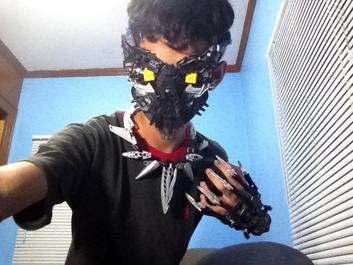
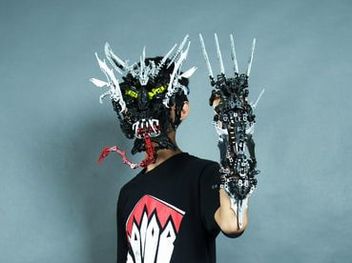
 RSS Feed
